If you have a Windows 11/10/8.x/7/vista installation ISO/WIM/ESD/SWM, a VHD/VHDX file which have Windows 11/10/8.x/7/vista installed, or a Windows 11/10/8.x/7/vista installation CD/DVD, you can use free Windows deployment tool WinToHDD to install Windows onto disks (HDD/SSD) other than the one where your Windows operating system is installed.
Tutorial to clean install Windows without using a CD/DVD or USB drive.
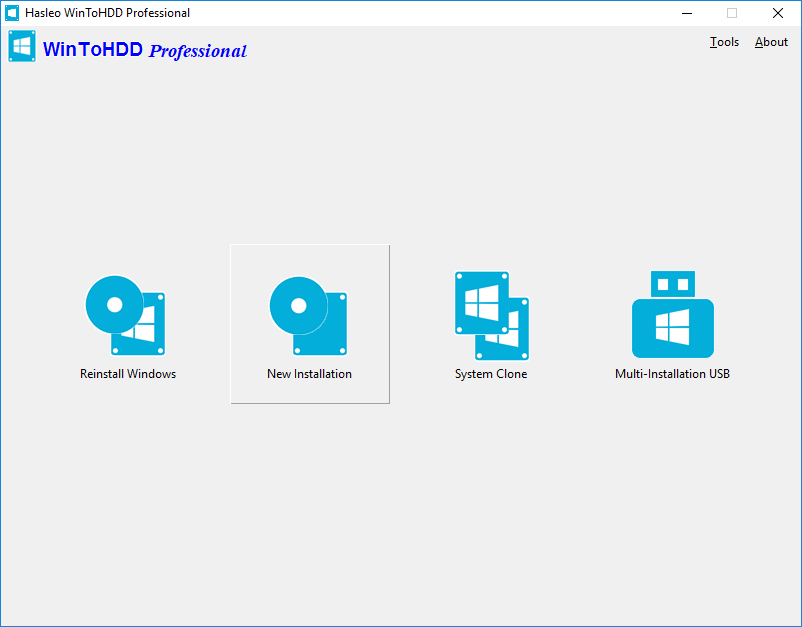
Step 1. Run WinToHDD, then click the "New Installation" button.
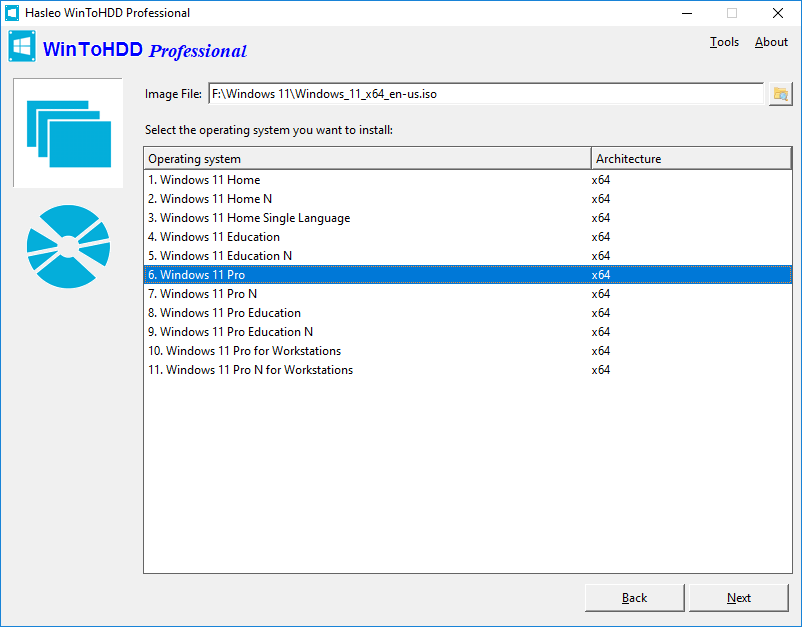
Step 2. Please use the following guidelines to prepare your installation source.
- Installing from an ISO/WIM/ESD/SWM/VHD/VHDX File: Click the
 button, then click the
  button and select the ISO/WIM/ESD/SWM/VHD/VHDX file from the open dialog box.
- Installing from a DVD drive: Insert the Windows installation CD/DVD into your CD/DVD drive. Once the CD/DVD is being detected in Windows, then click
 button and select the CD/DVD drive in the drop-down list. If your CD/DVD drive is not correctly recognized by WinToHDD, you need to click the
  button for the program to recognize the CD/DVD drive.
Step 3. WinToHDD scans for and lists installable operating systems. If you see the edition of Windows you want to install, select it, then click "Next".
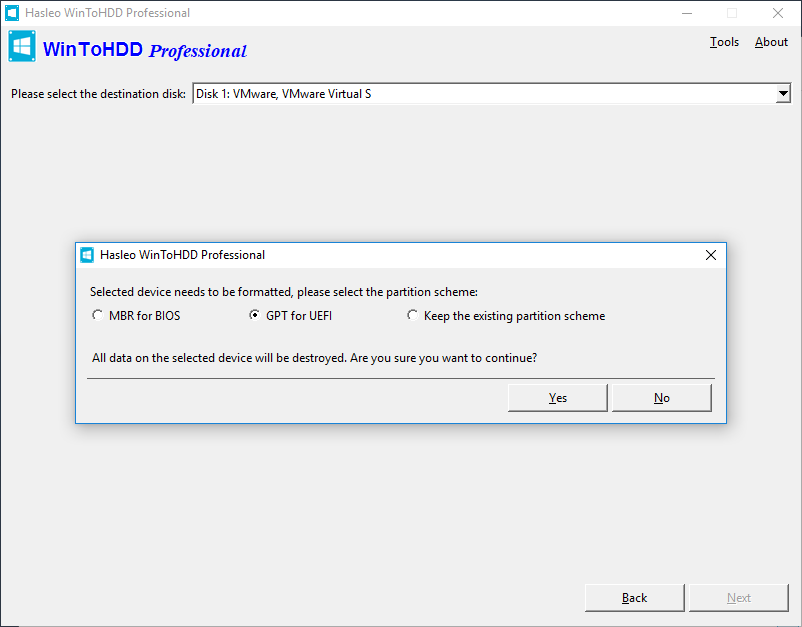
Step 4. Select the destination disk in the drop-down list, a pop-up will appear asking you if you want to format it to continue, select the partition scheme you want to use and click "Yes" to continue.
 Tips:
Tips:
- The "MBR for BIOS" and "GPT for UEFI" options will cause the destination drive to be formatted, so all data on the drive will be destroyed. And you can adjust the size of the system partition and the boot partition here.
- If you choose "Keep the existing partition scheme", you need to manually prepare the partitions on the disk before this step, and here is the user guide on how to manually prepare partitions for the destination disk.
Step 5. Select the boot partition and system partition from the partition list, the selected partitions will be marked as red.
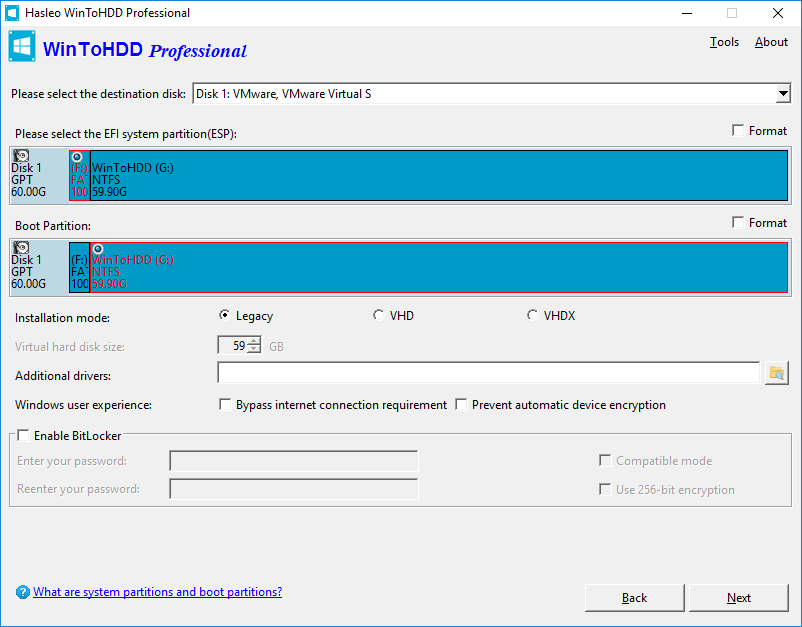
Tips:
- The "Legacy" installation mode installs Windows directly into the boot partition on the drive, and the "VHD/VHDX" installation mode installs Windows on the VHD/VHDX file that is stored in the boot partition.
- The "Enable support for 'Windows UEFI CA 2023'" option allows you to create a bootable medium that complies with Microsoft's UEFI CA 2023 secure signature standard. This enables it to pass Secure Boot verification on computers that only trust this new certificate. Therefore, please ensure that your computer's motherboard UEFI firmware is compatible with this standard.
- The "Additional drivers" option allows us to inject drivers into the newly installed Windows, which is particularly important when we have to rely on hardware drivers to complete the Windows installation.
- The "Bypass online account requirement" option allows us to bypass the requirement to sign in with a Microsoft account when installing Windows 11.
- The "Prevent automatic device encryption" option allows us to prevent automatic BitLocker device encryption when installing Windows 11.
- The "Auto-set time zone and region" option allows us to set the time zone and region automatically using the current user's settings.
- The "Disable privacy/data collection" option allows us to skip privacy questions during Windows OOBE to avoid being prompted for consent on diagnostic data, location, and personalized ads.
- The "Create a local account with username:" option allows us to create a local account during Windows setup using the username you specify.
- If you want to encrypt boot partition using BitLocker, tick the "Enable BitLocker" check box and enter encryption password. You can also specify the encryption mode and encryption strength here.
Step 6. Click "Next". After clicking "Next", WinToHDD begins installing Windows.
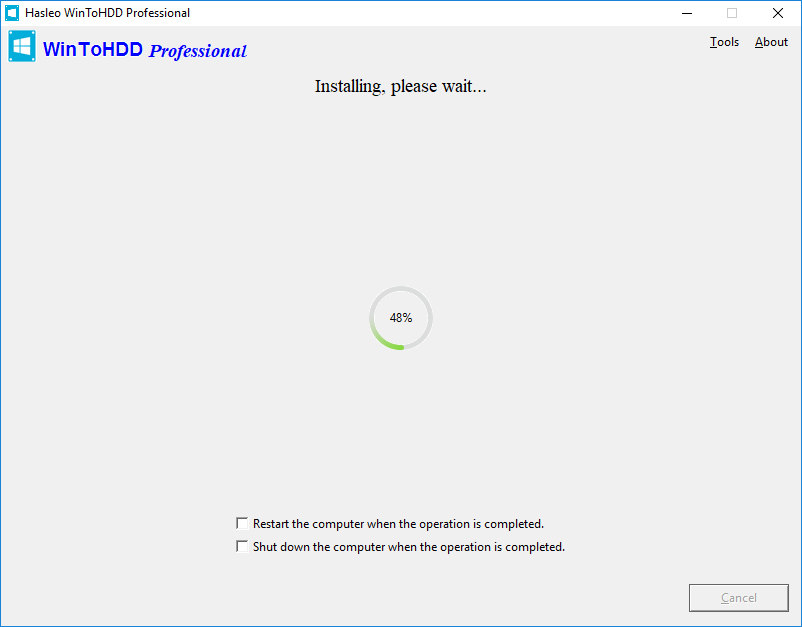
Step 7. It takes some time to install. After installation restart the computer and change BIOS to boot from your hard disk drive.
Step 8. Windows installation starts up and you have to complete all the installation steps. You will have to boot from your hard disk drive if the Windows Installation restarts the computer.
Follow these simple steps, you can install Windows onto disks other than the one where your Windows operating system is installed with free Windows deployment tool WinToHDD easily.