
Clover is a free and open source EFI bootloader which allows you to multi-boot Windows, Mac OS X and Linux on UEFI based computer, it can auto-detect all installed operating systems on the computer and displayed in the form of GUI menu for you to choose the operating system you want to start.
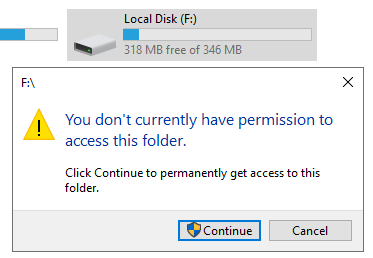
As an EFI bootloader, Clover must be installed to the EFI System Partition (ESP). In earlier versions of Windows 10 and Windows 8/7, we can use diskpart to assign a drive letter to ESP and then manually copy Clover to that partition. In the newer version of Windows 10, we cannot copy Clover to the ESP partition even if we have used diskpart to assign a drive letter to the partition. When we try to access an ESP partition that has been assigned a drive letter with diskpart, we will get the "You don't currently have permission to access this folder." error.
Is there any other way we can install Clover to the ESP partition in Windows? The answer is yes, we recommend you to use EasyUEFI here. As a professional EFI system partition management software, EasyUEFI provides an EFI system partition Explorer, which can help you explore and write files to an EFI System Partition (ESP) in Windows. This tutorial will show how to manually install Clover to the EFI system partition and set Clover as the priority startup item with EasyUEFI.
Tutorial to set up multi-boot of Windows, Mac and Linux using Clover and EasyUEFI.
Step 1. Download Clover from Clover's official website, and unzip it if it is a compressed package.
Step 2. Download, install and run EasyUEFI, click the  button, and then click the
  button.
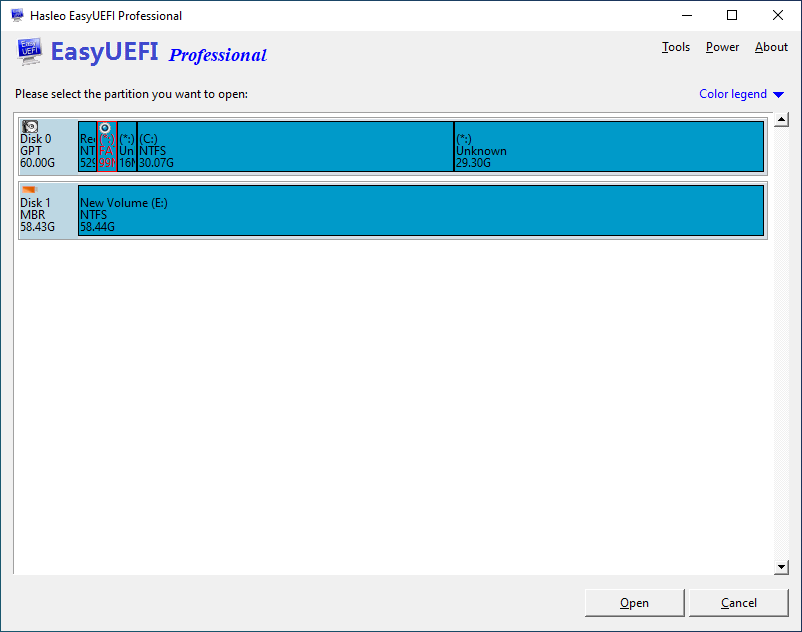
Step 3. Select the EFI System Partition (ESP) where you want to install Clover in the disk/partition list, then click the "Open" button to open the EFI System Partition Explorer.
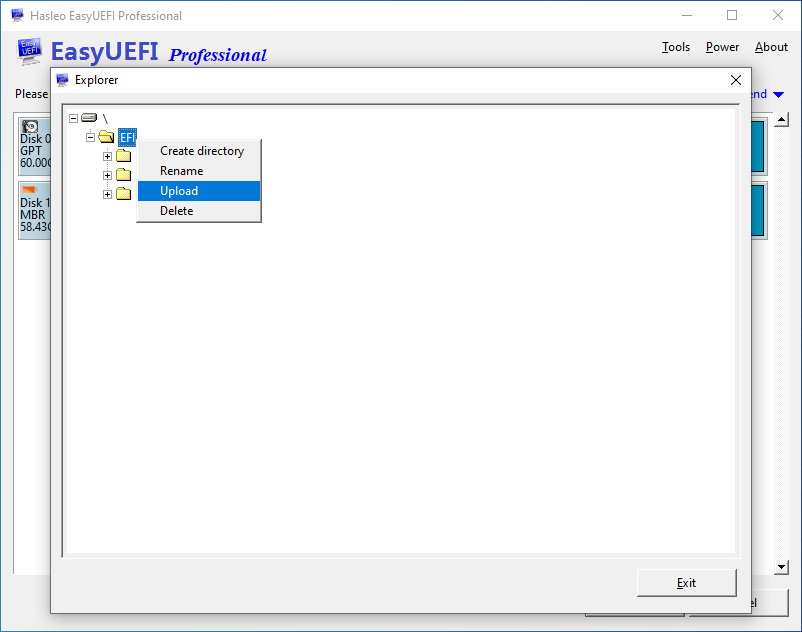
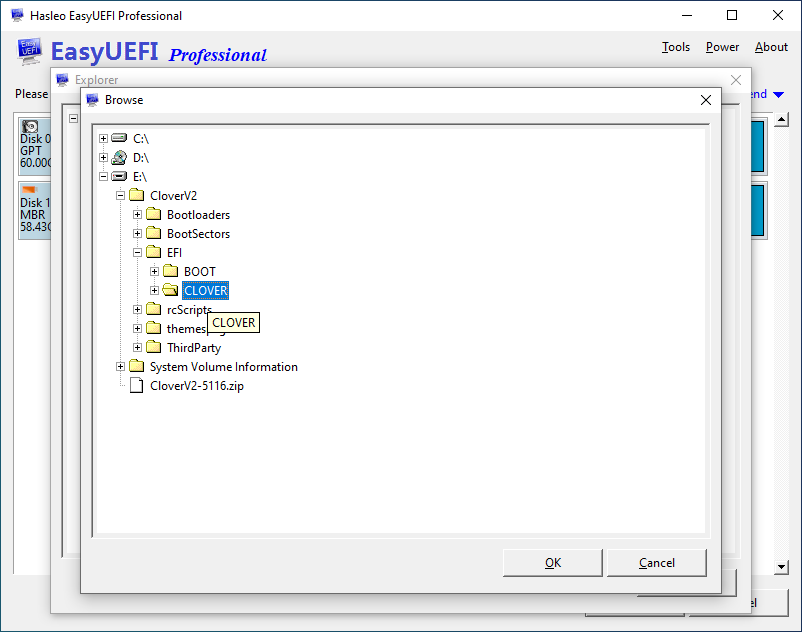
Step 4. Right-click on the EFI directory and select "Upload".
Step 5. Select the CLOVER in the directory extracted from the Clover compressed file, then click "OK" button to upload it.
Step 6. After the upload is complete, right-click "config-sample.plist" in the CLOVER directory and select "Rename".
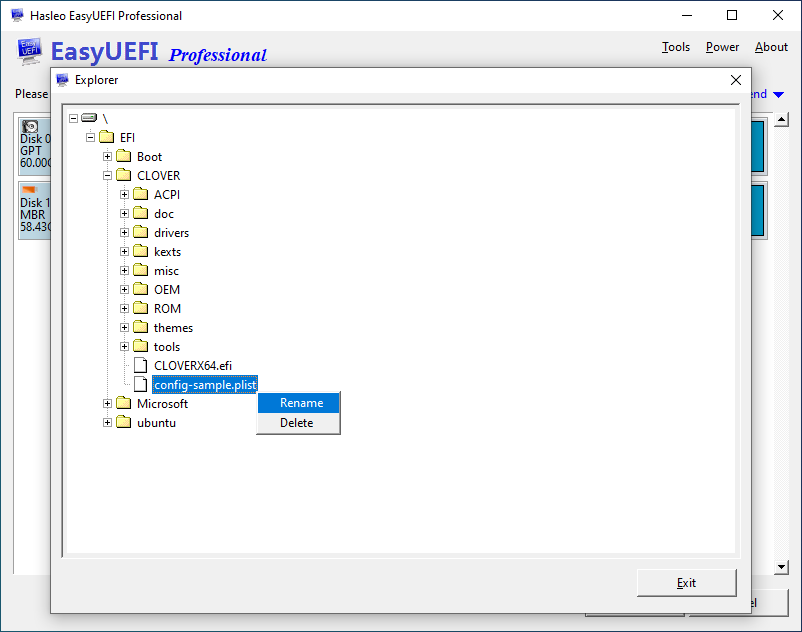
Step 7. In the dialog box that pops up, rename "config-sample.plist" to "config.plist", and then click "OK".
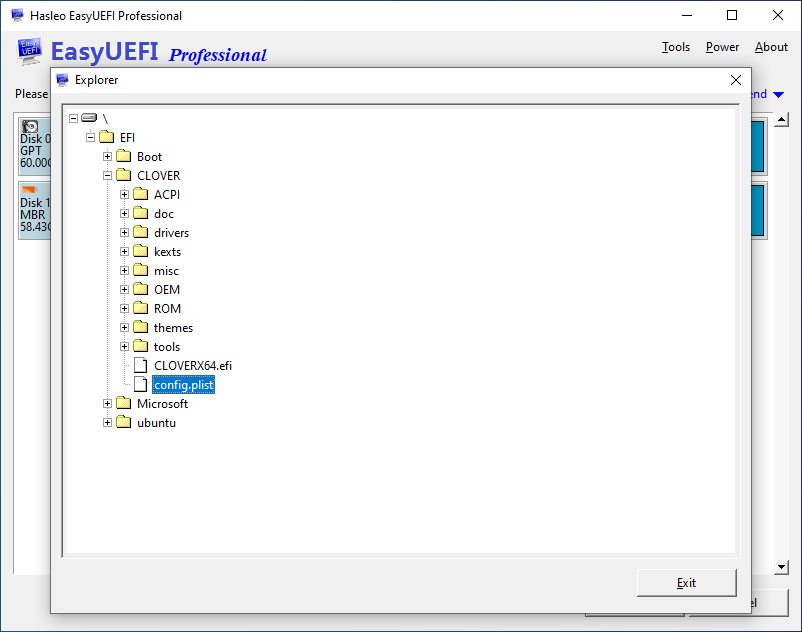
Step 8. After all the above operations are completed, click the "Exit" button to close the EFI System Partition Explorer.
Step 9. Return to the main page of the program, click the  button, then click the
 ![]() button.
button.
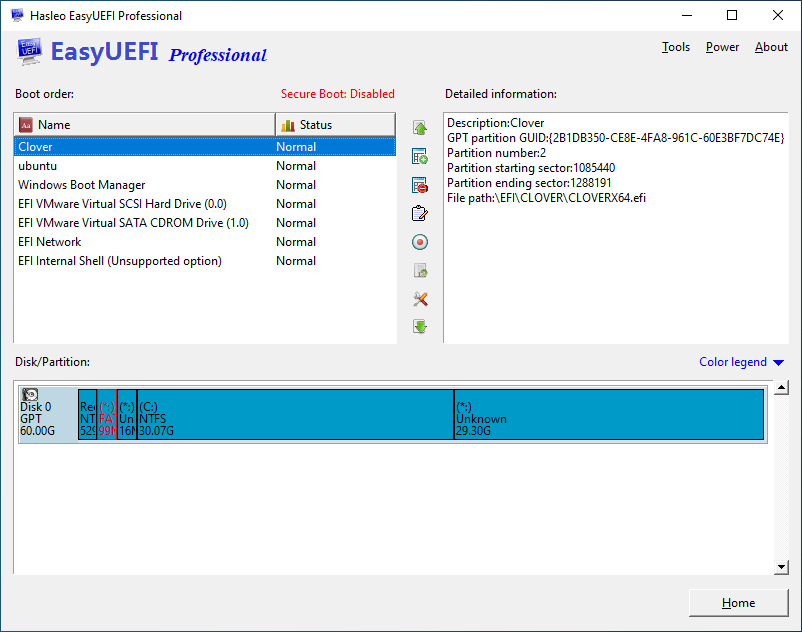
Step 10. In this page, select the type as "Linux or other OS", enter "Clover" as the description, select the ESP partition that Clover has been copied into, then click the "Browse" button and select "\EFI\CLOVER\CLOVERX64.efi" as the file path.
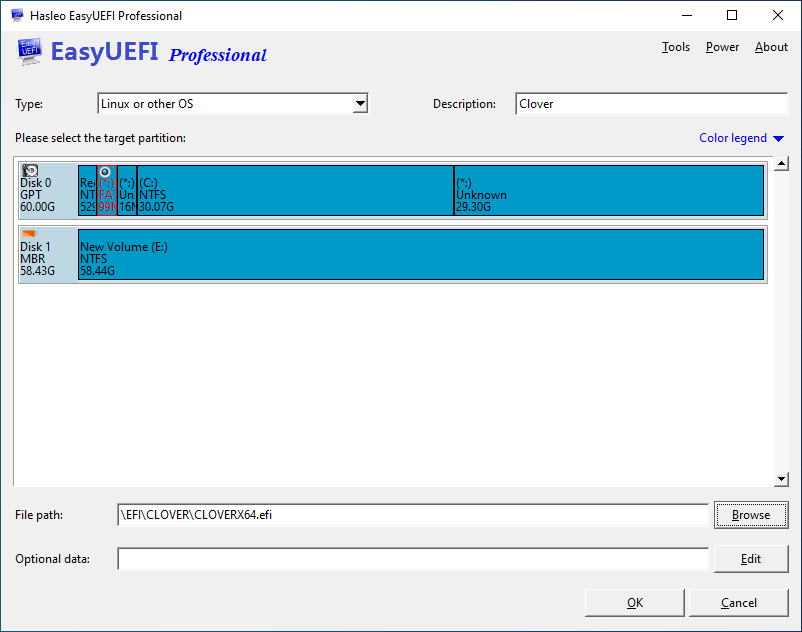
Step 11. After completing the settings, click "OK" to create the boot option, then move Clover to the top of the boot order list as the priority startup item.
Step 12. Restart the computer, Clover will start and display the multi-boot menu.

As a professional EFI boot option management and EFI system partition management software, EasyUEFI can help you copy Clover to an EFI System Partition and set Clover as the priority startup item.
Frequently Asked Questions
A: Clover is a free and open-source EFI bootloader that allows you to multi-boot Windows, macOS, and Linux on UEFI-based computers. It automatically detects all installed operating systems and presents them in a graphical menu for easy selection.
A: In newer versions of Windows 10 and later, you cannot directly copy files to the EFI System Partition even with a assigned drive letter due to permission restrictions. EasyUEFI provides an ESP Explorer that allows you to bypass these limitations and write files to the EFI partition.
A: You need to copy the entire CLOVER folder from the extracted Clover package to the EFI folder on the ESP. The key file is CLOVERX64.efi which serves as the boot entry point. You also need to rename config-sample.plist to config.plist for Clover to work properly.
A: Clover is primarily designed for Hackintosh builds (running macOS on non-Apple hardware). It includes special drivers and patches needed for macOS to work on standard PC hardware. However, this requires technical knowledge and may have compatibility limitations.
A: Clover is more feature-rich and includes extensive customization options, themes, and macOS-specific support. rEFInd is simpler and focuses on automatic detection of boot loaders. Clover requires more configuration while rEFInd is more plug-and-play.
A: After creating the Clover boot entry using EasyUEFI, you can reorder boot entries to make Clover the first priority. Simply drag Clover to the top of the boot order list in EasyUEFI's Manage EFI Boot Option section.
A: Yes, Clover can coexist with Windows Boot Manager. You can choose which one to use at startup. Some users prefer keeping Windows Boot Manager as primary and use Clover only when they need to boot into other operating systems.
A: Check that the CLOVERX64.efi path is correct in your boot entry. Verify that the ESP has the EFI\\CLOVER folder with all necessary files. Make sure the boot entry is enabled and set as active in EasyUEFI.