WinPE is a lite version of Windows operating system, and some third-party software usually uses WinPE as the recovery environment. For example, backup software providers often use WinPE as the restore environment, so that you can boot from WinPE and restore the system if Windows doesn't boot properly. This tutorial details how to add WinPE (Here we assume that you already have a WinPE.iso file.) to Windows boot menu with Hasleo EasyUEFI, then you can choose to boot from that WinPE from the Windows menu.
Tutorial to add WinPE to Windows boot menu with Hasleo EasyUEFI.
Step 1. Mount the ISO file of WinPE in Windows. You just need to double click on the ISO file to mount it in Windows 10/11, this is a built-in feature of Windows 10/11, for old Windows operating systems you have to use a third-party tool in order to mount the ISO file.
Step 2. Copy the sources\boot.wim and boot\boot.sdi from the mounted WinPE to a folder on your local drive, for example, C:\EasyUEFI.

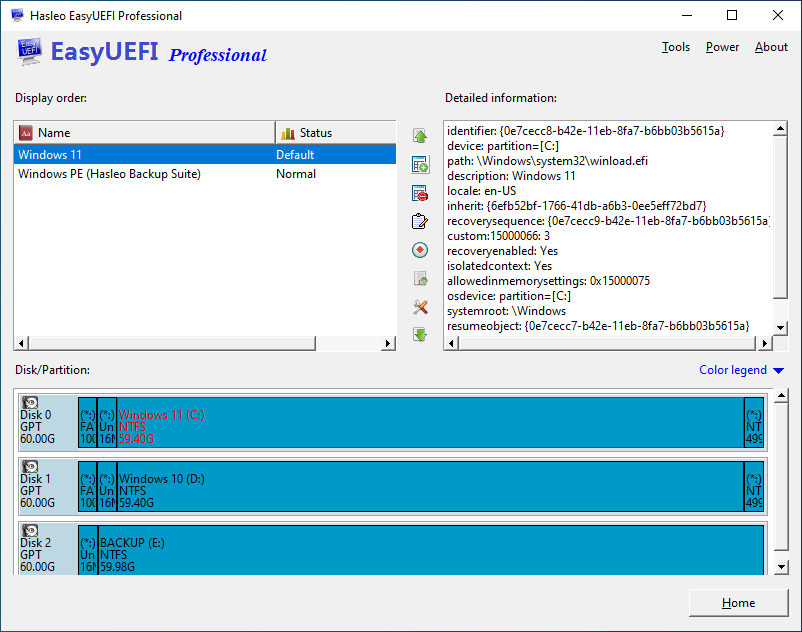
Step 3. Run EasyUEFI as administrator, then click the 'Manage BCD Boot Option' button.
Step 4. Click the ![]() button in the window.
button in the window.
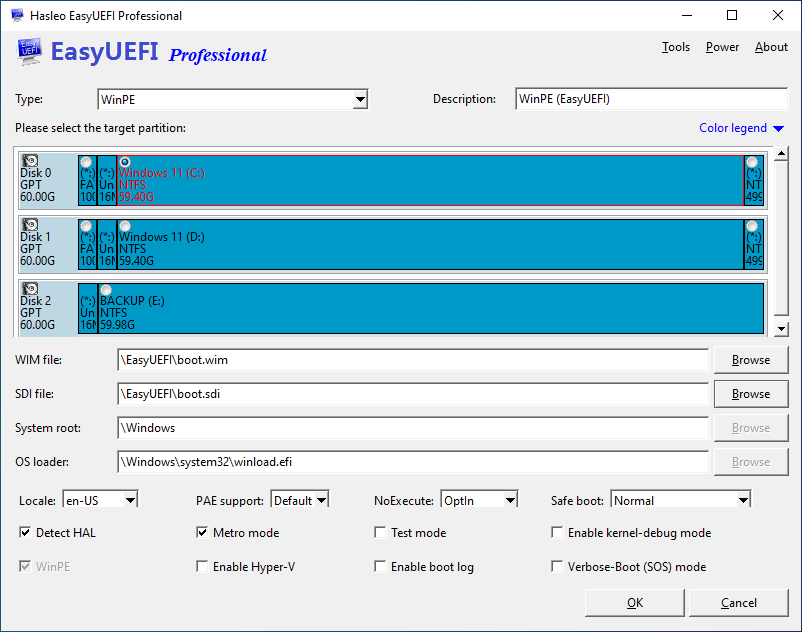
Step 5. In the window for creating a boot entry, select WinPE as type and enter a description for it (the description will be displayed in the Windows boot menu), then select the partition where the extracted WinPE is located and specify the storage path for the WIM and SDI files, of course you can choose other options if you are familiar with them.
Step 6. Click "OK" to create the boot entry, and you will see the newly created BCD boot entry after the creation is successfully completed.
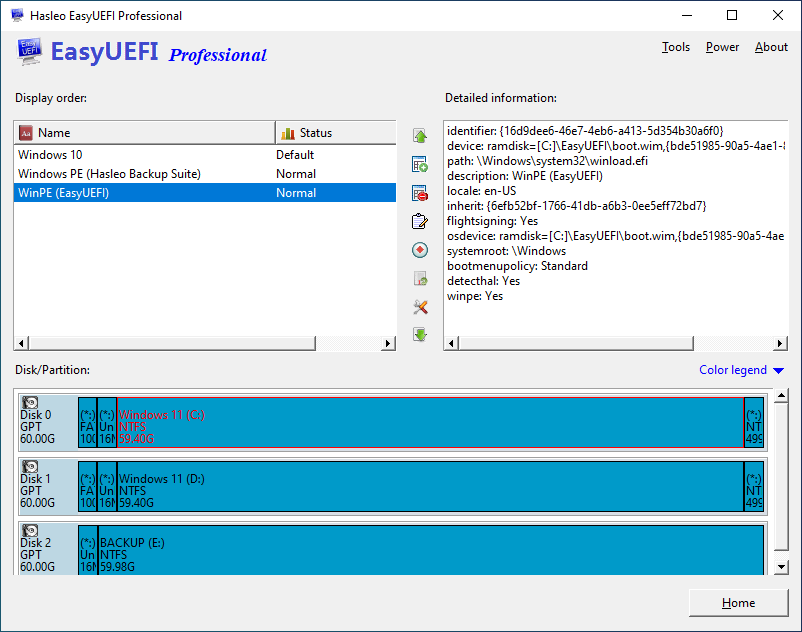
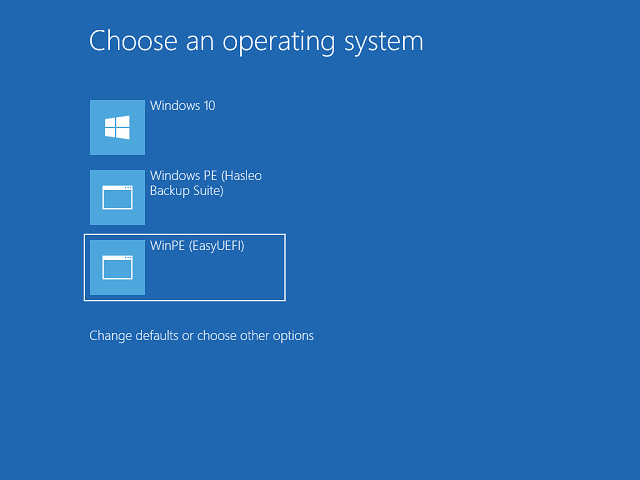
Step 7. Restart the computer and you will see that the newly created WinPE boot entry has been displayed in the Windows boot menu and you can boot WinPE normally from that WinPE boot entry.
As described above, you can see that in just a few simple steps, you can add a third-party WinPE to the Windows boot menu, and then you can choose to boot WinPE from the Windows boot menu.
Frequently Asked Questions
A: WinPE (Windows Preinstallation Environment) is a lightweight Windows used for system recovery and troubleshooting. Adding it to the boot menu allows you to access recovery tools without creating a separate bootable USB drive. Many backup and recovery software use WinPE as their recovery environment.
A: You need to extract two key files from the mounted WinPE ISO: sources\boot.wim and boot\boot.sdi. These files contain the WinPE boot image and are required for EasyUEFI to create a BCD boot entry for WinPE.
A: Yes, you can add multiple WinPE versions to the boot menu by creating separate BCD boot entries for each one. Give each entry a unique description (like 'WinPE 10' or 'WinPE 8') to distinguish them in the boot menu.
A: Common reasons include: incorrect file paths for boot.wim or boot.sdi, the selected partition doesn't have enough space, or the WIM/SDI files are corrupted. Verify the files are correctly extracted and try creating the boot entry again.
A: Yes, you can use the bcdedit command in elevated Command Prompt to add WinPE manually. However, EasyUEFI provides a much simpler graphical interface and handles all the complex BCD settings automatically.
A: No, adding WinPE to the boot menu doesn't modify your existing Windows boot files. It only adds an additional boot entry that you can select when needed. Your normal Windows boot remains unchanged.
A: Yes, you can use EasyUEFI's Manage BCD Boot Option feature to delete the WinPE boot entry at any time. This only removes the boot menu entry, not the actual WinPE files on your hard drive.
A: If you move or delete the extracted WinPE files, the boot entry will no longer work. You would need to recreate the boot entry with the new file path or restore the files to their original location.