
- Introduction to VHD and VHDX
- Prerequisites for Creating Windows To Go from VHD/VHDX
- Detailed Steps to Create Windows To Go from VHD/VHDX Using WinToUSB
- Differences Between VHD and VHDX and Selection Guidelines
- Common Issues and Troubleshooting
- Frequently Asked Questions
- Conclusion
With the increasing popularity of virtualization technology, more and more users are using VHD (Virtual Hard Disk) and VHDX formats to store and deploy Windows systems. VHD is a virtual hard disk file format that can be mounted and used like a physical hard disk, while VHDX is its enhanced version offering larger capacity support and better performance. If you already have a VHD or VHDX file containing a Windows system, you can convert it to a Windows To Go portable system and carry it with you to use on any compatible computer.
This tutorial will provide a detailed explanation of how to create a Windows To Go portable system from an existing VHD or VHDX virtual hard disk file.
Introduction to VHD and VHDX
VHD (Virtual Hard Disk) is a virtual hard disk file format developed by Microsoft, first introduced in Windows 7 for the Hyper-V virtualization platform. VHD files can be mounted as drives just like physical hard drives, allowing users to store files, install applications, and even install full operating systems within them.
VHDX (Virtual Hard Disk v2) is the enhanced version of the VHD format, introduced with Windows 8 and Windows Server 2012. VHDX offers the following advantages over VHD:
- Larger Capacity Support: VHDX supports up to 64TB, while VHD supports up to 2TB
- Better Performance: VHDX uses larger block sizes (2MB), reducing fragmentation and improving performance
- Higher Reliability: VHDX includes logging functionality to protect data integrity during unexpected power outages
- 4KB Sector Support: VHDX better supports the 4KB sector format of modern hard drives
By converting the Windows system in VHD or VHDX to Windows To Go, you can:
- Portability: Use your configured Windows environment anywhere, anytime
- Isolation: Run a customized Windows environment without affecting the host system
- Backup and Recovery: Easily backup and restore entire system configurations
- Testing and Development: Provide a consistent environment for development and testing
Prerequisites for Creating Windows To Go from VHD/VHDX
Before starting to create Windows To Go from VHD/VHDX, you need to meet the following prerequisites:
- VHD/VHDX File: A VHD or VHDX file containing a bootable Windows system (.vhd or .vhdx format)
- USB Drive: A USB drive with sufficient capacity (not less than the VHD/VHDX file size, 64GB or larger high-speed USB 3.0/3.1 drive or SSD external drive recommended)
- WinToUSB Software: Download and install the latest version of Hasleo WinToUSB, ensuring the version supports VHD/VHDX conversion
- Target Computer: A computer that supports booting from USB with BIOS/UEFI settings allowing USB boot
- Administrator Privileges: Administrator privileges on the source computer to mount and access the VHD/VHDX file
Important Notes:
- The Windows system in the VHD/VHDX file must be bootable
- Ensure the Windows version in the VHD/VHDX file is compatible with the target computer's hardware
Detailed Steps to Create Windows To Go from VHD/VHDX Using WinToUSB
Step 1. Connect the USB drive to your computer. Ensure the USB drive has enough space to accommodate the system from the VHD/VHDX.
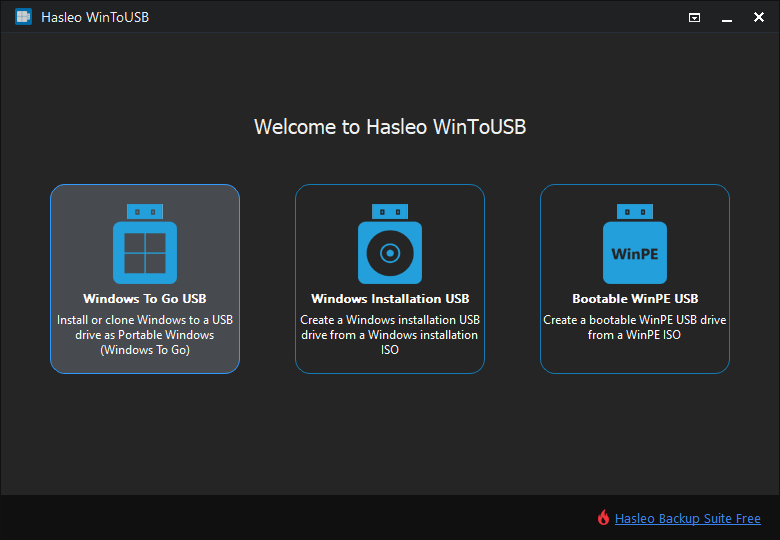
Step 2. Run Hasleo WinToUSB and click the "Windows To Go USB" option.
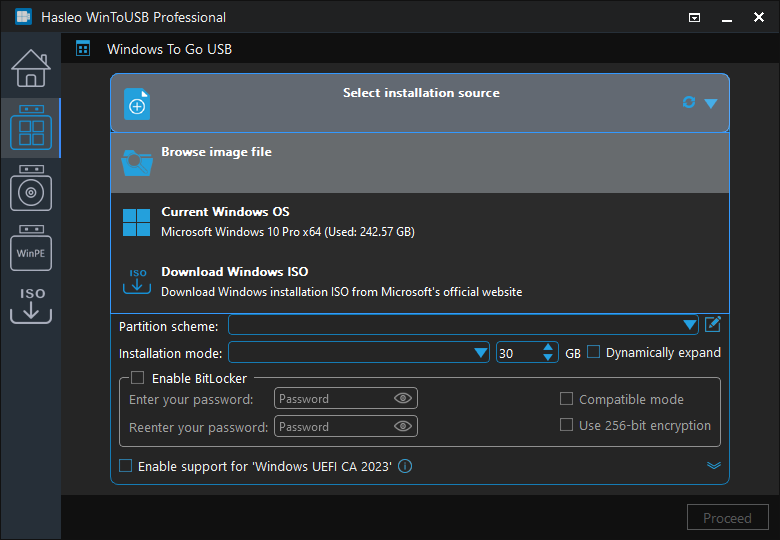
Step 3. Click "Select installation source", then choose "Browse image file" from the popup list, and select your VHD/VHDX file as the installation source in the file dialog that appears.
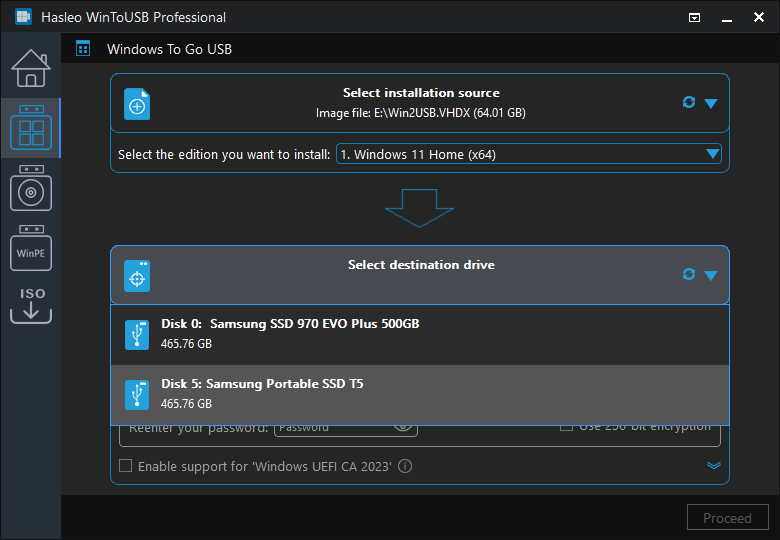
Step 4. Click "Select destination drive" and select your USB drive from the popup list.
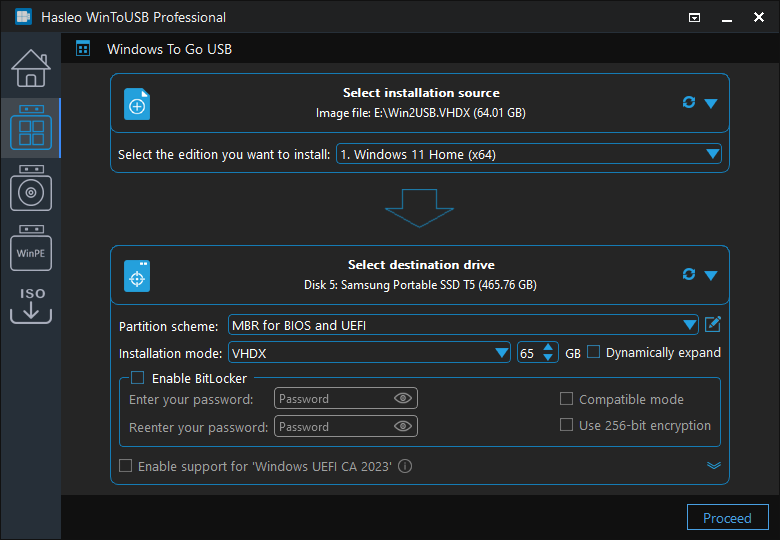
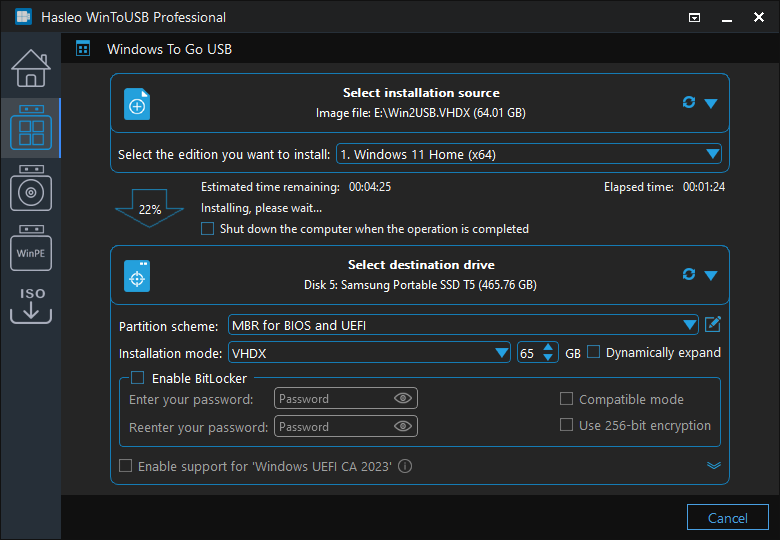
Step 5. Select your preferred partition scheme and installation mode. The GPT partition scheme is generally recommended for better UEFI compatibility. After confirming, click "Proceed".
* Tip: For detailed information about "Partition Scheme", "Installation Mode" and "Enable BitLocker", please refer to: How to Create Windows To Go from Windows Installation ISO?
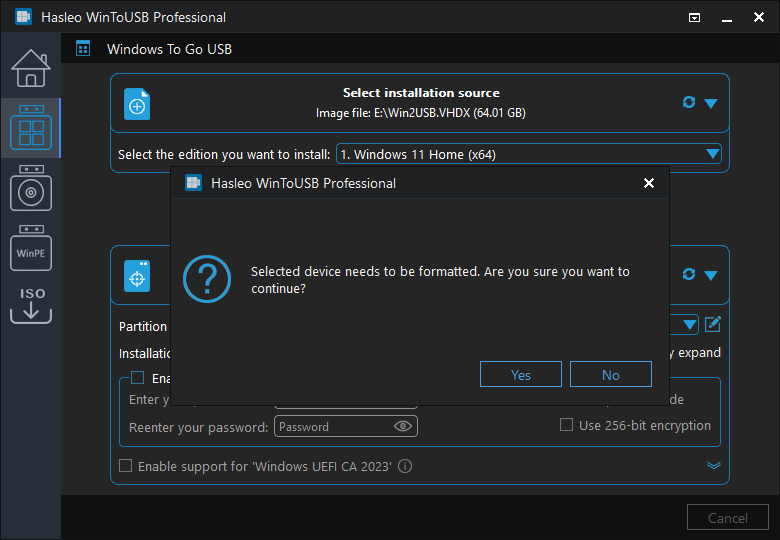
Step 6. After clicking "Proceed", a confirmation dialog will appear asking whether to continue formatting the USB drive. If you accept the operation, click "Yes".
Step 7. After clicking "Yes", WinToUSB begins installing the Windows system from the VHD/VHDX to the USB drive. The time required for this process depends on the size of the VHD/VHDX file and the write speed of the USB drive.
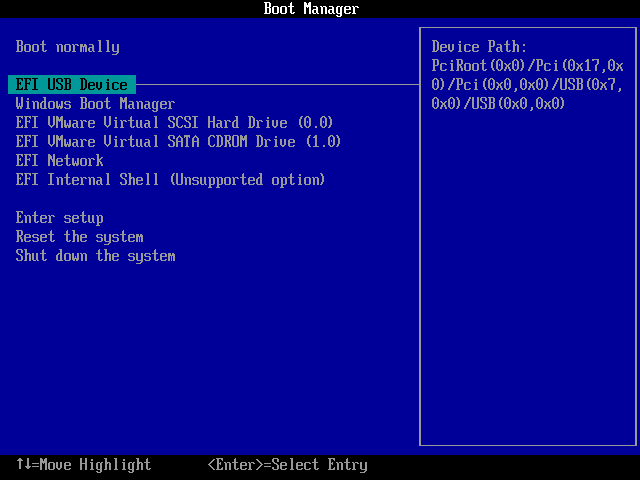
Step 8. Wait for the installation process to complete. After successful completion, restart the computer and enter UEFI/BIOS settings, set the USB drive as the first boot device, then boot Windows To Go from the USB.
Differences Between VHD and VHDX and Selection Guidelines
When choosing between VHD and VHDX formats, consider the following factors:
| Feature | VHD | VHDX |
|---|---|---|
| Maximum Capacity | 2TB | 64TB |
| Performance | Standard performance | Higher performance (larger blocks) |
| Data Protection | Basic protection | Logging functionality, stronger protection |
| Compatibility | Windows 7 and later | Windows 8 and later |
| 4KB Sector Support | Limited support | Full support |
Selection Guidelines:
- If your system needs to support Windows 7, use the VHD format
- If your system requires large-capacity storage (over 2TB) or better performance, use the VHDX format
- For newly created virtual hard drives, use the VHDX format for better performance and reliability
Common Issues and Troubleshooting
Issue 1: Errors During Installation
If errors occur during installation:
- Check if the USB drive is healthy, recommend using a brand-name high-speed USB drive
- Ensure the USB drive has sufficient free space
- Try using a different USB port or USB drive
- Check if the system in the VHD/VHDX file is complete and bootable
- Ensure you have sufficient permissions to access the VHD/VHDX file
Issue 2: Blue Screen After Booting from USB
If a blue screen error appears after booting from USB:
- Ensure the target computer's hardware is compatible with the Windows version in the VHD/VHDX
- Try generalizing the Windows system on the source computer (using Sysprep)
- Check if necessary drivers are missing
- Try using a different partition scheme (GPT vs MBR)
Issue 3: VHD and VHDX Format Conversion
If you need to convert VHD to VHDX or vice versa:
- You can use Hyper-V Manager for format conversion
- Or use third-party disk management tools
- Note: The conversion process creates a new file, the original file remains unchanged
Issue 4: USB Drive Not Recognized
If WinToUSB cannot recognize the USB drive:
- Try unplugging and replugging the USB drive
- Use a different USB port (USB 3.0 port recommended)
- Check if the USB drive is properly partitioned and formatted
- Check the USB drive status in Disk Management
Frequently Asked Questions
A: You can create Windows To Go from any bootable VHD or VHDX file containing a Windows system. The VHD/VHDX must have a working Windows installation with proper boot files. Non-bootable VHD files or those without a Windows system cannot be converted to Windows To Go.
A: VHD is the original virtual hard disk format supporting up to 2TB capacity, while VHDX is the enhanced version supporting up to 64TB with better performance and data protection features. VHD is compatible with Windows 7 and later, while VHDX requires Windows 8 or later.
A: Yes, you can convert VHD to VHDX using Hyper-V Manager or third-party disk management tools. The conversion creates a new file, preserving the original. Note that VHDX files cannot be directly converted back to VHD format without third-party tools.
A: Your USB drive must be large enough to hold the entire VHD/VHDX file plus some overhead. We recommend using a USB drive at least 1.5 times the size of your VHD file. For Windows 10/11, a 64GB or larger drive is typically needed for comfortable usage.
A: Yes, WinToUSB free version supports creating Windows To Go from VHD file. You can select your VHD file as the installation source and create portable Windows on any USB drive.
Conclusion
As described above, by following these steps, you can use Hasleo WinToUSB to create a Windows To Go portable system from an existing VHD or VHDX virtual hard disk file. This method is particularly suitable for the following scenarios:
- Migrating Windows from a virtualized environment to removable media
- Backing up and restoring complete system configurations
- Using a consistent Windows environment across different computers
- Portabilizing development and testing environments
As a professional portable Windows creation tool, Hasleo WinToUSB not only supports creating Windows To Go from VHD/VHDX, but also allows creating portable Windows systems from ISO files, installation discs, or already-installed Windows systems.
Experience the powerful features of WinToUSB today and easily convert your VHD/VHDX system to a portable Windows To Go!


