
- Step-by-Step Guide: Install and Run Portable Windows on Mac Using Hasleo WinToUSB
- Troubleshooting Mac Boot Issues
- Frequently Asked Questions
- Conclusion
I have a late 2016 MacBook Pro with macOS and Windows 10 Pro dual systems installed on it, so far so good, but I only use Windows 10 Pro to play some games that can't be run on macOS. Now I'm trying to get rid of my Boot Camp installation, because of low space on main SSD drive. I noticed that WinToUSB can install Windows to a USB drive, can the Windows USB drive created by WinToUSB be started from a Mac computer? How do I make it? Could let me know step by step for using your tool Hasleo WinToUSB.
The portable Windows (Windows To Go) USB drive created by Hasleo WinToUSB can boot on Intel-based Macs (excluding Apple Silicon M1/M2/M3/M4), though boot success rates may be not 100%. Understanding the causes of boot failures can help avoid these issues.
This guide provides step-by-step instructions for creating a portable Windows USB drive compatible with Intel-based Macs, enabling you to run Windows on the Mac computer to complete the Windows-dependent work.
* Tips:
1. Not all Mac computers use Intel CPUs (Newer Mac computers use Apple Silicon M1/M2/M3/M4 chips), so you should verify your Mac uses an Intel CPU.
2. Apple selected Intel's Extensible Firmware Interface (EFI) as its UEFI/BIOS replacement, replacing the Open Firmware used in PowerPC systems. Therefore, to successfully boot Windows on Intel-based Macs, the portable Windows USB drive must support EFI boot mode.
3. To boot Windows on (U)EFI computers, the Windows version must match the PC architecture: a 64-bit (U)EFI computer supports only 64-bit versions of Windows and a 32-bit (U)EFI computer supports only 32-bit versions of Windows. Intel-based Macs utilize a 64-bit Intel CPU, therefore ensure you use a 64-bit Windows to create portable Windows.
Step-by-Step Guide: Install and Run Portable Windows on Mac Using Hasleo WinToUSB
Step 1. Download Boot Camp Windows Support Software for Windows To Go: How to Download Boot Camp Windows Support Software for Windows To Go?
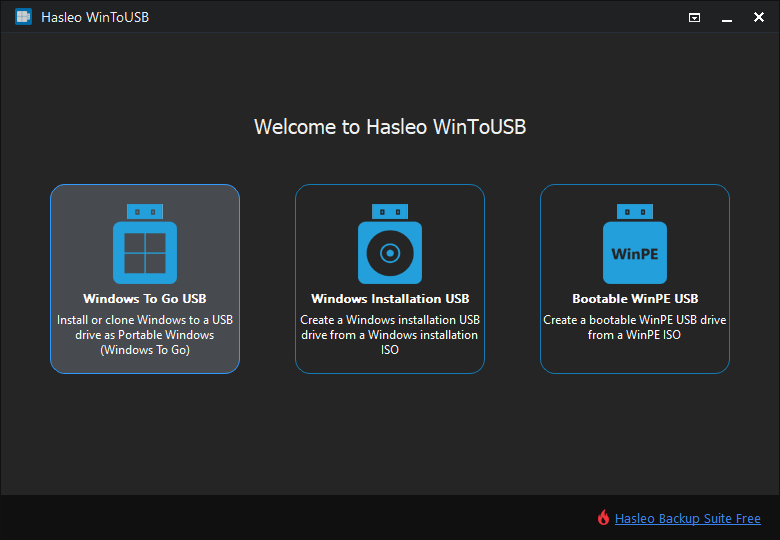
Step 2. Copy the Boot Camp Support Software (downloaded in the previous step) to the WinToUSB-installed computer, then connect the external hard drive to the computer. Run Hasleo WinToUSB and click the "Windows To Go USB" option.
Step 3. Click "Select installation source" => "Browse image file". Then choose the Windows 11/10 installation ISO file from the dialog box as your source. Alternatively, select a CD/DVD drive with Windows 11/10 installation media.
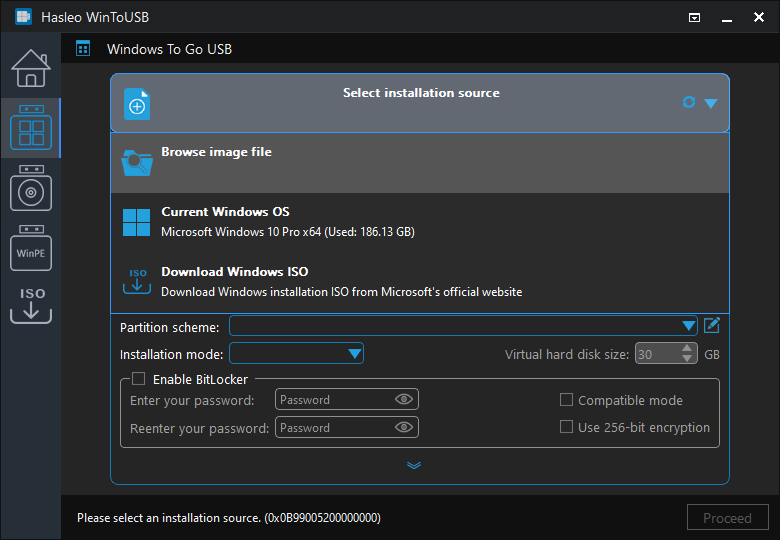
Step 4. Hasleo WinToUSB scans for and lists installable operating systems. Select your target Windows edition to proceed with the installation.
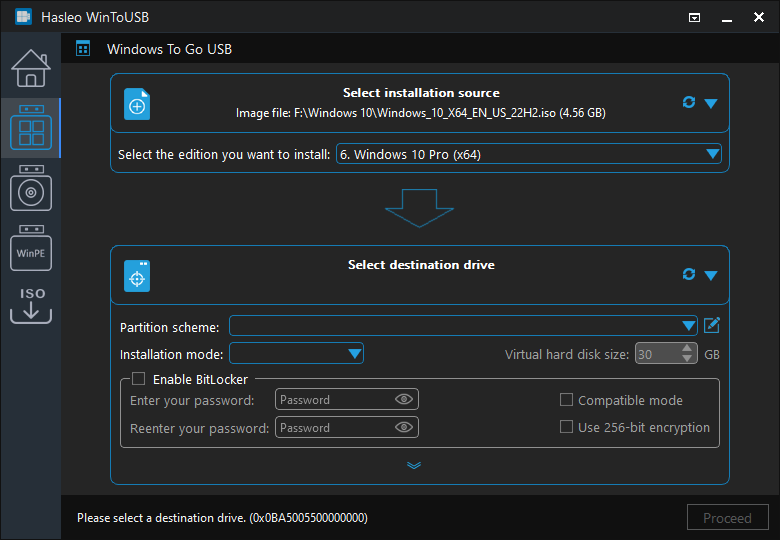
Step 5. Click "Select destination drive", then choose the target drive from the pop-up list. If Hasleo WinToUSB fails to detect the drive, click the ![]() button to initiate drive recognition.
button to initiate drive recognition.
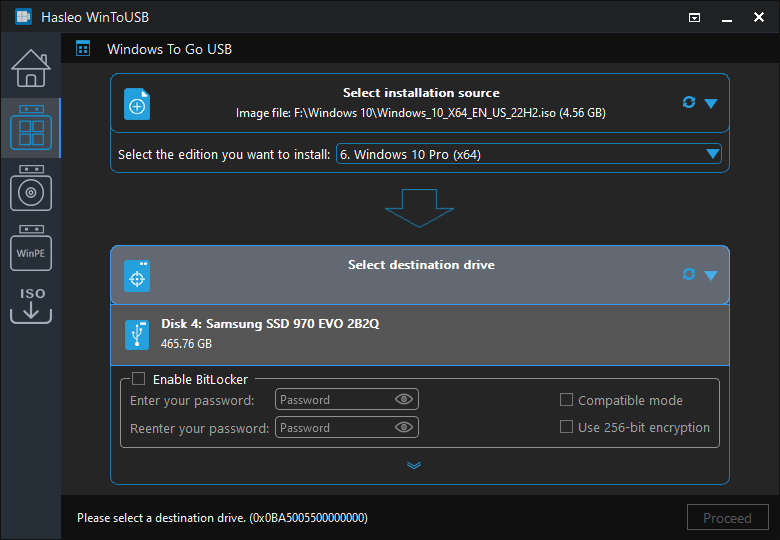
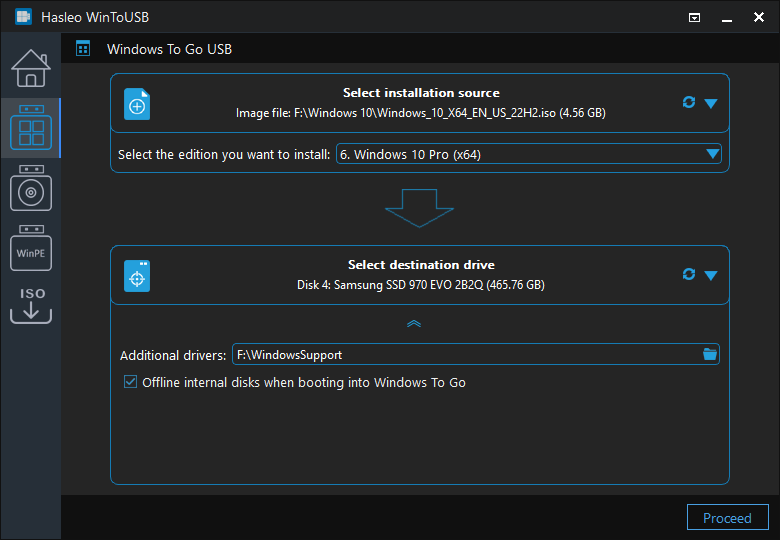
Step 6. Select your preferred partition scheme and installation mode. Specify the directory of the additional drivers as the save path of Boot Camp Support Software and enable BitLocker encryption for the Windows To Go external hard drive if you want, then click "Proceed".
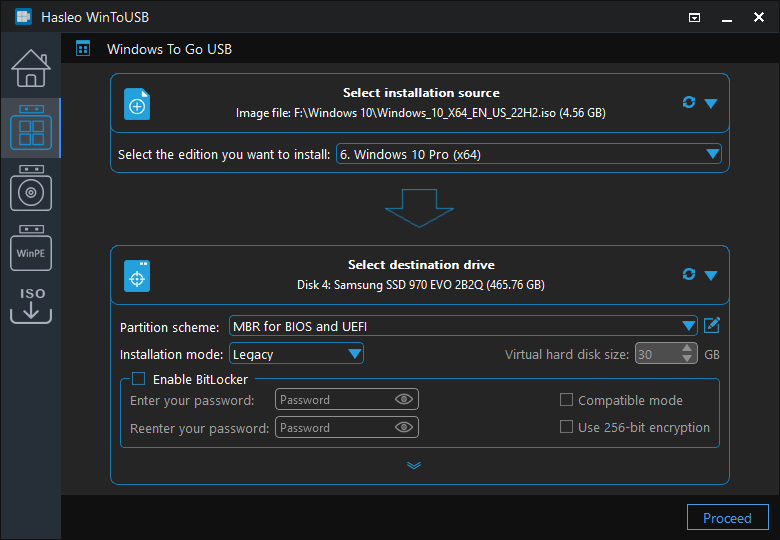
* Tips:
- Macs are (U)EFI-based computers, so you should select the "GPT for UEFI"/"MBR For BIOS and UEFI" partitioning scheme, or a custom partition scheme with UEFI boot support.
- For detailed information about "Partition scheme", "Installation mode" and "Enable BitLocker", please refer to: How to Clone Existing Windows to USB drive as a Windows To Go Workspace?
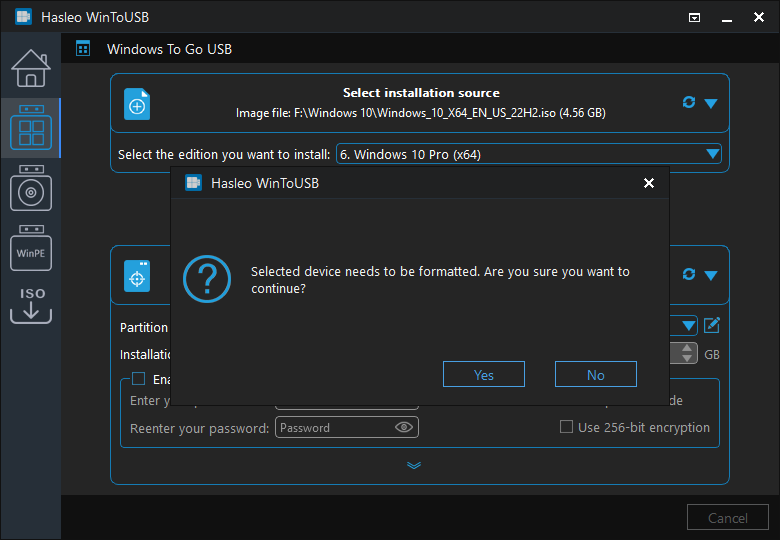
Step 7. After clicking "Proceed", a confirmation dialog will appear asking whether to continue formatting the drive. Click "Yes" if you accept the operation.
Step 8. After clicking "Yes", WinToUSB initiates Windows installation on the destination drive.
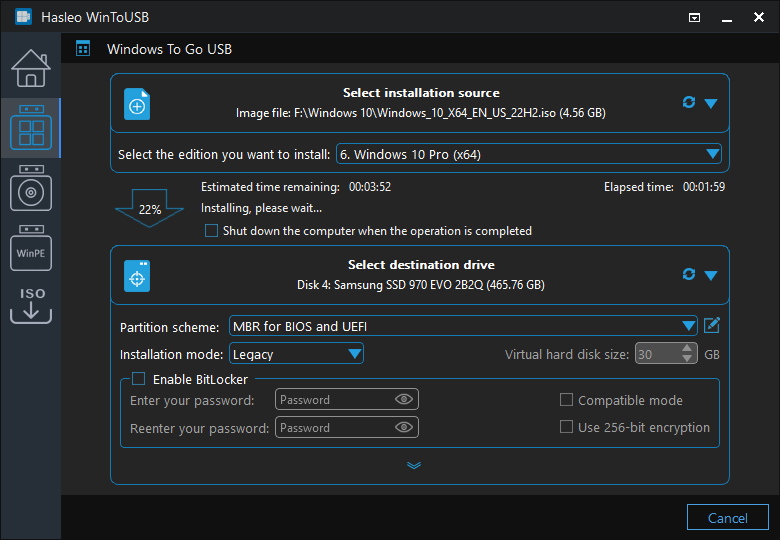
Step 9. It takes several minutes to install. After installation, safely unplug the USB drive from the Windows computer. Connect the drive to the target Mac. For Macs with only USB-C ports, a USB-C to USB adapter is required to connect the USB device.
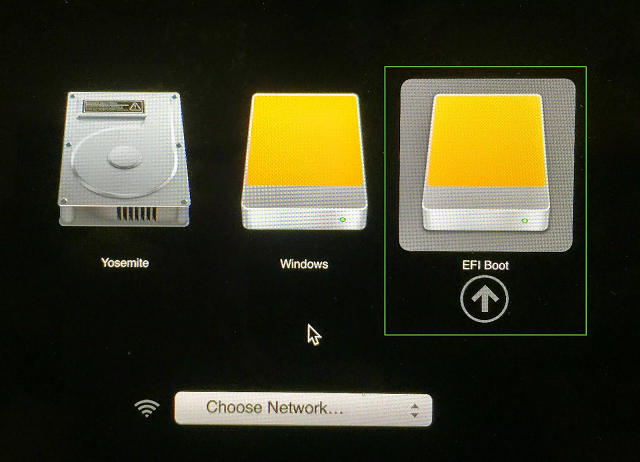
Step 10. Power on the Mac and immediately hold the Option key, then select the USB drive and press Return to boot from it. Please note that the USB drive typically appears as "EFI boot" or "Windows" in the boot menu.
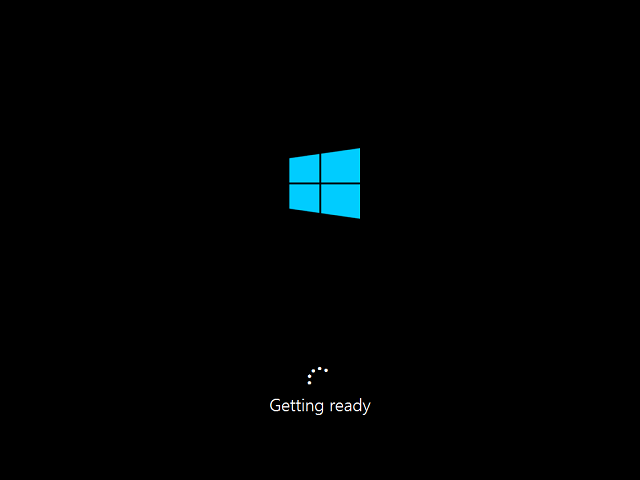
Step 11. A standard Windows installation requires completing all setup steps during the first boot. Should the Mac's built-in keyboard/touchpad fail during installation, connect an external USB keyboard or mouse to complete the installation. Afterward, you can install Windows Support Software (Boot Camp drivers), applications, and copy files, etc.
Troubleshooting Mac Boot Issues
The USB drive does not appear in the Mac Startup Manager.
Ensure the drive uses a GPT partition scheme with UEFI boot support. If you have a T2-equipped Mac (2018-2020 models), verify that Startup Security Utility is configured to allow external booting. Try a different USB port or adapter. Some USB-C hubs may not pass boot signals properly.
Windows boots to a black screen or shows a prohibitory symbol.
This usually indicates an incompatible partition scheme or missing EFI bootloader. Recreate the portable Windows using "GPT for UEFI" partition scheme in WinToUSB. Ensure you are using a 64-bit Windows ISO.
Keyboard and trackpad do not work during Windows setup.
The Boot Camp drivers have not been loaded yet because Windows setup uses generic drivers. Connect a USB keyboard and mouse to complete the initial setup. After Windows is installed, the injected Boot Camp drivers should enable the built-in input devices.
Wi-Fi or audio not working in Windows.
Open File Explorer and navigate to the Boot Camp driver folder. Run Setup.exe or the appropriate installer for your Mac model. If the drivers were not injected correctly during Step 6, download the Boot Camp Windows Support Software again and install it manually in Windows.
Frequently Asked Questions
A: Only Intel-based Macs can run Windows To Go (excluding Apple Silicon M1/M2/M3/M4 chips). Apple Silicon Macs are not supported because they use a different architecture that is incompatible with standard Windows x64.
A: Yes, after installing Windows To Go on a Mac, you need to install the Boot Camp Windows Support Software for proper hardware support including keyboard, trackpad, Wi-Fi, and graphics.
A: Macs display external boot devices as 'EFI boot' in the boot menu. This is normal behavior. Select the EFI boot option and press Return to boot into Windows.
A: You should use 'GPT for UEFI' or 'MBR for BIOS and UEFI' partition scheme since Macs are UEFI-based computers. This ensures the Windows To Go USB can boot properly on Mac hardware.
A: Yes, for Macs with only USB-C ports, you can use a USB-C to USB adapter or hub to connect the USB drive. Make sure the adapter supports USB 3.0 for optimal performance.
Conclusion
Having learned to install and run portable Windows (Windows To Go) on Intel-based Macs with Hasleo WinToUSB, you may also use WinToUSB to clone existing Boot Camp Windows installations to USB drives and then boot the Windows from that USB on an Intel Mac. Download Hasleo WinToUSB to create your own portable Windows drive for Mac today.
Related Guides
- How to clone Boot Camp Windows to USB drive as portable Windows?
- How to download Boot Camp Windows Support Software for Windows To Go?
- How to create a portable Windows 11/10 USB drive?
- How to clone Windows 11 to USB drive as portable Windows 11?
- How to clone Windows 10 to USB drive as portable Windows 10?


