
Disk clone completely copies the contents of one disk to another disk, including the partition structure and the files in the partitions. It is mainly used to upgrade or replace a disk, such as replacing a mechanical hard disk with an SSD or upgrading a small capacity disk to a large capacity disk. Of course, it can also be used for disk backup purposes. In addition, the Disk clone feature allows you to clone an MBR disk into a GPT disk or vice versa.
Tutorial to clone disk with Hasleo Backup Suite.
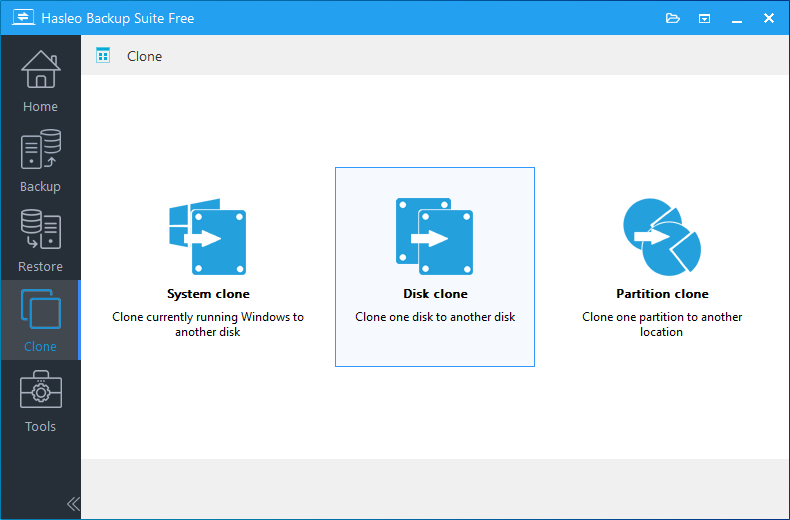
Step 1. Install and run Hasleo Backup Suite, click "Clone" button in the navigation bar, then click "Disk Clone" button in the operation area.
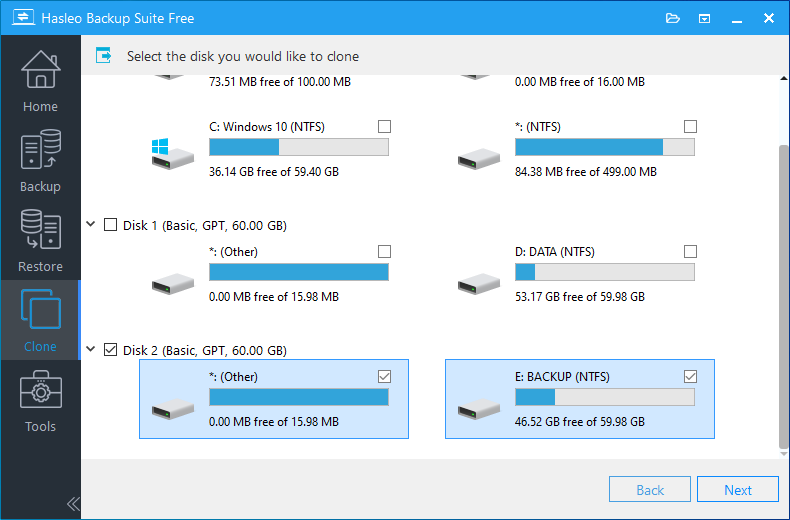
Step 2. Select the source disk you want to clone, then click "Next".
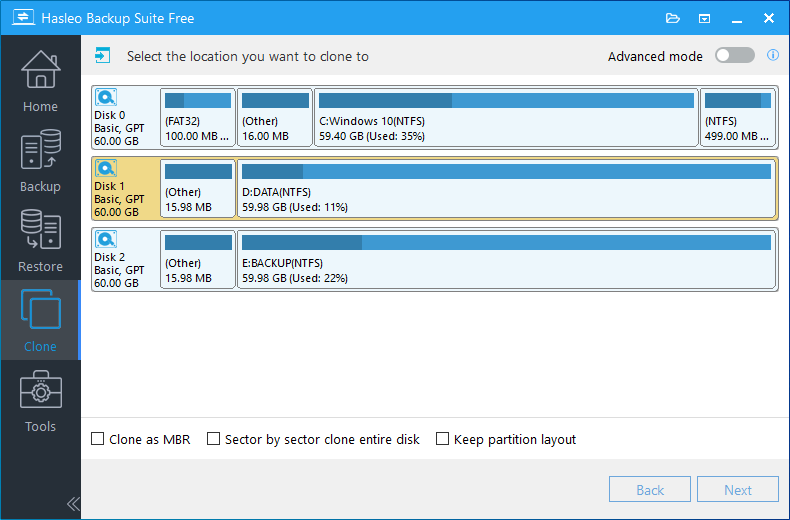
Step 3. Choose the location you want to clone the disk to, Hasleo Backup Suite provides two ways: Normal mode and Advanced mode.
Normal mode: Clone disk to the destination disk and all partitions on the destination disk will be destroyed. You just need to select the destination disk you want to clone to, then click "Next".
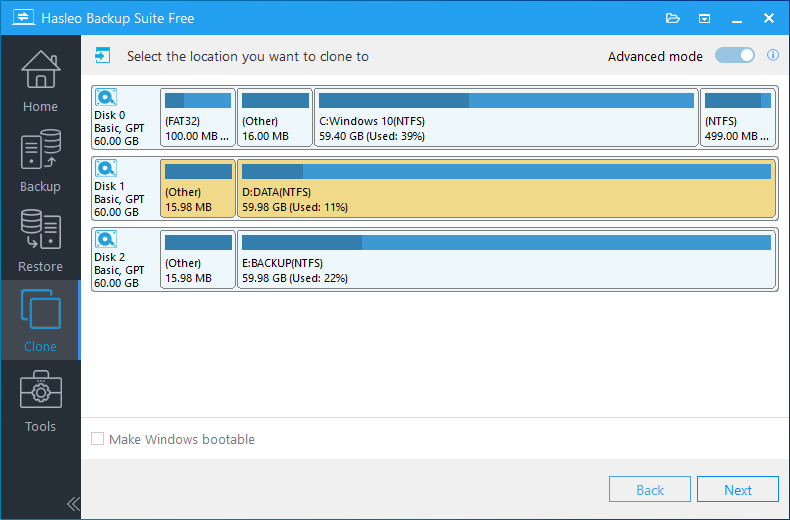
Advanced mode: Clone disk to a contiguous space (it can be a combination of multiple existing partitions and free space) on the destination disk and keep other unselected partitions that exist on the destination disk. Please enable "Advanced mode" and select the contiguous space you want to clone the disk to on the destination disk, then click "Next".
* The Clone as MBR or Clone as GPT option can clone MBR disk to GPT or clone GPT disk to MBR.
* The Sector by sector clone entire disk option enables you to clone all sectors from source disk to destination disk, so the capacity of the destination disk should be equal to or greater than the capacity of the source disk.
* The Keep partition layout option can ensure that the partition layout of the destination disk is exactly the same as the source disk after the cloning operation is completed.
Step 4. Adjust the size and location of the partitions according to your needs, then click "Proceed". A warning message may pop up to tell you that all data on the destination drive will be destroyed, click the "Yes" to continue if you do not have important data on the destination disk.
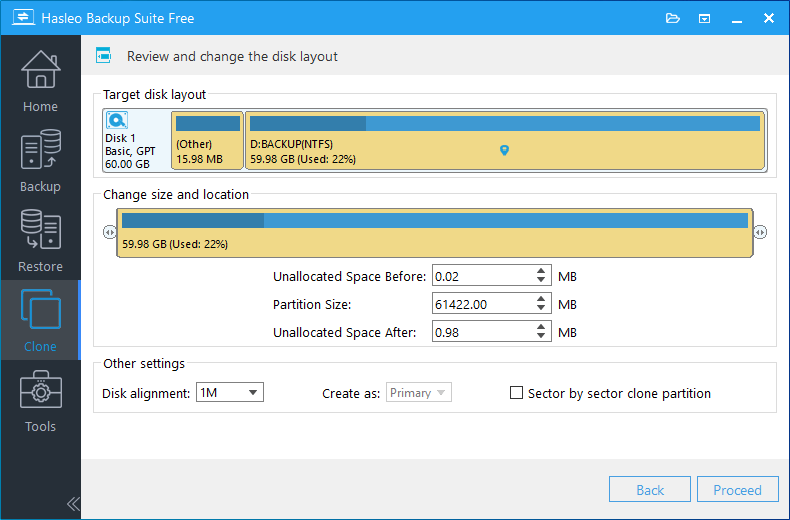
* Disk alignment:
- 1M (Recommended): 1M alignment is a subset of 4K alignment, and partitions aligned by 1M are always 4K alignment, so it can help you get the best performance of an SSD. In Windows Vista and later OSs, partitions created using Windows Disk Management always aligned by 1M bytes, regardless of whether the disk is an SSD.
- 4K: Ensure that the start sector of each destination partition is always aligned by 4K bytes, which is very important for the best performance of an SSD.
- Cylinder: Ensure that the start sector of each destination partition always starts at the beginning of a cylinder. Windows XP and previous OSs use this alignment mode.
- None: The start sector of each destination partition is not aligned.
* The Sector by sector clone partiton option enables you to clone all sectors from source partition to destination partition.
Step 5. Hasleo Backup Suite starts cloning the source disk to the destination disk. Please note that the time required for disk cloning is related to the size of the data that needs to be cloned, so please be patient.
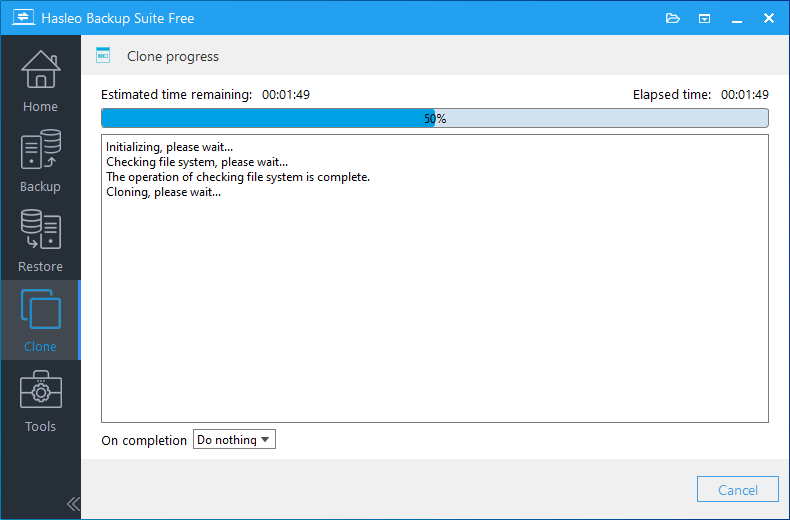
* Here you can specify a power management action to be performed after the backup is complete.
Frequently Asked Questions
A: Depends on data size and disk speed. A 500GB SSD to HDD clone takes 10-20 minutes. Larger disks or HDDs take longer.
A: Only if the smaller disk has enough capacity for all used data. The destination must hold all files from source.
A: 1M alignment (recommended) works best for all SSDs. Use 4K for older drives if needed. Cylinder is outdated.
A: Yes. Use "Clone as MBR" or "Clone as GPT" option during cloning. The target partition scheme converts automatically.
A: No. Cloning copies everything—OS, apps, settings—for an exact copy. Just change boot order in BIOS to boot from new disk.
A: Normal mode overwrites entire destination disk. Advanced mode clones to free space while keeping other partitions.
A: Only for forensic purposes or to recover deleted files. It copies unused sectors and takes much longer.
A: Yes, but for best results, boot into WinPE using emergency disk. This ensures no files are in use during cloning.


