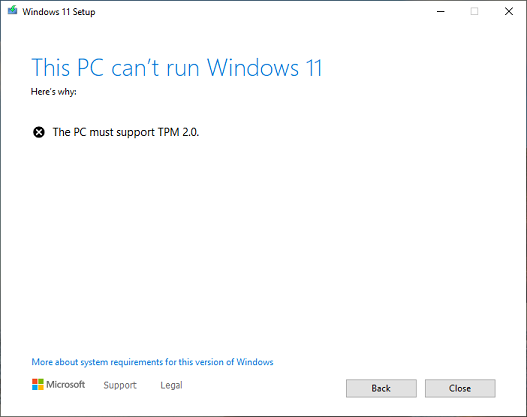
Microsoft officially released the latest generation of Windows operating system Windows 11 on October 5, 2021, which brings users a brand-new interface and more powerful functions. The Windows 11 hardware requirements provided by Microsoft show that the computer to install Windows 11 must have TPM 2.0, so if we try to install Windows 11 on a computer without TPM 2.0, you will get the "The PC must support TPM 2.0." error message.
For some old computers, especially desktop computers, the motherboard may not have a built-in TPM 2.0. If you want to install Windows 11 on these computers, you can buy a TPM 2.0 module to connect to the TPM 2.0 interface of the motherboard, but if your motherboard does not have one TPM 2.0 interface, then you will not be able to install Windows 11. In this case, we seem to have to replace a motherboard that supports TPM 2.0, but this is expensive. In fact, even if the computer does not have TPM 2.0, we can also install Windows 11. You can find various tutorials on the Internet to install Windows 11 on computers without TPM 2.0 by modifying the Windows 11 installation ISO or modify the registry key during Windows installation. This guide will show you how to install Windows 11 on computers without TPM 2.0, and you do not need to modify the Windows 11 installation ISO or registry key.
GOOD NEWS: Now you can use our product Hasleo WinToUSB to create a Windows 11 installation USB drive that can bypass the Windows 11 system requirements, and then use this USB drive to easily install Windows 11 on a computer that does not meet the Windows 11 system requirements, such as a legacy BIOS computer or a UEFI computer without a TPM 2.0 chip. For detailed steps, please refer to the link below:
How to create a Windows 11 installation USB drive that can bypass the Windows 11 system requirements?Hot
Tutorial to install Windows 11 on computers without TPM 2.0.
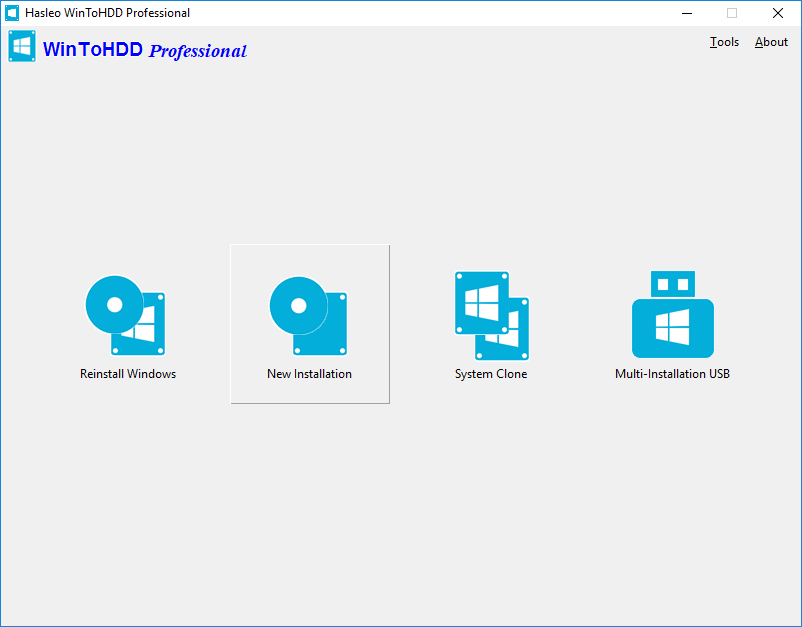
Step 1. Install and run WinToHDD, then click the "New Installation" button.
Step 2. Please use the following guidelines to prepare your installation source.
- Installing from an ISO/WIM/ESD/SWM/VHD/VHDX File: Click the
 button, then click the
  button and select the ISO/WIM/ESD/SWM/VHD/VHDX file from the open dialog box. If you don’t have a Windows 11 installation ISO file, download Windows 11 installation ISO file first.
 - Installing from a DVD drive: Insert the Windows installation CD/DVD into your CD/DVD drive. Once the CD/DVD is being detected in Windows, then click
 button and select the CD/DVD drive in the drop-down list. If your CD/DVD drive is not correctly recognized by WinToHDD, you need to click the
  button for the program to recognize the CD/DVD drive.
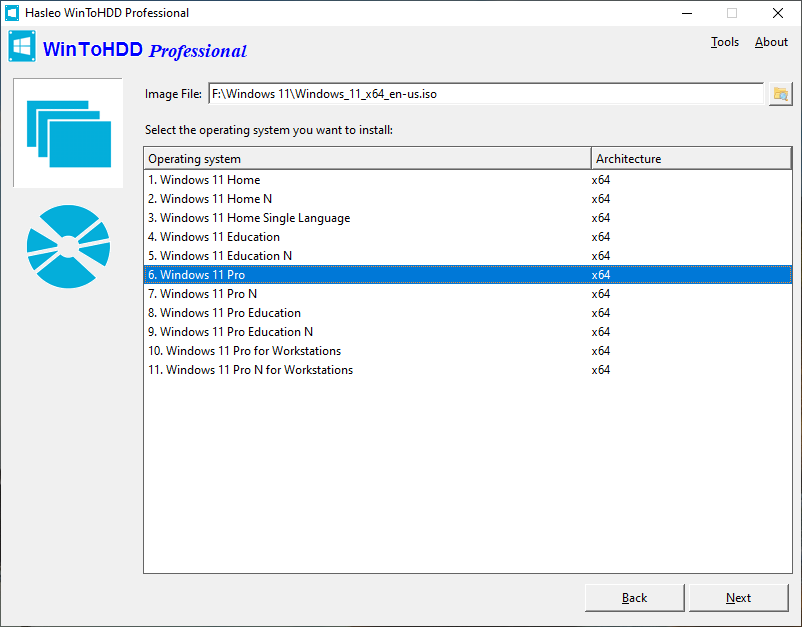
Step 3. WinToHDD scans for and lists installable Windows 11 operating systems. If you see the edition of Windows 11 you want to install, select it, then click "Next".
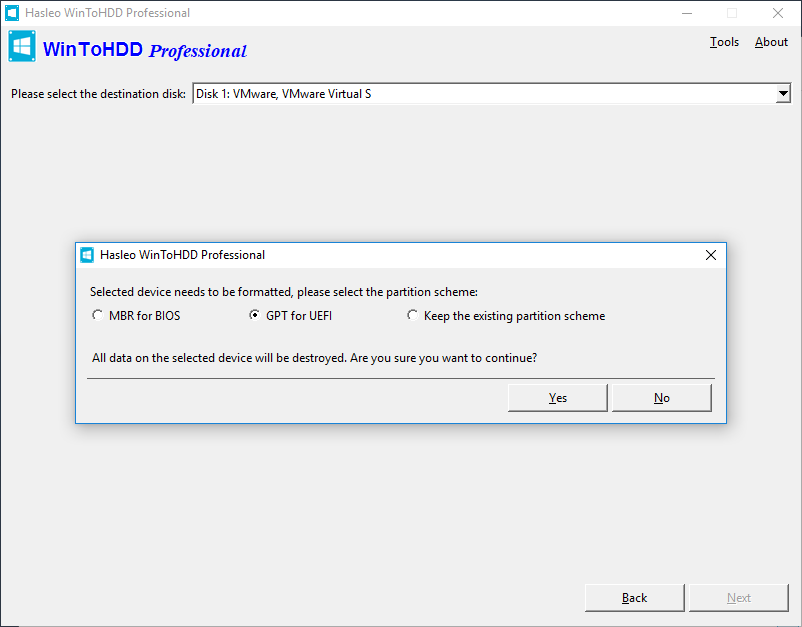
Step 4. Select the destination disk in the drop-down list, a pop-up will appear asking you if you want to format it to continue, select the partition scheme you want to use and click "Yes" to continue.
![]() Tips:
Tips:
- The "MBR for BIOS" and "GPT for UEFI" options will cause the destination drive to be formatted, so all data on the drive will be destroyed.
- If you choose "Keep the existing partition scheme", you need to manually prepare the partitions on the disk before this step, and here is the user guide on how to manually prepare partitions for the destination disk.
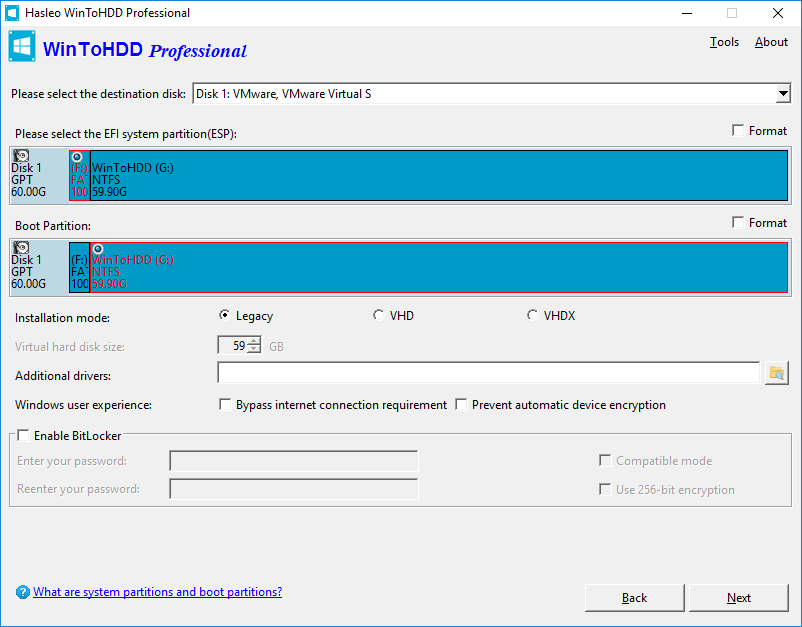
Step 5. Select the boot partition and system partition from the partition list, the selected partitions will be marked as red.
![]() Tips:
Tips:
- The "Legacy" installation mode installs Windows directly into the boot partition on the drive, and the VHD/VHDX installation mode installs Windows on the VHD/VHDX file that is stored in the boot partition.
- The "Bypass internet connection requirement" option allows us to bypass the Internet connection requirement when installing Windows 11.
- The "Prevent automatic device encryption" option allows us to prevent automatic BitLocker device encryption when installing Windows 11.
- If you want to encrypt boot partition using BitLocker, tick the "Enable BitLocker" check box and enter encryption password. You can also specify the encryption mode and encryption strength here.
Step 6. Click "Next". After clicking "Next", WinToHDD begins installing Windows 11.
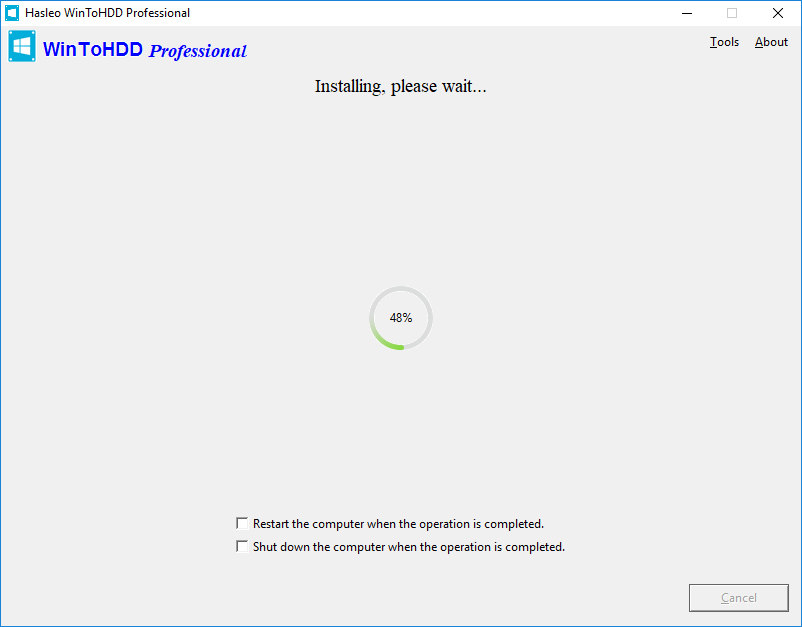
Step 7. It takes some time to install. After installation restart the computer and change BIOS to boot from your hard disk drive.
Step 8. Windows 11 installation starts up and you have to complete all the installation steps. You will have to boot from your hard disk drive if the Windows 11 Installation restarts the computer.
From the above, you can see that with the help of WinToHDD, you can easily install Windows 11 on a computer without TPM 2.0, and you don't need to modify the Windows 11 installation ISO or registry key.
Frequently Asked Questions (FAQ)
A: Yes, you can install Windows 11 on computers without TPM 2.0 using WinToHDD. It bypasses the TPM requirement and allows installation on older hardware that doesn't meet Windows 11 official requirements.
A: No, you don't need to modify the Windows 11 ISO or registry keys. WinToHDD handles the TPM bypass automatically during the installation process.
A: Beyond TPM 2.0, WinToHDD can also bypass the internet connection requirement during installation, allowing you to set up Windows 11 offline.
A: Yes, WinToHDD supports installing Windows 11 on both UEFI and legacy BIOS computers, making it versatile for older systems.
A: Yes, WinToHDD is free for Windows installation and system cloning, including installing Windows 11 on computers without TPM 2.0.
Related Guides
- How to clone Windows with free Windows system clone software?
- How to transfer Windows 11 to new hard drive without reinstalling Windows?
- How to transfer Windows 10 to new hard drive without reinstalling Windows?
- How to do system clone in Windows 10 without reinstalling Windows?
- How to move Windows 7 to new hard drive without reinstalling Windows?