
- Overview of Surface Devices and Windows To Go
- Supported Surface Models for Windows To Go
- Prerequisites for Creating Portable Windows on Surface
- Detailed Steps to Create Portable Windows on Surface Using WinToUSB
- Booting and Configuring Portable Windows on Surface Devices
- Common Issues and Troubleshooting
- Frequently Asked Questions
- Conclusion
Surface devices are loved for their mobility and strong performance. For Surface users, being able to create a portable Windows system means you can use your familiar Windows environment anywhere while keeping your data portable and secure. This tutorial provides a detailed guide on creating a portable Windows To Go system from an ISO file for Microsoft Surface devices.
Overview of Surface Devices and Windows To Go
The Microsoft Surface series includes multiple devices such as Surface Pro, Surface Laptop, Surface Book, and Surface Studio, with some equipped with ARM64 processors (like Surface Pro X and Surface Pro 9 5G), running Windows systems optimized for ARM architecture. Windows To Go is a powerful feature that allows users to install the Windows operating system on a USB drive and boot from it.
Through Windows To Go, Surface users can:
- Carry a portable workspace: Use your Surface portable Windows on any compatible computer, maintaining consistency in all settings, applications, and data
- Ensure data security: Store sensitive data on a portable USB device to reduce the risk of data leakage
- Flexible work style: Use a unified work environment at home, on business trips, or at client sites to improve work efficiency
- System isolation: Run a customized Windows environment without affecting the host system to protect privacy
- Multi-device sharing: Use the same system environment across multiple Surface devices or compatible computers
Supported Surface Models for Windows To Go
Not all Surface devices support booting Windows To Go from USB. Below are the main Surface device models that currently support this feature:
1. Surface Pro X Series
- Surface Pro X (released in 2019, equipped with Microsoft SQ1 processor)
- Surface Pro X (released in 2020, equipped with Microsoft SQ2 processor)
- Surface Pro 9 5G (released in 2022, equipped with Microsoft SQ3 processor)
Surface Pro X series devices are equipped with ARM64 processors and run Windows 10/11 ARM64 versions, making them the most suitable Surface devices for creating Windows To Go.
2. Surface Pro 7 and Earlier Versions (x64 Versions)
- Surface Pro 7 (equipped with Intel Core processor, x64 architecture)
- Surface Pro 6 (equipped with Intel Core processor, x64 architecture)
- Surface Pro (5th Gen) (equipped with Intel Core processor, x64 architecture)
These devices support Windows To Go, but since they use x64 architecture, they require standard x64 Windows ISO files.
3. Surface Laptop Series
- Surface Laptop 4 (Intel or AMD versions)
- Surface Laptop 3 (Intel or AMD versions)
Important Notes:
- Surface Pro X series devices require Windows 10/11 ARM64 version ISO files
- x64 architecture Surface devices require standard x64 Windows ISO files
- Some newer Surface devices may need UEFI firmware updates to support booting from USB
- It is recommended to confirm that your device supports USB boot functionality before proceeding
Prerequisites for Creating Portable Windows on Surface
Before starting to create Windows To Go for Surface devices, you need to meet the following prerequisites:
- Supported Surface Device: Surface Pro X, Surface Pro 9 5G, Surface Pro 7 and earlier versions, Surface Laptop 4/3, etc.
- Windows ISO File: Choose the corresponding Windows version (ARM64 or x64) based on your Surface device
- USB Drive: At least 64GB capacity, high-speed USB 3.0/3.1 drive or SSD external hard drive recommended for better performance
- WinToUSB Software: Download and install the latest version of Hasleo WinToUSB, ensuring the version supports your device's architecture
- Surface Keyboard Cover or External Keyboard: For entering BIOS settings and initial configuration
- USB-C Adapter (if needed): Some Surface devices may require a USB-C to USB-A adapter to connect the USB drive
Special Notes for Surface Devices:
- Surface Pro X series devices use ARM64 architecture and must use ARM64 version Windows ISO
- Ensure the Surface device's UEFI firmware is updated to the latest version
- It is recommended to use Surface officially certified USB drives or high-quality third-party products
- Keep network connection during first boot to install necessary drivers
Detailed Steps to Create Portable Windows on Surface Using WinToUSB
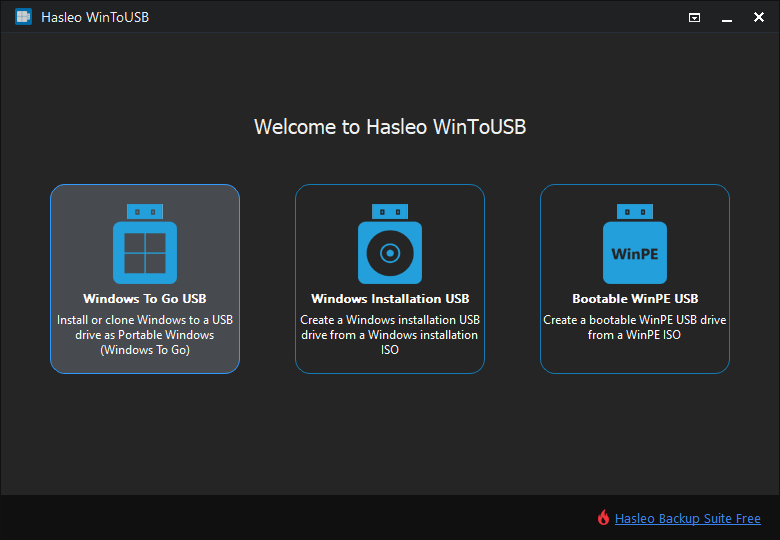
Step 1. Connect the USB drive to your computer. Download, install and run Hasleo WinToUSB, then click the "Windows To Go USB" option.
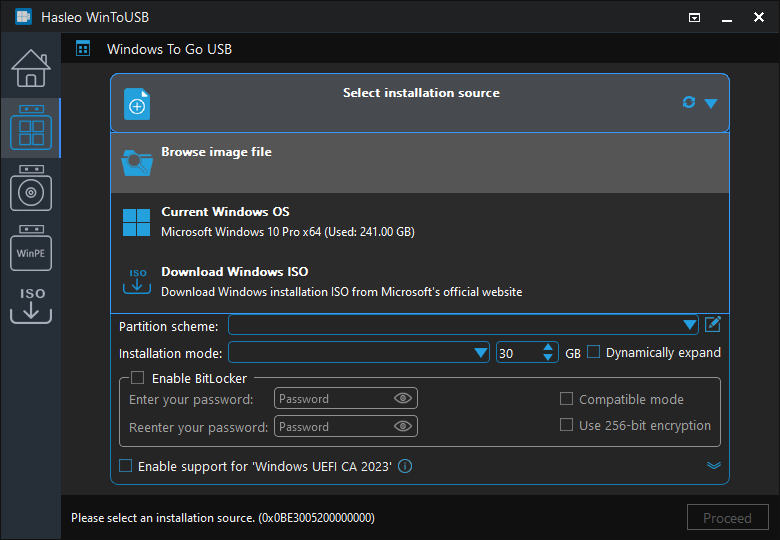
Step 2. Click "Select Installation Source", then select "Browse Image File" from the popup list, navigate to your downloaded Windows ISO file (choose ARM64 or x64 version based on your Surface device) and select it.
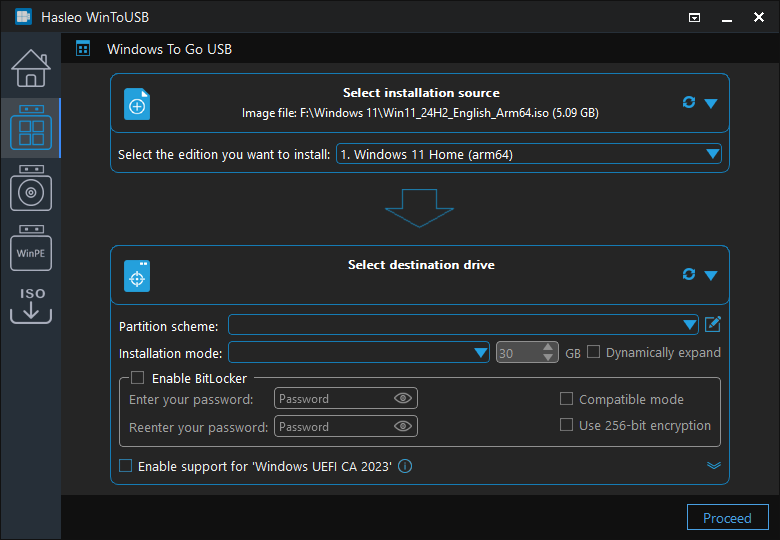
Step 3. WinToUSB will automatically detect the Windows version and architecture in the ISO file. Confirm that the correct Windows version is selected (ARM64 for Surface Pro X series, x64 for other models), then click "Continue".
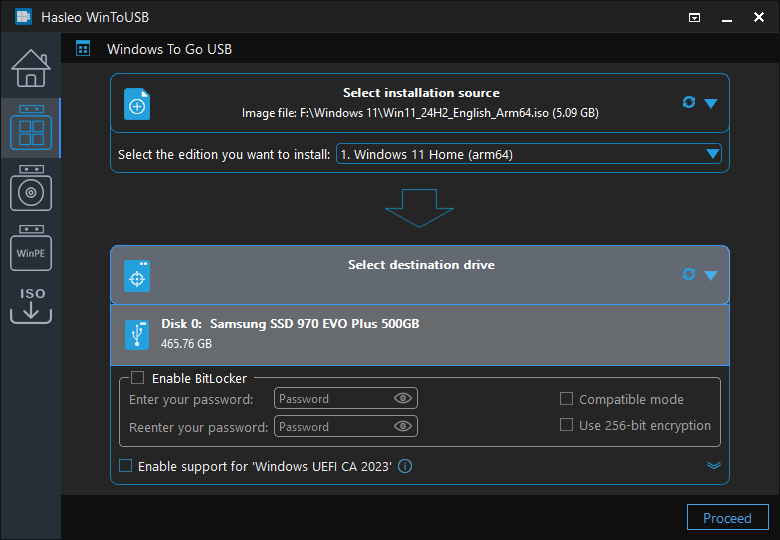
Step 4. Click "Select Destination Drive" and select your USB drive from the popup list.
Step 5. WinToUSB will automatically select the partition scheme suitable for your Surface device (GPT for Surface Pro X series, MBR or GPT for other models as needed). Confirm the settings are correct, then click "Continue".
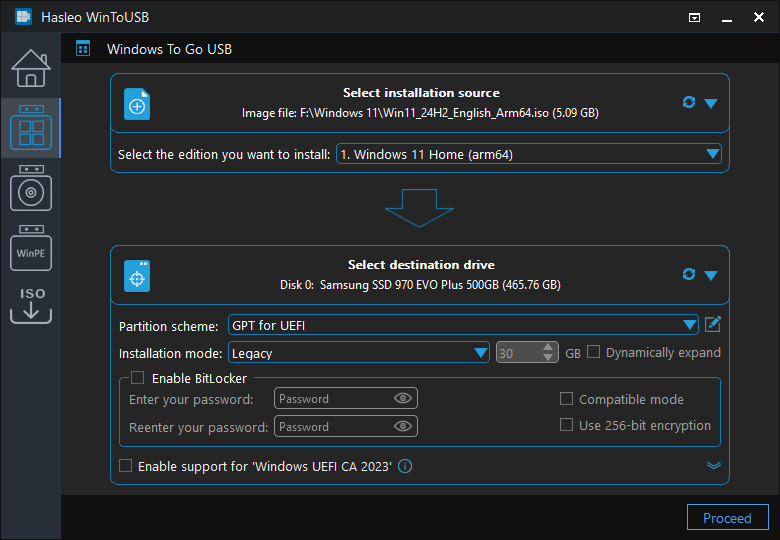
* Tip: For detailed information about "Partition Scheme", "Installation Mode" and "Enable BitLocker", please refer to: How to Create Windows To Go from Windows Installation ISO?
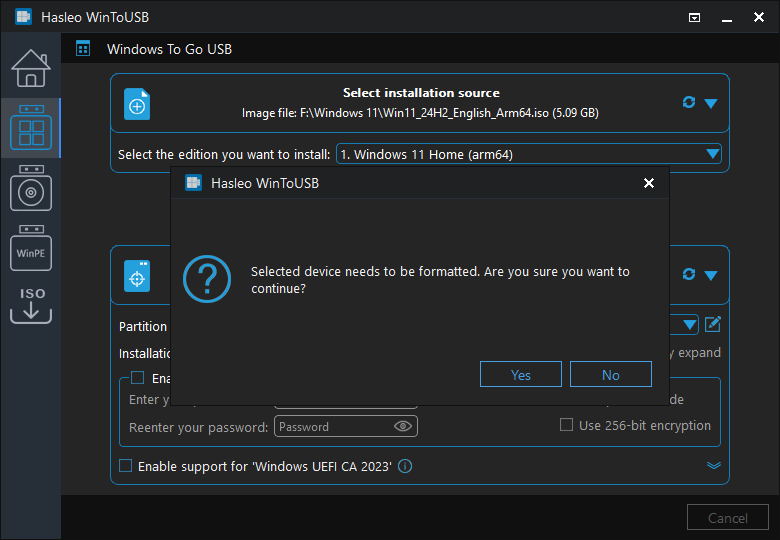
Step 6. After clicking "Continue", a confirmation dialog will appear asking if you want to continue formatting the USB drive. If you accept the operation, click "Yes".
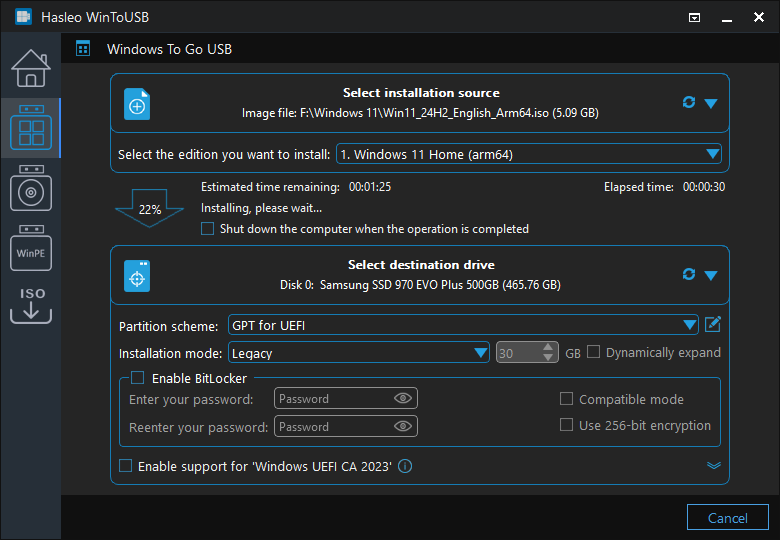
Step 7. After clicking "Yes", WinToUSB will start installing the Windows system to the USB drive. The time this process takes depends on the ISO file size and USB drive write speed.
Step 8. Wait for the installation process to complete. After successful completion, close WinToUSB and prepare to boot the portable Windows on your Surface device.
Booting and Configuring Portable Windows on Surface Devices
After creation, you can boot and use the portable Windows on your Surface device. Below are the detailed booting and configuration steps:
Step 1: Prepare the Surface Device
Connect the created USB drive to your Surface device. For ARM64 devices like Surface Pro X, you may need to use a USB-C adapter.
Step 2: Enter UEFI/BIOS Settings
The method to enter UEFI/BIOS on Surface devices differs from other computers. Below are the specific methods for each model:
- Surface Pro X / Surface Pro 9 5G: In powered-off state, hold the volume down button and power button simultaneously for about 10-15 seconds until the Surface logo appears on the screen, then release the power button and continue holding the volume down button until the UEFI menu appears
- Surface Pro 7 and earlier versions: In powered-off state, hold the volume up button and power button simultaneously for about 10-15 seconds until the UEFI menu appears
- Surface Laptop series: In powered-off state, hold the volume up button and power button simultaneously for about 10-15 seconds until the UEFI menu appears
Step 3: Change Boot Order
In the UEFI/BIOS interface, follow these steps:
Step a. Use arrow keys to navigate to the "Boot" or "Boot Order" tab.
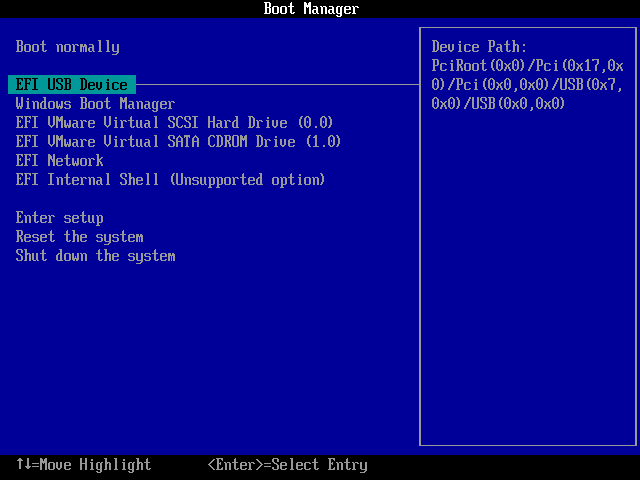
Step b. Find the USB drive option (usually displayed as "USB Drive" or similar), use F5/F6 keys or +/- keys to move it to the first position
Step c. Press F10 to save settings and exit, the Surface device will automatically restart
Step 4: Boot Windows from USB
The device will boot Windows To Go from USB, entering the initial setup experience.

Step 5: Complete First Boot Configuration
When booting from USB for the first time, Windows will perform the initial setup:
- Select region and language
- Set keyboard layout
- Connect to network (wired network or stable Wi-Fi recommended for better stability)
- Accept license terms
- Create username and password
- Set security questions (optional)
- Choose privacy settings
Step 6: Install Surface Drivers
After entering the system for the first time, it is recommended to perform the following operations for optimal compatibility:
- After connecting to the network, Windows Update will automatically check and install ARM64-specific drivers
- Visit the Microsoft official Surface support page to download the latest Surface drivers
- Pay special attention to drivers for Surface-specific accessories like the stylus, touchscreen, and keyboard cover
- Restart the system after installation to ensure all drivers are loaded correctly
Troubleshooting
Issue 1: Surface Device Cannot Boot from USB
If your Surface device cannot boot from the USB drive:
- Confirm the USB drive is properly connected and recognized by the system
- Enter UEFI/BIOS settings and confirm USB is listed as a valid boot option
- Check boot order settings to ensure the USB drive is before the internal disk
- Try using a different USB port on the Surface device
- Some Surface devices need to enable "USB Boot" option in UEFI
- Ensure the correct architecture Windows ISO file is used (ARM64 or x64)
Issue 2: Surface Pro X Cannot Recognize ISO File
If WinToUSB cannot recognize your ARM64 ISO file:
- Confirm the ISO file is ARM64 version, not x64 version
- Check if the ISO file is complete, try downloading again
- Try using virtual drive software to mount the ISO file, then select the mounted drive as source
- Ensure you are using the latest version of WinToUSB
Issue 3: Stylus or Touch Features Abnormal After Boot
If Surface stylus or touch features do not work properly:
- After connecting to network, install Surface-specific drivers through Windows Update
- Visit Microsoft official website to download and install Surface stylus drivers
- Check Device Manager for unknown devices or devices with exclamation marks
- Try re-pairing the stylus (Settings > Bluetooth > Remove device > Re-pair)
Issue 4: Blue Screen Error After Boot
If a blue screen or error appears during boot:
- USB drive speed insufficient, recommend using USB 3.0/3.1 drive or high-speed SSD external drive
- Windows version in ISO file incompatible with Surface device
- Surface UEFI firmware version too old, update to latest version
- Try recreating Windows To Go to ensure no errors during operation
Issue 5: Poor Performance or Slow Operation
If portable Windows runs slowly on Surface device:
- Use higher speed USB drive (USB 3.1/3.2 or NVMe SSD external drive)
- Disable unnecessary startup programs and services
- Perform regular disk cleanup and defragmentation (if applicable)
- Ensure system has latest Surface drivers and Windows updates installed
- For ARM64 versions, ensure native ARM64 applications are used instead of x64 programs running through emulation
Issue 6: Keyboard Cover or Accessories Unresponsive
If Surface keyboard cover or other accessories are unresponsive:
- Check if keyboard cover magnetic interface is clean, free of dust or debris
- Try disconnecting and reconnecting the keyboard cover
- Restart system to check if it recovers
- Update Surface keyboard cover drivers
- Some keyboard cover functions may require specific driver support
Issue 7: Wi-Fi or Bluetooth Connection Issues
If Wi-Fi or Bluetooth does not work properly:
- After connecting to network, install network adapter drivers through Windows Update
- Visit Microsoft official website or device manufacturer to download latest Wi-Fi/Bluetooth drivers
- Check network adapter status in Device Manager
- Try resetting network settings (Settings > Network & Internet > Status > Network reset)
Frequently Asked Questions
A: Windows To Go is supported on Surface Pro X series (with ARM64 processors like SQ1, SQ2, SQ3), Surface Pro 7 and earlier versions (with Intel x64 processors), and Surface Laptop 4/3. Surface Pro X devices require ARM64 Windows ISO files, while other models use standard x64 Windows ISO files.
A: We recommend using high-speed USB 3.0/3.1 drives or SSD external hard drives with at least 64GB capacity for Surface Windows To Go. Faster drives will provide better performance, especially for ARM64 Surface devices where system responsiveness depends heavily on USB speed.
A: Windows To Go created for Surface devices can be used on any compatible computer with USB boot support. However, x64 Windows To Go will only work on x64 computers, and ARM64 Windows To Go will only work on ARM64 computers. The Windows system must match the target computer's architecture.
A: To enter UEFI/BIOS on Surface Pro X or Surface Pro 9 5G, power off the device, then hold the volume down button and power button simultaneously for about 10-15 seconds until the Surface logo appears. Release the power button but continue holding the volume down button until the UEFI menu appears.
A: Yes, WinToUSB free version supports creating Windows To Go for Surface devices from ISO files. You can download the appropriate Windows ISO (ARM64 for Surface Pro X, x64 for other Surface models) and create portable Windows without any cost.
Conclusion
As described above, by following these steps, you can use Hasleo WinToUSB to create a portable Windows To Go system for Microsoft Surface devices. This method is particularly suitable for the following scenarios:
- Use a portable Windows workspace on Surface devices for mobile work
- Share a consistent system configuration and applications across different Surface devices
- Develop and test without affecting the host system
- Ensure data security by keeping sensitive data on a portable USB device
- For professionals who need to work in different locations
As a professional portable Windows creation tool, Hasleo WinToUSB fully supports the entire Microsoft Surface product line, including Surface Pro X series (ARM64) and traditional x64 architecture devices.
Experience the convenience of using portable Windows on Surface devices right away! Whether it's Surface Pro X or other models, it will provide you with excellent mobile computing experience.


