Rufus may fail to properly recognize USB drives due to several reasons. This tutorial will explain what causes this problem and how to fix it. The key aspects include:
- Overview of Rufus
- Why is my USB drive not detected by Rufus?
- Method 1: Change Rufus Settings to Recognize Your USB Drive.
- Method 2: Create a Bootable USB Drive with Hasleo WinToUSB.
- Frequently Asked Questions
- Summary
Overview of Rufus
Rufus is a popular open-source tool primarily used to create bootable USB drives compatible with Windows, Linux, DOS, and other operating systems. Rufus allows quickly write ISO files of different operating systems on USB drives on the Windows operating system, with seamless support for UEFI and Legacy BIOS boot modes. This makes it an essential tool for system installations and maintenance tasks. For Windows users, they can use it to create Windows installation USB drives and Windows To Go drives.
Why is my USB drive not detected by Rufus?
There are various reasons why Rufus may fail to recognize a USB drive, which can be caused by hardware or software issues. These include physical damage to the USB drive, an unstable USB cable, improper Rufus configuration, or software bugs. If Rufus fails to recognize your USB drive, first check whether Windows recognizes the drive correctly. This confirms whether it is a hardware issue. If you are sure that the problem is caused by a hardware issue, then try to replace the USB cable or the USB drive with a new one.
After comfirming the USB drive is properly recognized by Windows (no hardware issues), if Rufus still fails to list it, try Method 1 below to check for setup issues. If Method 1 still doesn't work, this may be a bug in Rufus. In this case, we recommend contacting the Rufus developer to solve the problem, which may take some time and affect your work. Alternatively,proceed directly to Method 2.
Method 1: Change Rufus Settings to Recognize Your USB Drive.
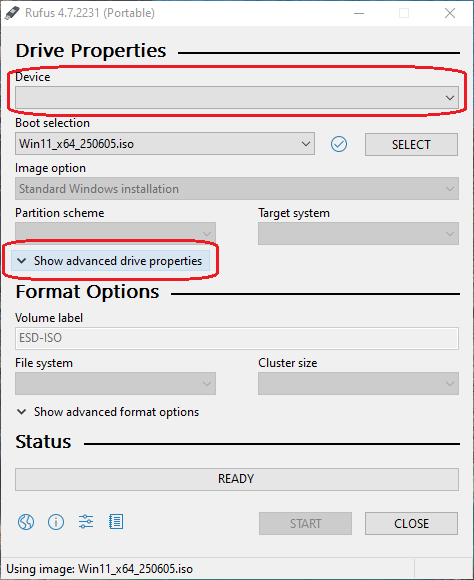
Step 1. Connect the USB drive to your computer and run Rufus. If the USB drive is not listed by Rufus, click "Show advanced drive properties".
Step 2. Check the "List USB Hard Drives" checkbox. If everything is normal, your USB drive will be listed.
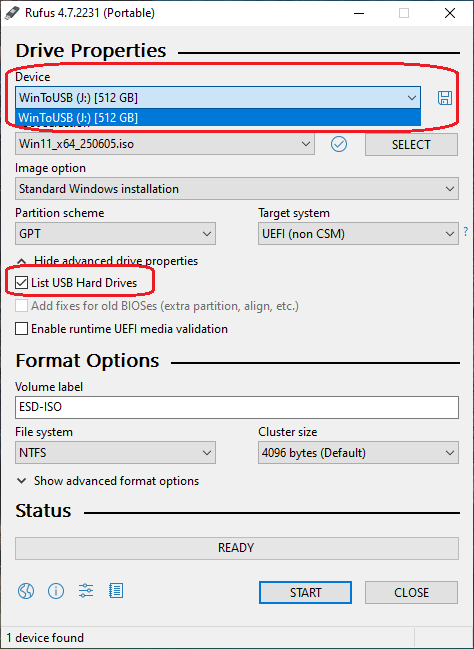
Step 3. Select the ISO file and then create a bootable USB drive.
Method 2: Create a Bootable USB Drive with Hasleo WinToUSB.
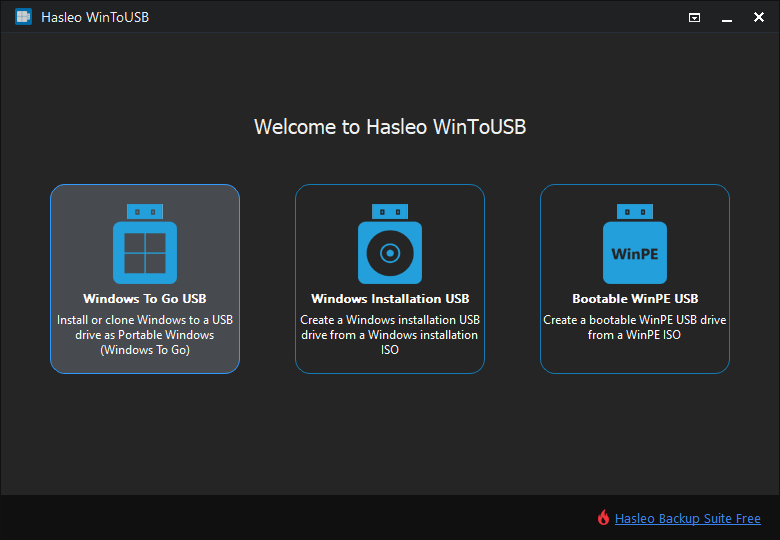
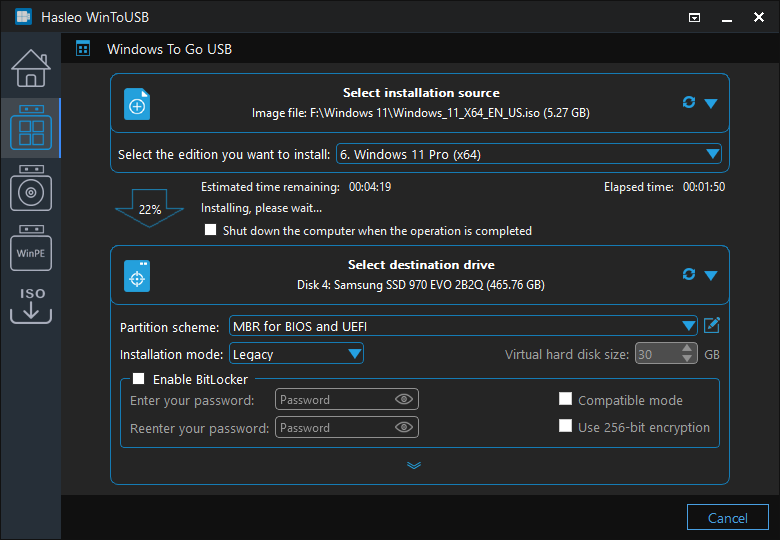
Step 1. Connect the USB drive to your computer, then download, install, and run Hasleo WinToUSB. Click the "Windows To Go USB" option.
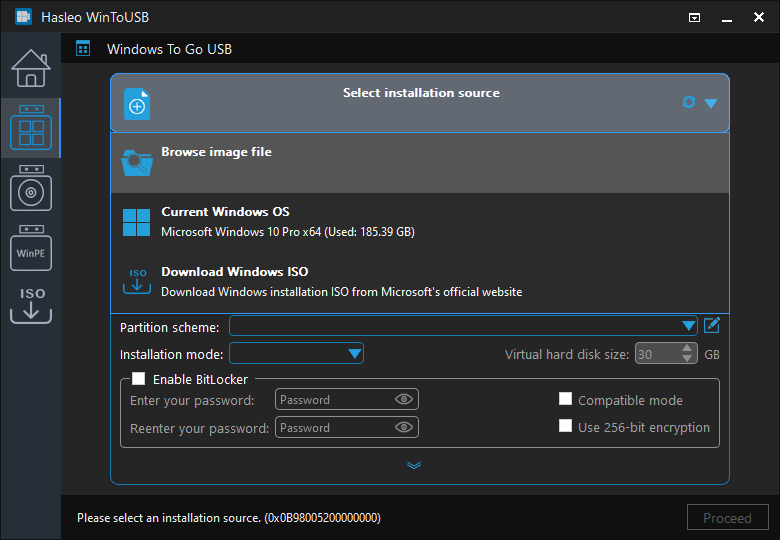
Step 2. Click "Select installation source", then click "Browse image file". Then choose the Windows installation ISO file from the dialog box as installation source. Alternatively, select a CD/DVD drive with Windows installation media.
Step 3. Hasleo WinToUSB will scan for and list the available Windows editions. Please select the edition you want to install.
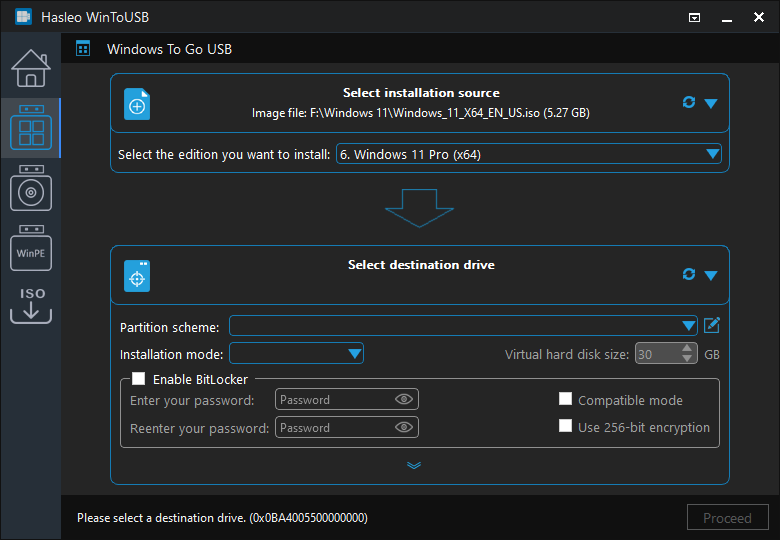
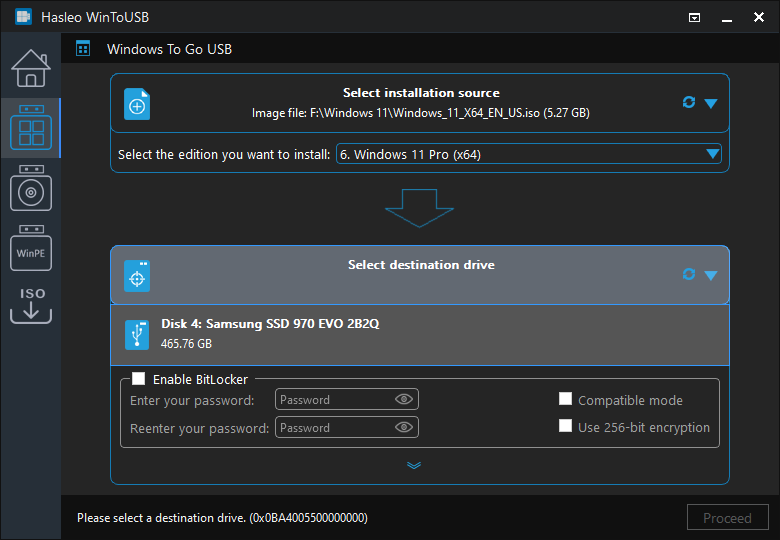
Step 4. Click "Select destination drive", then choose the target drive from the pop-up list. If Hasleo WinToUSB fails to detect the drive, click the ![]() button to initiate drive recognition.
button to initiate drive recognition.
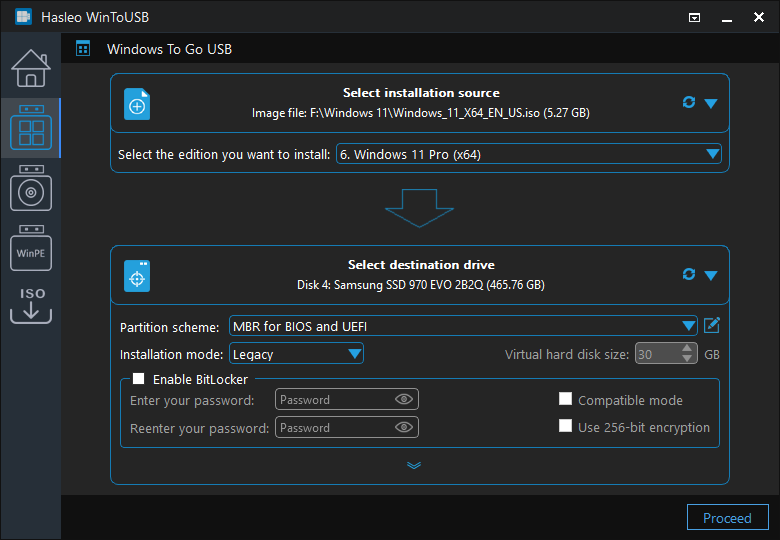
Step 5. Select your preferred partition scheme and installation mode. Optionally, you may specify additional drivers or enable BitLocker encryption for the Windows To Go drive, then click "Proceed".
* Tips:
- For detailed information about "Partition scheme", "Installation mode" and "Enable BitLocker", please refer to: How to Create Portable Windows 11/10/8/7 from ISO, WIM, ESD, SWM, VHD(X) or DBI Files?
- If you select "Keep the existing partition scheme" option, you need to manually prepare the USB drive partitions before this step. View guide: How to Manually Prepare Partitions for Windows To Go.
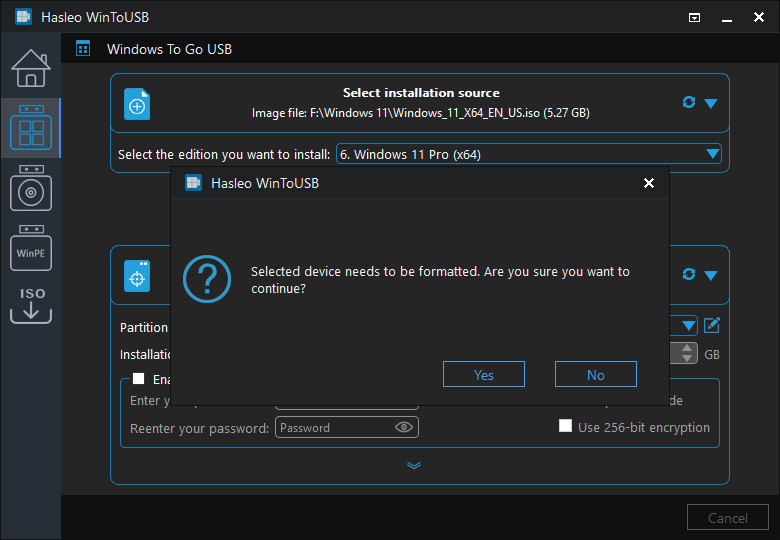
Step 6. After clicking "Proceed", a comfirmation dialog will appear asking whether to continue formatting the drive. Click "Yes" if you accept the operation.
Step 7. After clicking "Yes", WinToUSB initiates Windows installation on the destination drive.
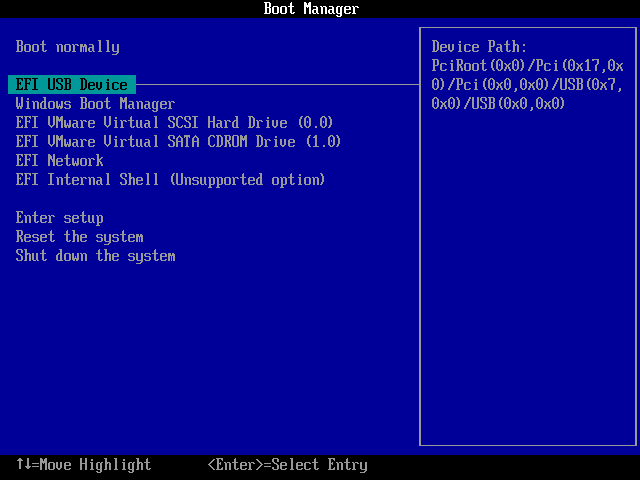
Step 8. The installation will take some time. After installation, restart the computer and enter UEFI/BIOS settings to boot from the USB drive.
Step 9. A standard Windows installation requires completing all setup steps during the first boot. Afterward, you can install applications and copy files, etc.

Frequently Asked Questions
A: Rufus may fail to detect USB drives due to hardware issues (damaged USB, bad cable), software conflicts, or configuration settings. First verify Windows recognizes the drive to rule out hardware problems.
A: Try these solutions: 1) Check "Show advanced drive properties" and "List USB Hard Drives" in Rufus settings, 2) Reconnect the USB drive to a different port, 3) Update USB drivers, or 4) Use an alternative tool like WinToUSB.
A: Yes, WinToUSB is an excellent alternative to Rufus. While Rufus is primarily for creating Windows installation USB drives, WinToUSB excels at creating both Windows To Go portable environments and installation media with more features.
A: WinToUSB offers several advantages: creates portable Windows environments (Windows To Go), supports BitLocker encryption, allows cloning existing Windows to USB, and provides better compatibility with various USB drives.
A: Yes, WinToUSB can create bootable USB drives from Windows ISO, WIM, ESD, SWM, VHD(X), and DBI files. It also supports creating Windows Installation USB drives and Windows To Go portable environments.
Summary
For Windows users, as the best free alternative to Rufus, Hasleo WinToUSB can create bootable USB drives in case Rufus doesn't recognize your USB drive correctly. Like Rufus, Hasleo WinToUSB can easily create Windows installation USB drives and Windows To Go. Additionally, it offers more features than Rufus, such as creating BitLocker-encrypted Windows To Go, cloning currently running Windows on USB drives as Windows To Go, and more.
Related Guides
- Best Free Alternative to EaseUS Windows To Go Creator
- Best Free Alternative to Windows To Go Creator built into Aomei Partition Assistant
- How to fix Aomei Windows To Go Creator "Failed to create Windows ToGO" error?
- How to create a portable Windows 11/10 USB drive?
- How to clone Windows 10 to an external hard drive as portable Windows 10?


