
- Method 1: Recover Deleted Files from OneDrive Recycle Bin
- Method 2: Recover from Local Recycle Bin
- Method 3: Restore OneDrive Files from Backup
- Method 4: Use Hasleo Data Recovery to Recover Locally Deleted Files
- How to Prevent OneDrive File Loss
- Frequently Asked Questions
- Conclusion
Have you ever accidentally deleted important files while using Microsoft OneDrive cloud storage service? Or realized you needed a file only after emptying the Recycle Bin? Don't worry - this article will provide you with detailed information on multiple methods to recover deleted files in OneDrive, helping you retrieve your valuable data.
Method 1: Recover Deleted Files from OneDrive Recycle Bin
When you delete a file in OneDrive, it first goes to the OneDrive Recycle Bin. This is the simplest and most direct method for recovering recently deleted files.
Step 1: Please visit OneDrive in your browser and sign in to your Microsoft account. After logging in, find and click "My files" in the left navigation bar. Then, in the top menu bar, click the "Recycle Bin" icon (usually located to the right of the search box or at the end of the menu bar) to access it.
Step 2: On the Recycle Bin page, you can browse through all deleted files. You can use the search box at the top of the page to quickly locate files, or sort the list by "Deleted date" to find recently deleted content.
Step 3. Once you find the file you need to recover, check the checkbox on the left side of the file, then click the "Restore" button that appears at the top of the page. The file will be automatically restored to its original location.
⚠️Tips:
- Files in OneDrive Recycle Bin for personal accounts are automatically and permanently deleted after 30 days by default. If you are using a work or school account, the retention period may be set longer by your administrator. Once expired, files cannot be recovered using this method.
- To avoid losing important data due to expiration, it is recommended to perform recovery operations as soon as you discover files have been accidentally deleted.
- If you have already performed the "Empty Recycle Bin" operation, files in the Recycle Bin cannot be recovered using this method.
Method 2: Recover from Local Recycle Bin
If you use the OneDrive desktop application and files have been downloaded to your local computer, when you delete these files on your computer, they will appear in your computer's local Recycle Bin.
Step 1: Double-click the "Recycle Bin" icon on your desktop, or press the "Win + R" key combination, type "shell:RecycleBinFolder", and then click "OK" to open the Recycle Bin.
Step 2: Find the OneDrive file you need to recover in the Recycle Bin, right-click the file, and select the "Restore" option. The file will be automatically restored to its original location on your computer and synchronized back to the OneDrive cloud.
⚠️Tips: This method only applies to files that have been downloaded locally. If a file is in "online-only" status, it will not go to the local Recycle Bin when deleted. You need to recover it from the Recycle Bin on the OneDrive website.
Method 3: Restore OneDrive Files from Backup
If your OneDrive files have ever been synchronized to your local computer and you have used Windows File History or third-party backup software (such as Hasleo Backup Suite) to create backups, you can try to restore OneDrive files from your local backup media.
Check Windows File History
Step 1. In the Windows Start menu, search for "Restore your files with File History" and open it.
Step 2. Navigate to: C:\Users\[Your Username]\OneDrive.
Step 3. Use the left and right arrows at the bottom of the window to browse through backup versions from different points in time.
Step 4. Select the target file or folder, then click the green restore button. The file will be restored to its original location.
Use Hasleo Backup Suite to Mount Backup Image
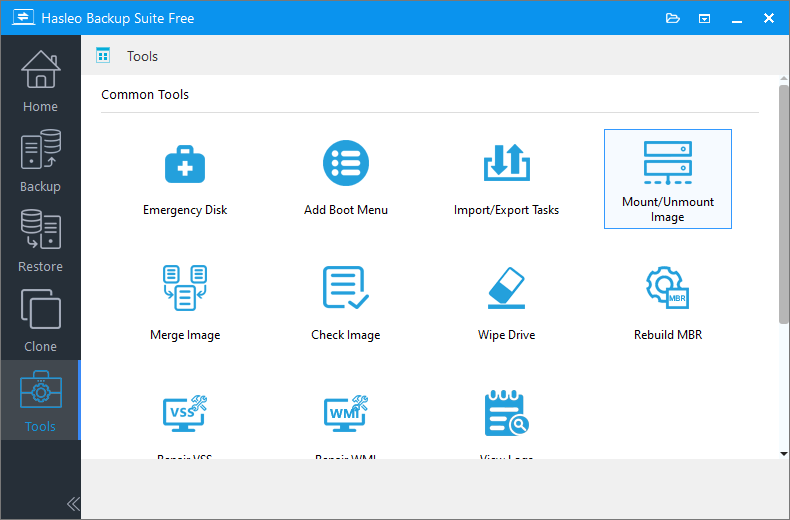
Step 1. Connect the device containing your backup files to your computer, run Hasleo Backup Suite, click the "Tools" button in the navigation bar, and then click "Mount/Unmount Image" in the operation area.
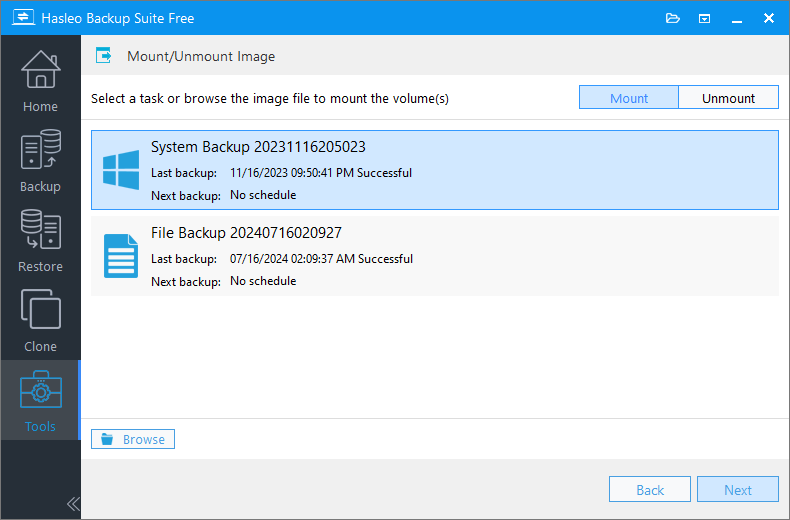
Step 2. In the pop-up window, select the image file you need to mount and click "Next".
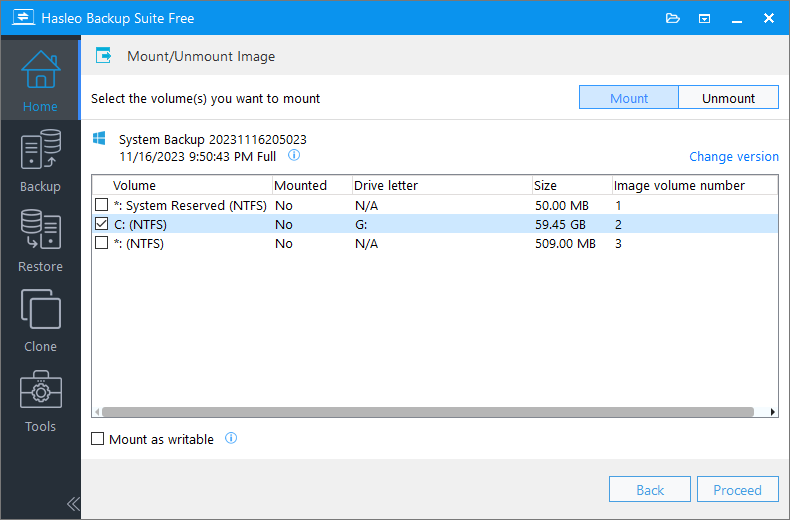
Step 3. The program will parse the image file and display all volumes (partitions) it contains. Click the "Mount" button in the upper right corner, and check the volumes you need to mount (multiple volumes can be mounted simultaneously).
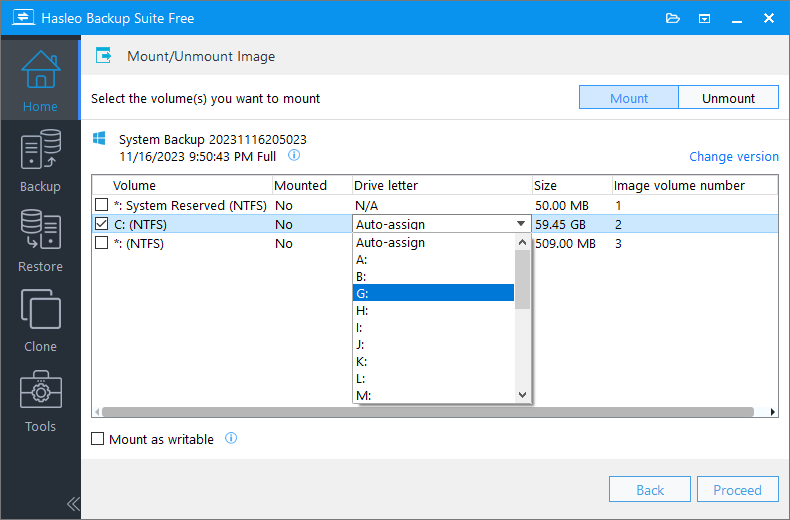
Step 4. Double-click the "Drive Letter" column for the selected volume, and select an unused drive letter from the dropdown menu as the virtual drive letter after mounting.
Step 5. After confirming the settings are correct, click "Continue" to mount the selected image volume. Open Windows Explorer, find and double-click the newly appeared drive letter to browse files in the backup image.
Step 6. Find the file or folder you need to recover. Select them and copy to a target folder on your computer (such as Desktop or D: drive) to complete the restoration.
Step 7. When you no longer need to access the mounted backup image, unmount it in time to free up system drive letters and avoid accidental operations.

💡Tips: For more mounting precautions, please see: How to Mount, Unmount, and Recover Files from Backup Images Using Hasleo Backup Suite
Method 4: Use Hasleo Data Recovery to Recover Locally Deleted Files
If you cannot find the required file in the Recycle Bin on the OneDrive website (i.e., it has been permanently deleted from the cloud), but the file was previously saved on your local computer hard drive before deletion and has not yet been overwritten by new data, you can try using professional file recovery software—Hasleo Data Recovery to scan your local hard drive for remaining copies. However, this will not work for files that are "Online-only" or have never been successfully uploaded to the cloud.
Hasleo Data Recovery can help you recover deleted, formatted, or lost files from various storage devices such as hard drives, USB drives, and SSDs.
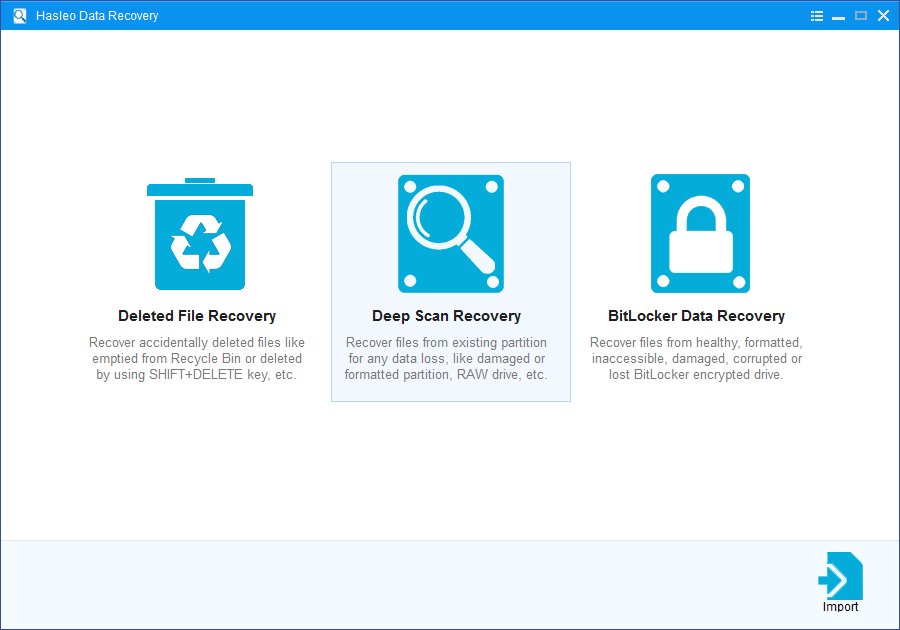
Step 1. Download, install and run Hasleo Data Recovery. On the main interface, select "Deep Scan Recovery" mode.
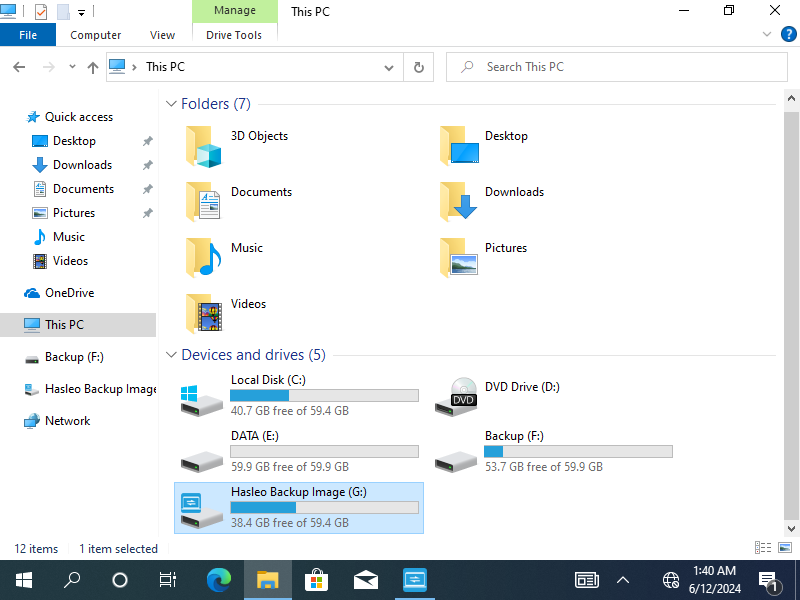
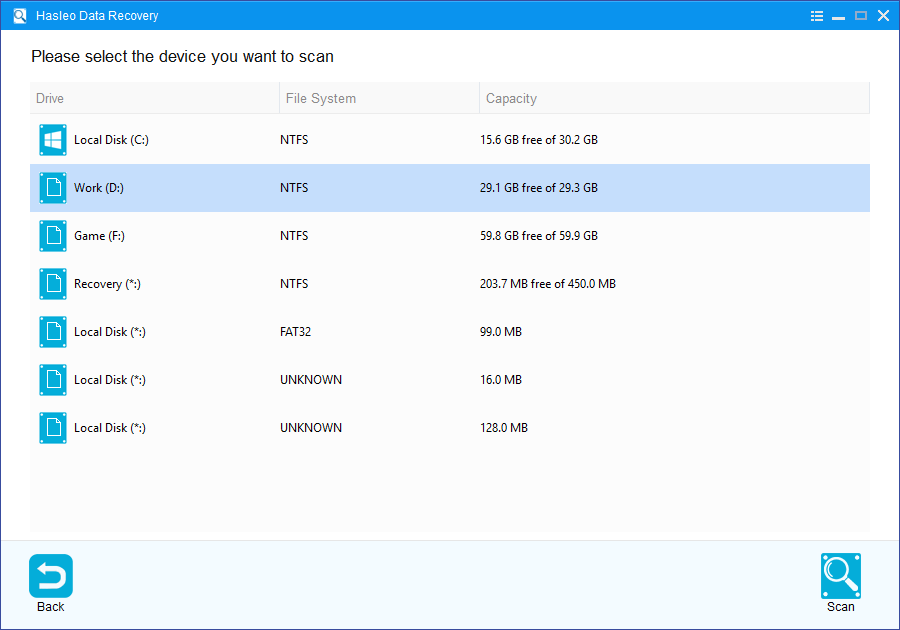
Step 2. Select the disk where the folder synchronized from OneDrive is located and start scanning. The software will search for recoverable data. Scanning time depends on the capacity of the storage - larger drives take longer to complete scanning.
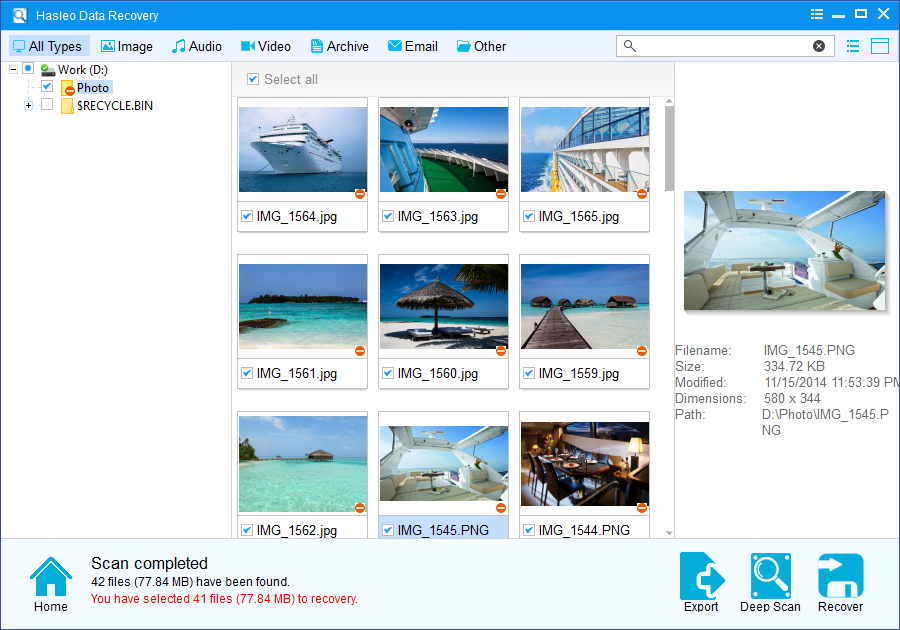
Step 3. After scanning completes, you can preview the found files in the result list. Locate the OneDrive files you need to recover through file paths and file types. Select the files you need to recover and click the "Recover" button to save them to a safe location.
💡Tips:
- If the file you need to recover is located on a BitLocker encrypted drive, please try using the BitLocker Data Recovery mode.
- Please save recovered files to a different disk partition than the original location to avoid overwriting lost data.
🎯How to Prevent OneDrive File Loss
Prevention is always better than recovery. Here are practical strategies to protect your OneDrive files:
Enable OneDrive Files On-Demand
The Files On-Demand feature helps you manage local storage and cloud files more efficiently.
- Right-click the OneDrive icon in the system tray and select "Settings"
- In the "Settings" tab, make sure "Files On-Demand" is enabled
- After enabling, you can see file status in File Explorer (cloud icon means online-only, green checkmark means available locally)
💡Tips: This feature does not automatically protect files, but by marking files as "online-only", you can prevent accidental deletions from affecting cloud files. If local files are deleted, as long as a cloud copy exists, you can still re-download them.
Regularly Check the OneDrive Recycle Bin
Make it a habit to check the OneDrive Recycle Bin regularly. This allows you to recover accidentally deleted files before they are permanently removed after 30 days.
Use the Version History Feature
Version history is a powerful tool for recovering from file overwrites or incorrect modifications. OneDrive automatically saves up to 25 previous versions of files for personal accounts.
Implement a Local Backup Strategy
While cloud storage is excellent, a local backup provides an extra layer of protection. Follow the "3-2-1 backup rule" : keep three copies of your data, on two different media, with one copy stored off-site. Regularly back up important OneDrive files to an external hard drive to prevent permanent data loss.
Frequently Asked Questions (FAQ)
A: When you delete files from OneDrive (either via the website or desktop app), they go to the OneDrive Recycle Bin where they remain for 30 days (personal accounts) or 93 days (business accounts with retention policy). To recover: sign in to OneDrive online, go to the Recycle Bin, select the files, and click 'Restore'. If the Recycle Bin is empty or files were permanently deleted, use Hasleo Data Recovery to scan your local OneDrive folder for recoverable files.
A: Yes, there are several ways to recover OneDrive files after permanent deletion: 1) Use OneDrive version history to restore previous versions of files, 2) Check the SharePoint Recycle Bin if using OneDrive for Business, 3) Use Windows File History if enabled, 4) Use Hasleo Data Recovery to scan the local OneDrive sync folder for deleted files that may still exist in the local cache before being fully purged from Microsoft's servers.
A: OneDrive automatically saves previous versions of files for 30 days (for most accounts). To access version history: right-click the file in OneDrive, select 'Version history', browse through previous versions listed by date, and click 'Restore' to revert to any earlier version. This is useful if you need to recover from accidental overwrites, corrupted files, or malware that modified but didn't delete your files.
A: This typically happens when OneDrive's selective sync is configured incorrectly, the local folder was moved or deleted, or sync was paused for too long causing local files to be removed. OneDrive keeps cloud copies even when local files are removed. To fix: go to OneDrive settings, check 'Folders' tab, ensure the folders you need are checked for sync, or re-sync by moving the folder location and reconnecting.
A: If your OneDrive subscription expires, Microsoft typically gives you 30 days to download your files before deletion. If your account is deleted, files are typically deleted within 30 days. To protect against this: always maintain local backups of important OneDrive files, use Hasleo Data Recovery to scan local OneDrive folders before account closure, and export files to external storage. Proactive backup is the only reliable protection against account loss scenarios.
Conclusion
There are multiple methods to recover deleted OneDrive files, ranging from simple Recycle Bin restoration to using professional data recovery software. Depending on when and how the files were deleted, choosing the appropriate method can help you maximize the recovery of lost data.
If none of the above methods can recover your files, it is recommended that you contact Microsoft support or professional data recovery services for assistance. Also, to avoid similar situations in the future, be sure to develop a good habit of regularly backing up important files.


