
- Method 1: Create a compatible Windows recovery drive using Hasleo Backup Suite Free (for multiple devices)
- Method 2: Create a Windows recovery drive using the built-in tool (for the current PC)
- Method 3: Create a Windows installation media using the Windows MediaCreationTool (for different computers)
- Frequently Asked Questions (FAQ) for Windows Recovery Drive
- Summary
This guide covers three free and effective methods to reinstall or recover your Windows system. We'll detail how to create a Windows installation media, a Windows recovery drive, and a compatible Windows recovery drive. For each method, you'll find step-by-step guidance and applicable scenarios, helping you solve system issues or upgrade smoothly.
Method 1: Create a compatible Windows recovery drive using Hasleo Backup Suite Free (for multiple devices)👑
Hasleo Backup Suite Free is a comprehensive, professional backup and recovery software that combines essential features like system backup, data restoration, and disk cloning. It's compatible with both UEFI and Legacy BIOS boot modes and natively supports Windows x86, x64, and ARM64 architectures. With scheduling, incremental, and differential backups, it efficiently conserves storage space and time. Designed with an intuitive interface, it delivers robust data protection for both enterprise and home users, providing a reliable solution for disaster recovery, data loss prevention, and seamless disk migration.
The Windows recovery drive created by Hasleo Backup Suite Free offers excellent hardware compatibility and can boot quickly on various compatible devices. Unlike a standard Windows Recovery Drive, which is tied to a specific computer's recovery partition, Hasleo's solution is built on a native Windows kernel, forming an independent, portable system environment. It supports flexible deployment via USB, CD/DVD, or ISO image, greatly simplifying system backup and recovery. The following sections will detail the operational procedure, which is primarily divided into two phases: creating the recovery drive and adding system images along with necessary tools.
1. Create the Windows recovery drive (USB 3.0 recommended)
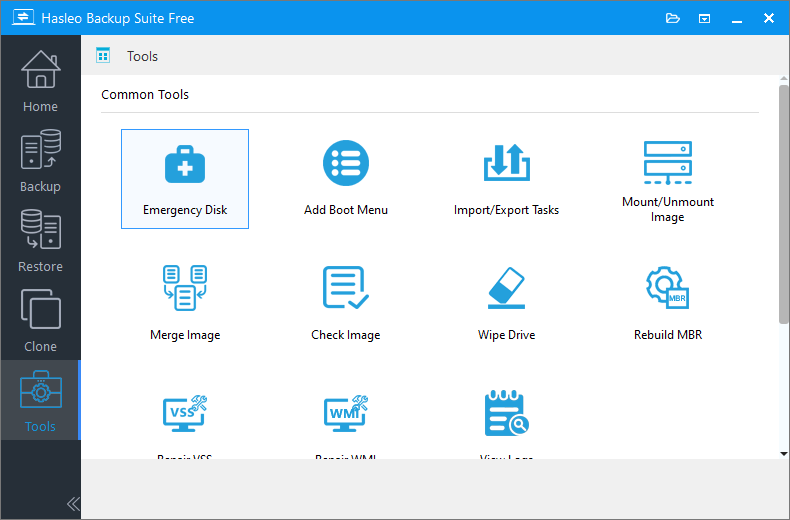
Step 1. Insert a USB flash drive (16GB or large) into a working computer. Download, install, and run Hasleo Backup Suite Free. Click the "Tools" button on the navigation bar, then select "Emergency Disk" in the operation area.
Step 2. Check the "Automatic driver injection" or "Download WinPE components" option to have the required drivers added to WinPE, then click "Next". To add any additional drivers, click "Add driver" and make your selection.
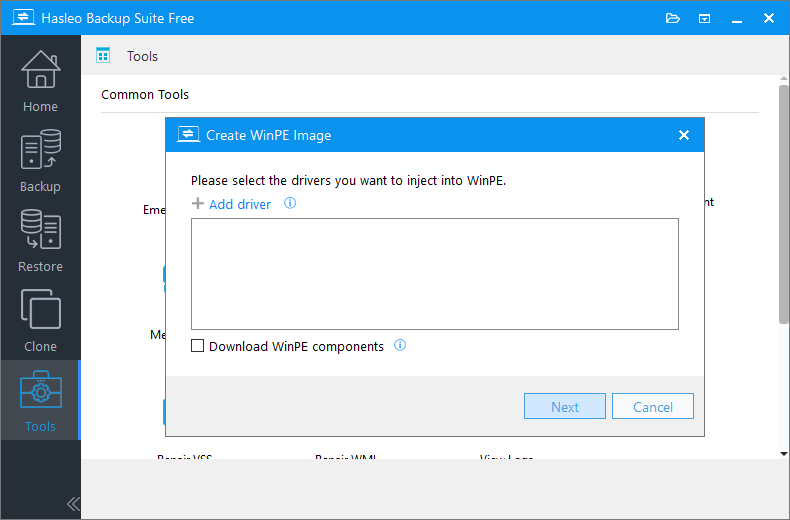
* Tips:
- Only drivers that are based on an .inf file can be injected into WinPE.
- The "Download WinPE components" option allows you to obtain them from Microsoft.
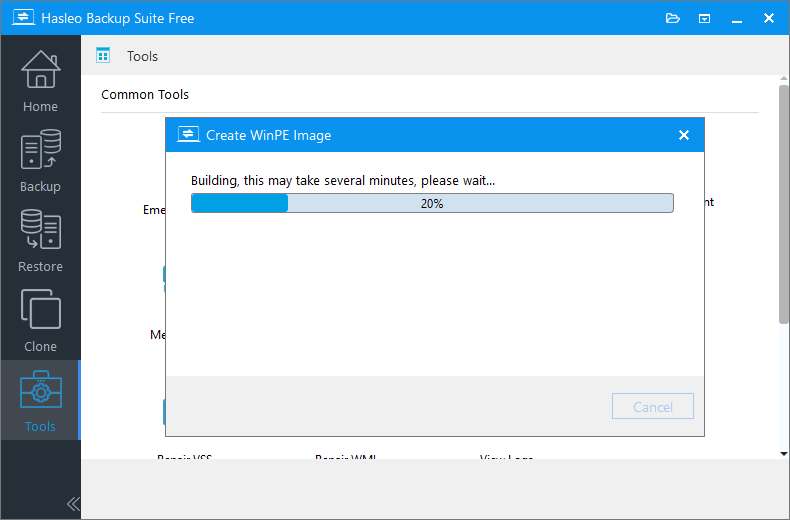
Step 3. Hasleo Backup Suite begins creating a WinPE bootable image.
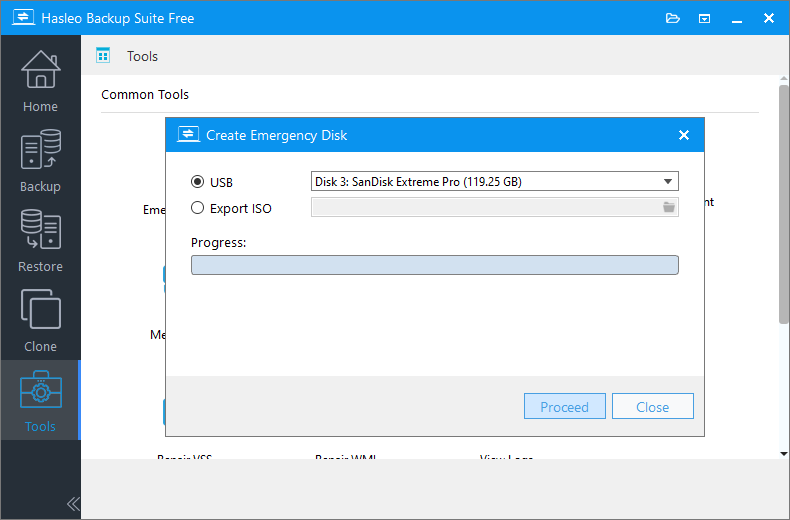
Step 4. After the WinPE image is created successfully, select "USB" and click "Proceed" to create the bootable USB drive.
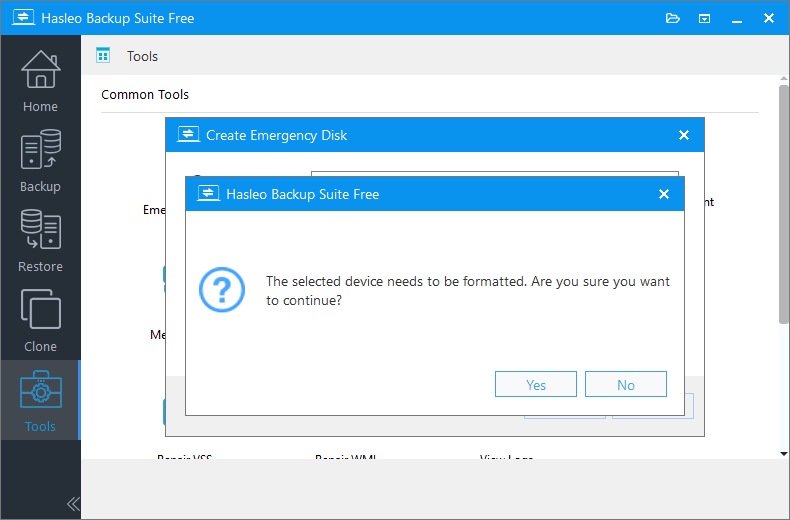
Step 5. The program will prompt you that the selected USB drive will be formatted. Please ensure any important files are backed up beforehand. To confirm and proceed with creating the bootable drive, click "Yes".
Step 6. Hasleo Backup Suite Free is now creating a USB recovery drive. Once the recovery drive is created, you can add various tools and system backup images as needed to make it more powerful and personalized.
2. Add system image and tools (optional)
Step 1. Press "Win + E" to open File Explorer. In the left navigation pane, click "This PC". Double-click to open your USB drive from the list of devices and drives, then create the new folders you need (e.g., Tools, Backups, Documents).
Step 2. Copy the pre-prepared system images, tools, and other files to the corresponding folders, and a powerful USB recovery disk will be ready.
Method 2: Create a Windows recovery drive using the built-in tool (for the current PC)
The built-in Windows "Create a recovery drive" tool allows you to make a recovery drive, which integrates useful features such as Startup Repair, System Restore, and Command Prompt to help resolve common system startup issues. If "Back up system files to the recovery drive" is selected during creation, the recovery drive can also be used to reset or reinstall Windows on the current PC.
To ensure timely recovery when the system fails to start, we recommend that you create a recovery drive in advance while the system is healthy. In addition, regularly updating the system backup on the recovery drive can ensure it remains consistent with the current system state, further enhancing the reliability of fault recovery. For important data, please also make sure to back it up regularly to avoid data loss due to system issues.
It should be noted that the Recovery Drive created by this method is closely tied to the current device's Windows version and hardware configuration, and is generally not suitable for other computers. The specific steps are as follows:
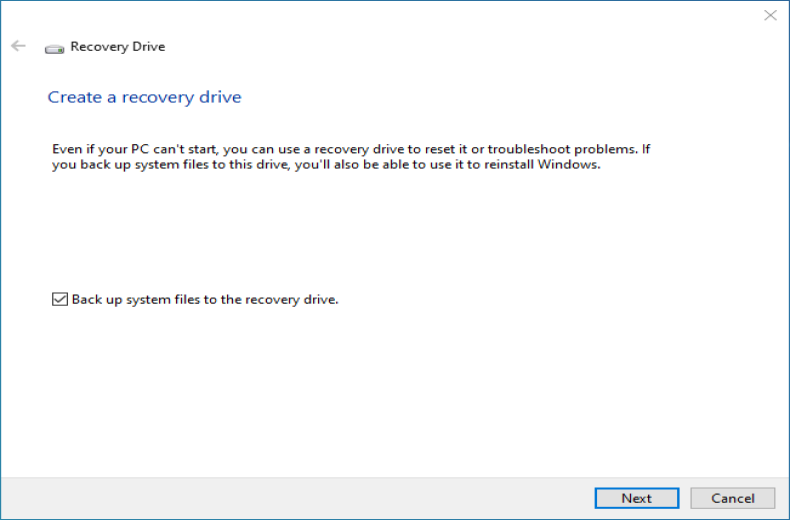
Step 1. Press the "Win + S" keys and search for "Create a recovery drive". Enter the "Recovery Drive" interface, check "Back up system files to the recovery drive", and then click "Next" to proceed.
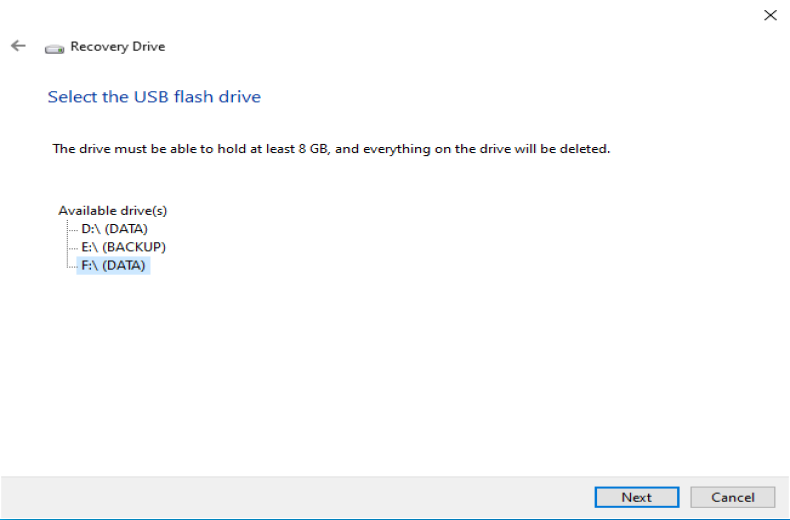
Step 2. Select the USB drive you inserted (16GB or larger) from the list and click "Next".
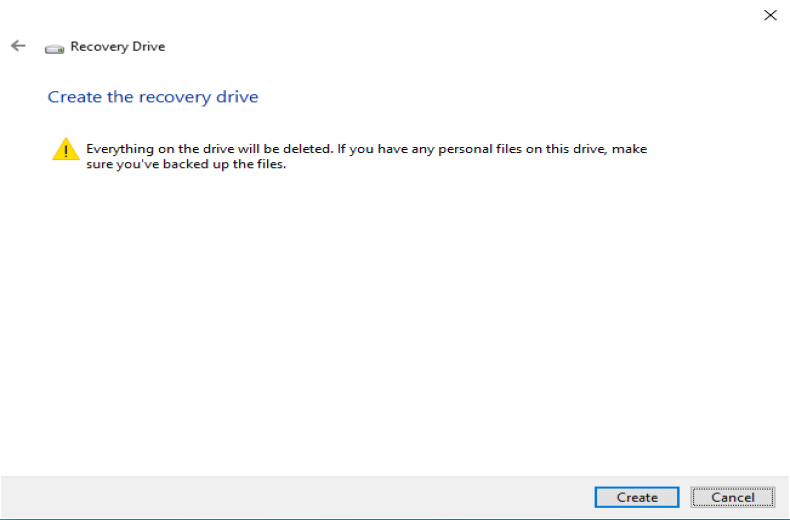
Step 3. The process will delete all data on the selected USB drive. Please ensure any important files are backed up beforehand. Once confirmed, click "Create" to continue.
Step 4. The program starts copying the system and creating a recovery drive for this device.
Method 3: Create a Windows installation media using the Windows MediaCreationTool (for different computers)
The Windows Media Creation Tool is a free, official Microsoft utility, primarily used to download Windows 11/10 system files and create installation media such as a bootable USB drive or ISO image. It can also be used to directly upgrade the system on the current computer. This tool offers a simple and secure way to obtain a clean, official Windows installation. The created media can be used for system reinstallation, repair, or deployment on new devices, particularly useful when upgrades via regular Windows Update are not possible. Before use, ensure your device meets the system requirements and back up personal data to prevent accidental loss. The specific steps to create the installation media are as follows:
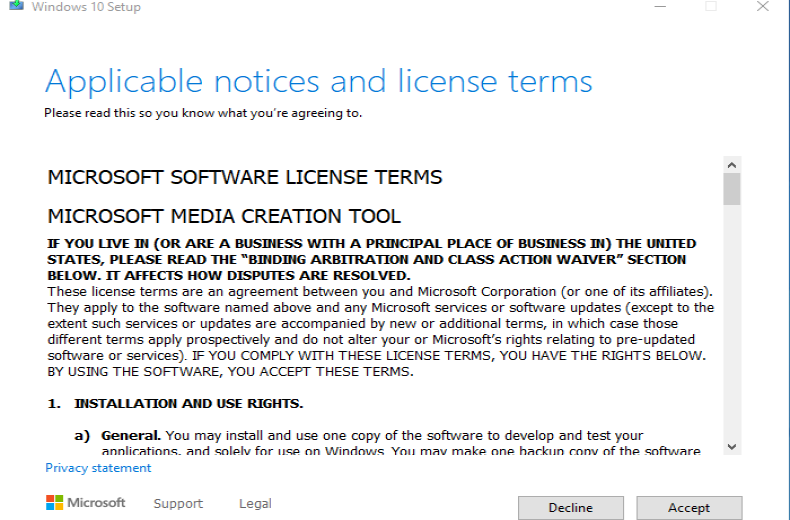
Step 1. Insert the USB (8 GB or large) into the computer. Visit the Microsoft official website and download the Windows 11/10 Media Creation Tool. Double-click the MediaCreationTool.exe file and accept the license agreement.
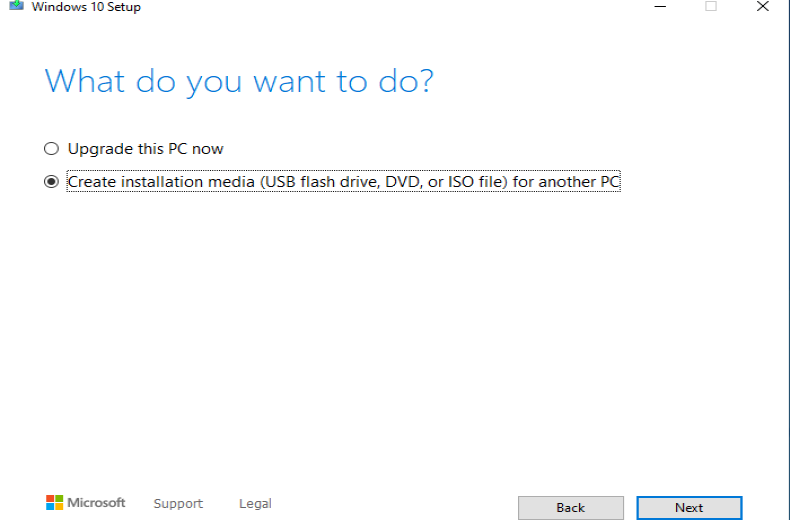
Step 2. Select "Create installation media (USB flash drive, DVD, or ISO)", then click "Next".
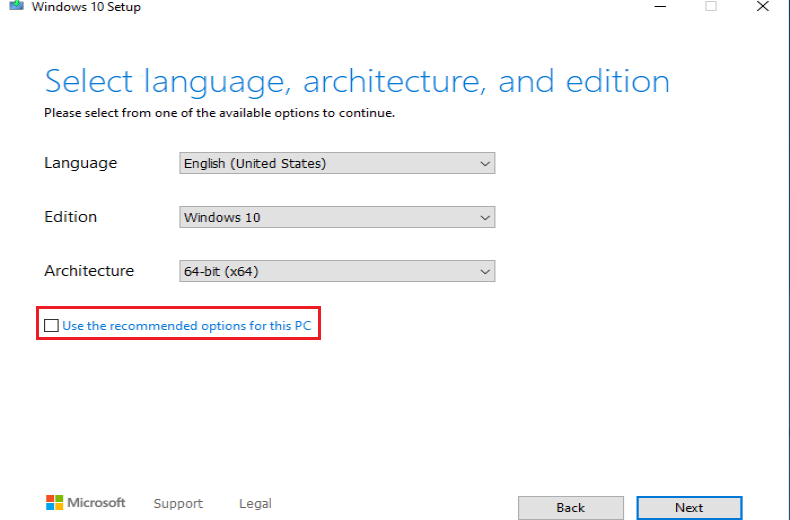
Step 3. Choose the language, version, and architecture. Make sure to uncheck the box for "Use the recommended options for this PC". If left checked, the tool will default to the settings matching your current computer's configuration.
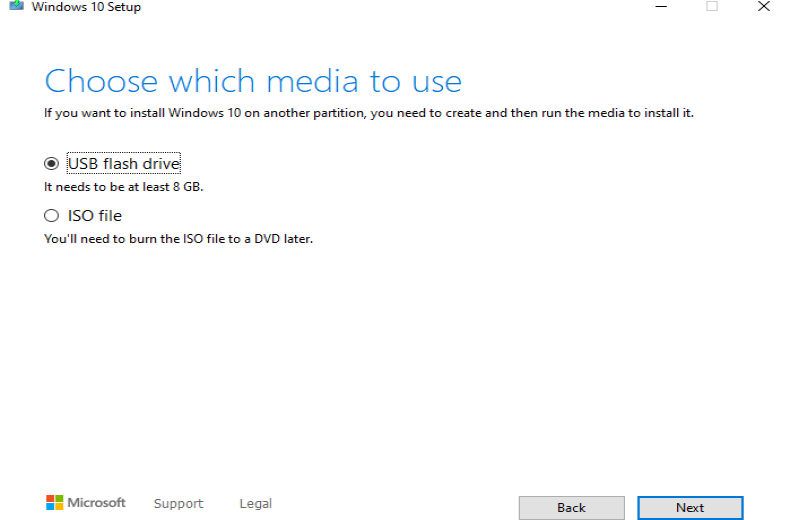
Step 4. Select USB as the installation media and click "Next". The tool will automatically download the system files and create a bootable USB drive. When prompted with "Your USB drive is ready", the process is complete.
Frequently Asked Questions (FAQ) for Windows Recovery Drive
A: Method 1 (Hasleo Backup Suite Free) creates a universal recovery drive that works on multiple devices and supports both UEFI and Legacy BIOS. Method 2 (Windows built-in tool) creates a recovery drive tied to your current PC only. Method 3 (Media Creation Tool) creates installation media for fresh Windows installs on any compatible computer.
A: For Method 1 and Method 2, a USB drive with 16GB or larger is recommended. For Method 3 using Media Creation Tool, 8GB or larger is sufficient.
A: Yes, if you check "Back up system files to the recovery drive" during creation (Method 2), you can use it to reset or reinstall Windows. Method 1 also allows you to add system backup images for recovery.
A: Hasleo Backup Suite Free is recommended as it creates a versatile recovery drive that works across multiple devices, includes system backup and disk cloning features, and provides the most flexible recovery options.
A: Yes, the recovery drive created by Hasleo Backup Suite Free supports both UEFI and Legacy BIOS boot modes, making it compatible with a wide range of devices.
A: Yes, all three methods support creating Windows 11 recovery drives. The Media Creation Tool specifically offers Windows 11 media creation options.
A: A recovery drive allows you to access Startup Repair, System Restore, Command Prompt, and restore your system from backup images. It's essential for troubleshooting when Windows fails to boot.
Summary
The recovery drive created by Windows' built-in tool is tied to the current device and requires creation in advance while the system is functioning properly. While a Windows installation media is essential for clean installs, it does not protect existing data. In contrast, Hasleo Backup Suite Free creates compatible recovery drive that works across multiple devices. It integrates practical features like system backup, disk cloning, and system restore, providing users with a more flexible and safer system maintenance solution. Therefore, we strongly recommend Hasleo Backup Suite Free as the primary tool for daily system maintenance. Whether deploying a recovery environment for multiple devices or establishing a reliable data recovery mechanism for personal computers, it can handle the job!
Related Articles
- How to Merge/Delete Old Backup Files using Hasleo Backup Suite Free?
- How to backup and restore Windows 11 for free?
- How to Compress Backup Files using Hasleo Backup Suite Free?
- How to set up a schedule to automatically back up Windows Server?
- How to Restore Your System From Full/Incremental/Differential Backups?


