
- Getting to Know Hasleo Backup Suite
- How to Perform Your First Backup with Hasleo Backup Suite
- Setting Up Backup Schedules for Automatic Backups
- How to View Files in a Backup (Without Restoring)
- Frequently Asked Questions
- Conclusion
I just did my first backup on Win 11 after purchasing your product. I'm not sure how to go back to set a backup schedule or look at the files that were backed up. Do you have a link to instructions as to how to get around in your product?
Getting to Know Hasleo Backup Suite
Overview of Hasleo Backup Suite?
Hasleo Backup Suite is a professional all-in-one backup and restore solution for Windows users. It combines three core functions: backup, recovery, and cloning, aiming to help users deal with common risks like data loss, system crashes, and hard drive failures. It performs reliably and has a very fast backup and restore speed, effectively boosting work efficiency, making it a comprehensive and trustworthy data protection tool.
Key Features:
- Comprehensive and powerful: Its backup and restore features let you create system images effortlessly and recover from crashes instantly, while the cloning function promotes seamless data migration.
- Advanced technology and excellent performance: Compatible with all Windows PCs and servers, it supports Windows x86/x64 and ARM64 architectures. It boots in both UEFI and Legacy BIOS modes, ensures safe and stable program running, and operates with high efficiency and low power consumption.
- Multiple backup modes: It supports full, incremental and differential backups. Following an initial full backup, both incremental and differential backups save time and storage space by only copying the data that has changed.
- Advanced features: It offers advanced features, including compressing backup images to save space, encrypting images to protect important data, and restoring encrypted backup images while keeping them encrypted. New
- Practical toolbox: Here you can access multiple features like creating a WinPE emergency disk, merging backup images, and securely wiping disks.
- Intuitive and user-friendly interface: The interface design is clear, with the main functions immediately obvious, and guided prompts allow even beginners to get started quickly.
How to Perform Your First Backup with Hasleo Backup Suite
Download and Installation
Step 1. Visit the Hasleo Backup Suite official website and download the latest version of the installer.
Step 2. Run the installer and follow the on-screen instructions step by step until the installation is complete.
Performing Your First Backup: Core Operations
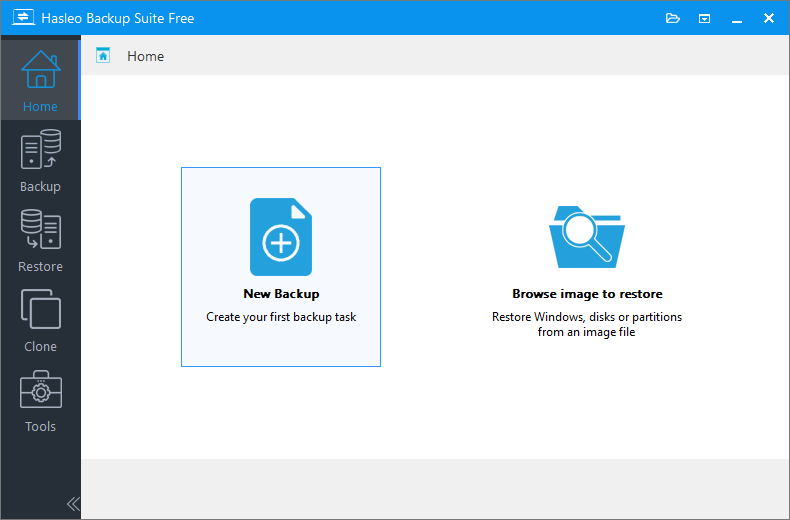
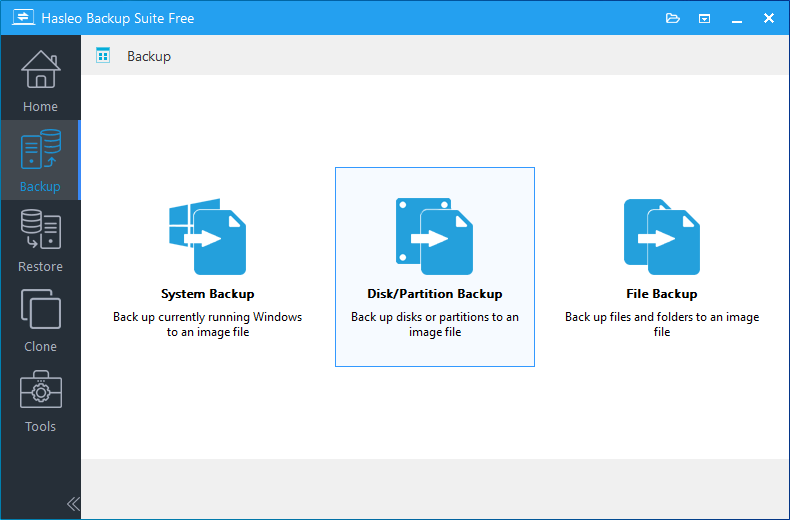
Step 1. Run Hasleo Backup Suite. Click the Home button in the navigation bar. In the operation area, click New Backup to create your first backup task.
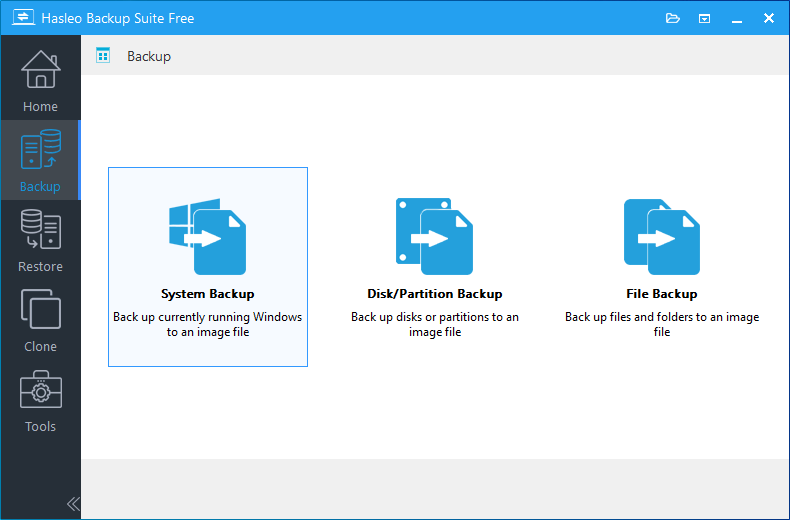
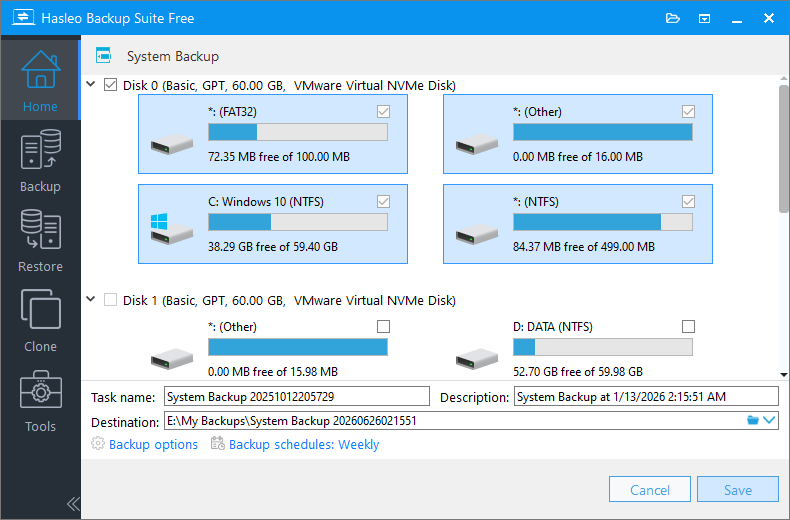
Step 2. Hasleo Backup Suite will automatically jump to the backup page. Click the System Backup button.
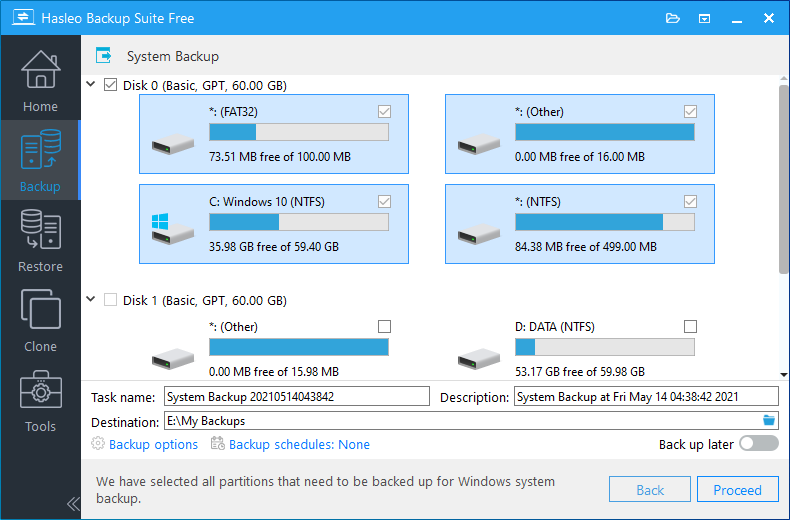
Step 3. Hasleo Backup Suite will automatically select all partitions required for a Windows system backup. You only need to customize the task name, description, destination, and backup options as needed, then click the Proceed button.
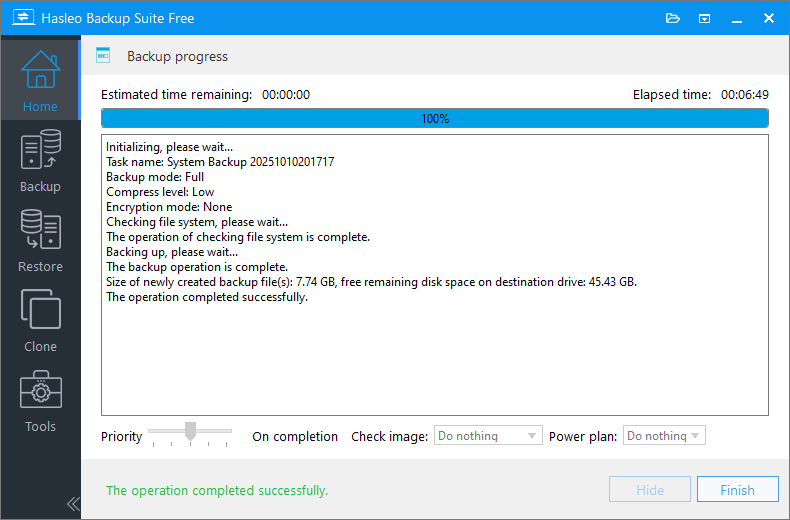
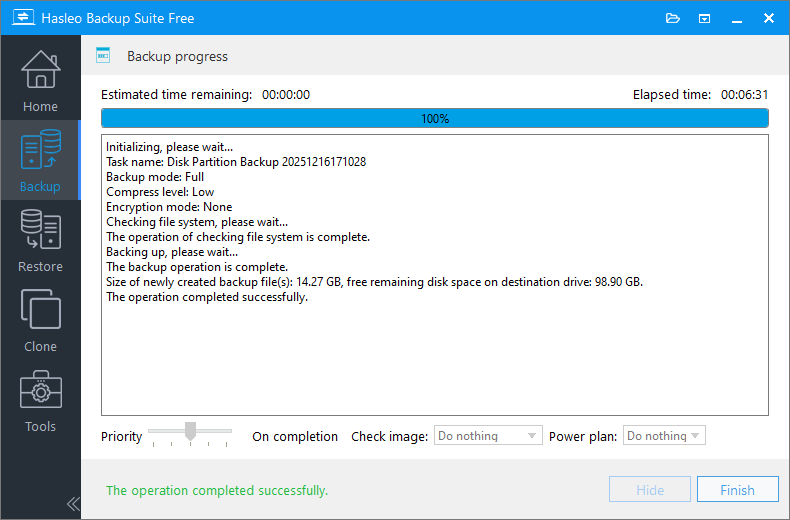
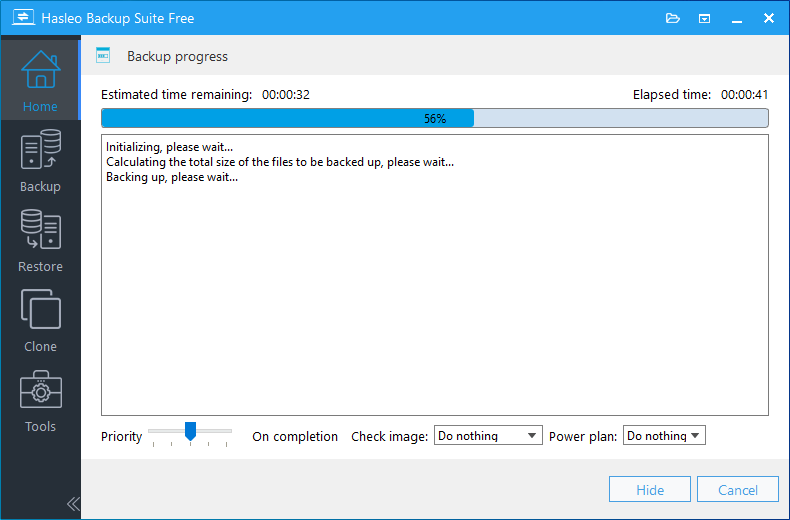
Step 4. After clicking Proceed, Hasleo Backup Suite will start backing up your Windows operating system to the specified location. The backup duration depends on the amount of data being backed up, so please be patient.
Step 2. Hasleo Backup Suite will automatically jump to the backup page. Click the Disk/Partition Backup button.
Step 3. Select the source disk or partition to back up, customize the task name, description, destination, and backup options as needed, then click Proceed.
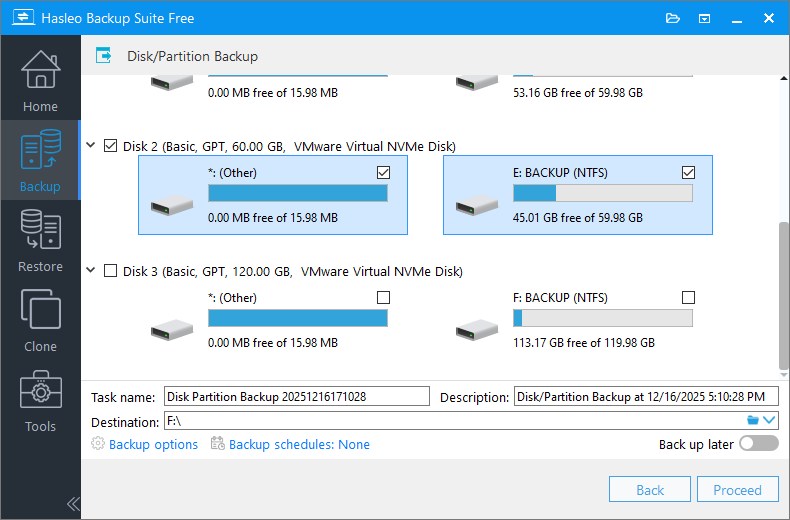
Step 4. Hasleo Backup Suite is now backing up your hard disk/partition data to the target location. This may take some time; please be patient.
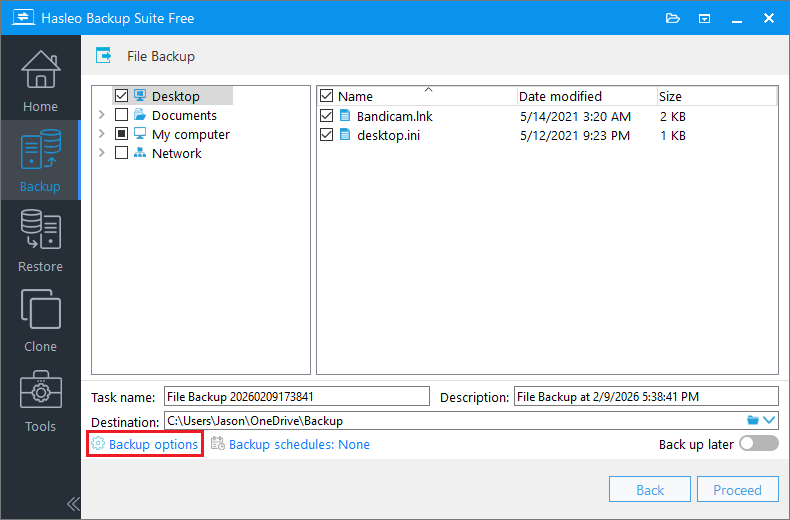
Step 2. Hasleo Backup Suite will automatically jump to the backup page. Click the File Backup button.
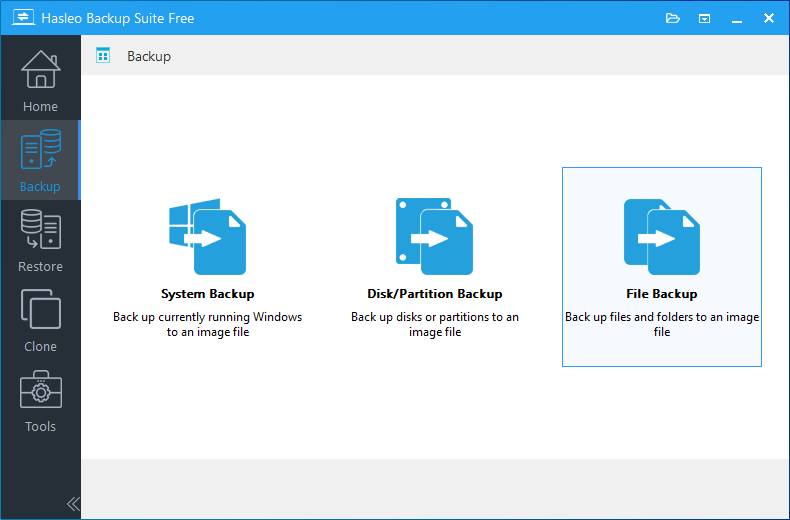
Step 3. Select the folders you want to back up, customize the task name, description, destination, and backup options, then click Proceed. To save disk space, click Backup Options to enable the deduplication feature, which is specific to file backups. For more details, see: How to Use the Deduplication in Hasleo Backup Suite to Save Storage Space.
Step 4. Hasleo Backup Suite is now backing up your files to the target location. This may take some time; please be patient.
Setting Up Backup Schedules for Automatic Backups
Return to the Home screen:
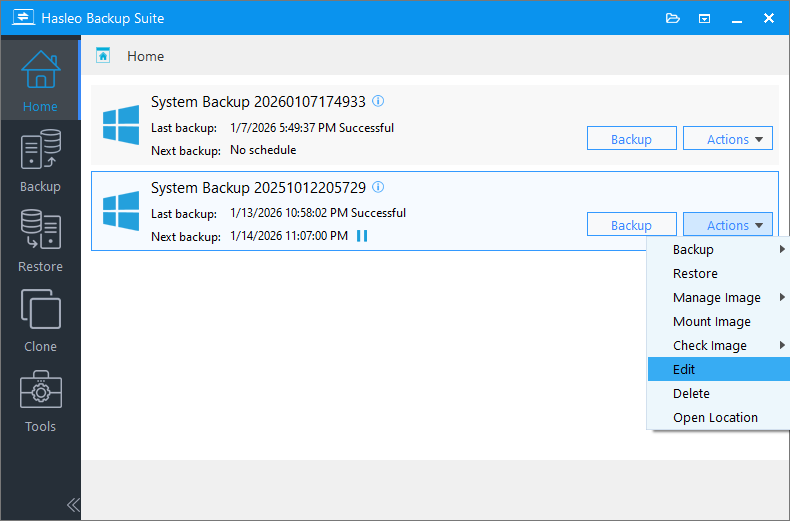
Once the backup is complete, click Finish to exit the process. Then click Home in the left navigation bar to return to the main dashboard - the central hub for managing all your backup tasks. From there, you can view all your backup tasks and perform the following actions for each: run incremental or differential backups, restore data, edit task settings, mount images, and more.
Set Up Backup Schedules
Hasleo Backup Suite supports advanced backup scheduling, allowing you to automate backups at predefined times - no need to manually run them each time.
Step 1. On the home page, find the backup task you just created. Click the Actions button on the right, and select Edit from the dropdown menu.
Step 2. The program will automatically navigate to the backup screen. Locate and click Backup Schedules to open the settings.

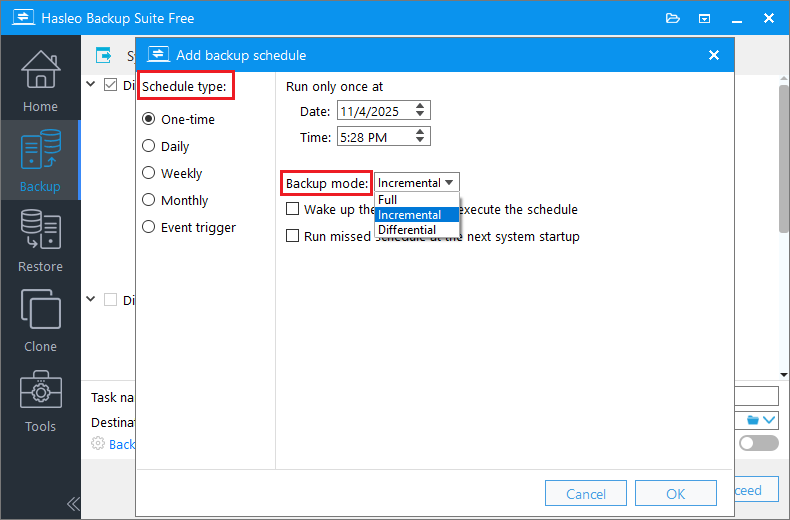
Step 3. Click Add backup schedule to go to the schedule configuration page.
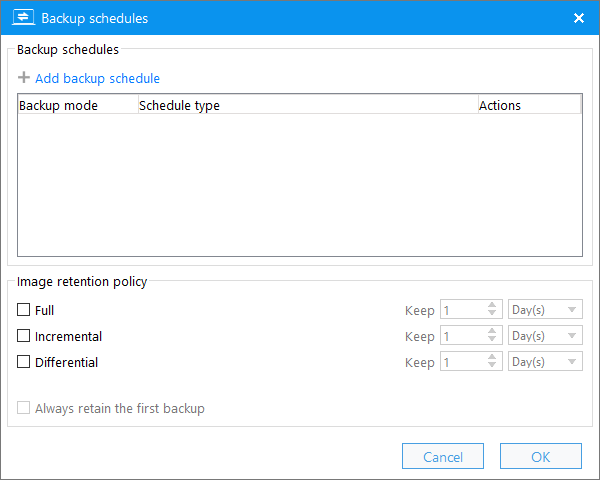
Step 4. In the pop-up window, select a schedule type: One-time, Daily, Weekly, Monthly, or Event-triggered. Then configure the backup time and backup mode as needed. Click OK to save your settings. You can add multiple schedules to the same task by repeating these steps.
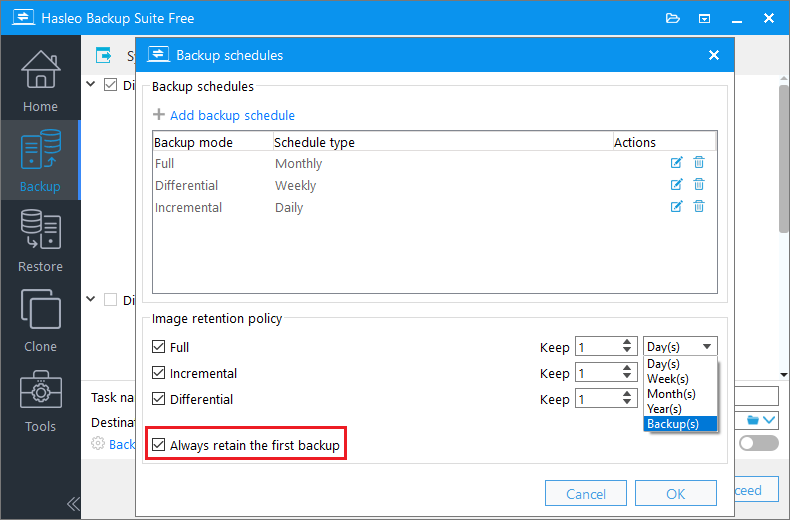
Step 5. (Optional) If you want to manage backup storage space, you can set up the Image retention policy. This feature automatically deletes older backup versions according to your specified rules.
Step 6. After completing the settings, click Save to apply your changes. Hasleo Backup Suite will then run the backup automatically at the scheduled time.
How to View Files in a Backup (Without Restoring)
Hasleo Backup Suite allows you to mount backup images as virtual drives without performing a full restore. Once mounted, the image appears as a separate disk partition, letting you browse, copy, or extract files just as you would from a physical hard drive.
Preparations
Before mounting a backup image, please make sure the following conditions are met:
Install Dokan Driver (For File Backup Images)
- To browse or extract files from file backup images, you may need to install the Dokan V2.1.0.1000 driver.
- You can download it from the official website or from our website
Install Required Windows Updates (For Windows 7/Server 2008 R2 and Earlier)
- For Windows 7/Server 2008 R2 and earlier versions, you need to install the KB4474419 update to support new driver signing (SHA-2 code signing)
- Please download the KB4474419 update from the Microsoft Update Catalog
- Note: Windows Vista users should install the KB4474419 update for Windows Server 2008
Ensure You Have a Usable Backup Image File
- Make sure you have created a valid system, disk, or file backup using Hasleo Backup Suite
- The backup image file should be stored in an accessible location
Mounting a Backup Image
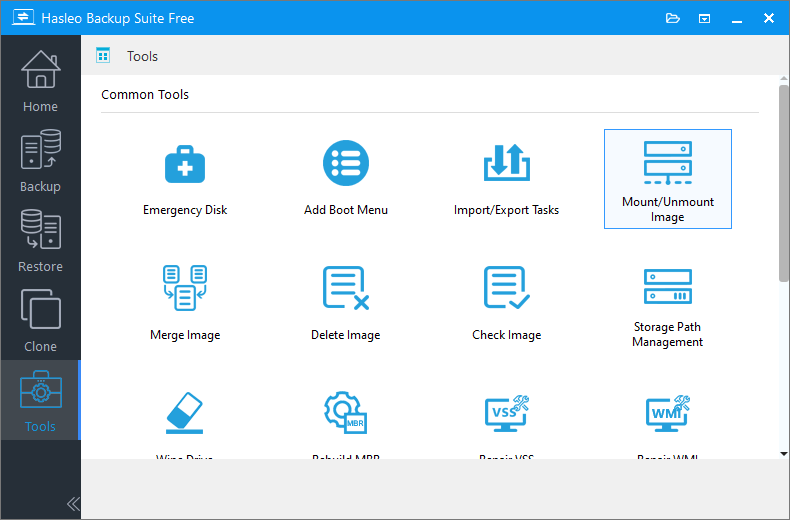
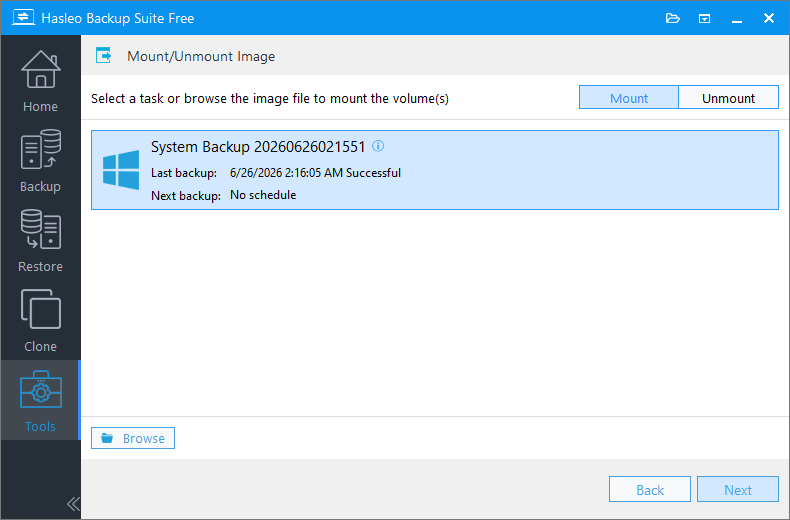
Step 1. Launch Hasleo Backup Suite. In the navigation bar, click Tools, then select Mount/Unmount Image from the operation area.
Step 2. In the pop-up window, you can select a backup task you've created or browse directly to select the image file you want to mount. Once you've made your selection, click Next.
Step 3. The program will parse the image file and display all volumes (partitions) it contains. Then check the volumes you need to mount (you can mount multiple volumes simultaneously).
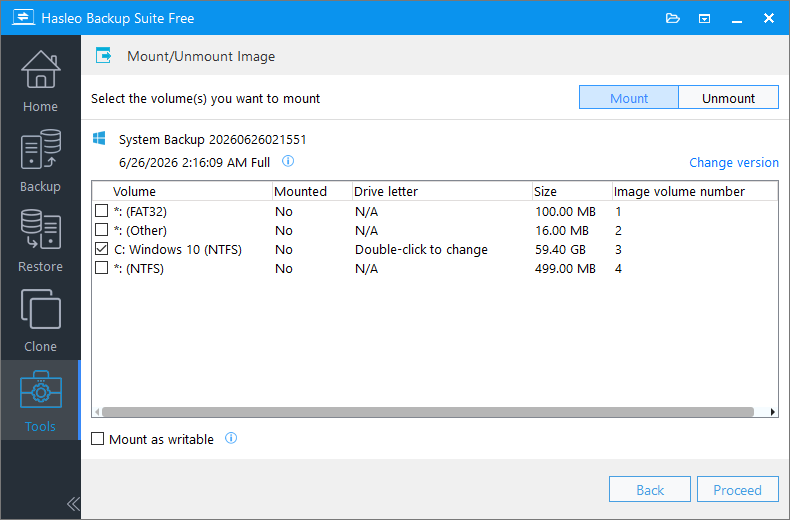
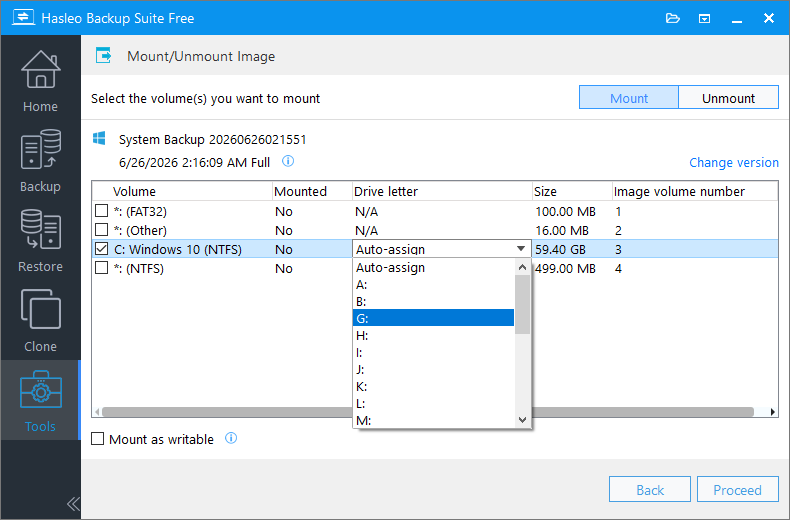
Step 4. Double-click the Drive Letter column for the selected volume, then select an unused drive letter from the dropdown (or choose Auto-assign to let the program handle it automatically) as the virtual drive letter after mounting.
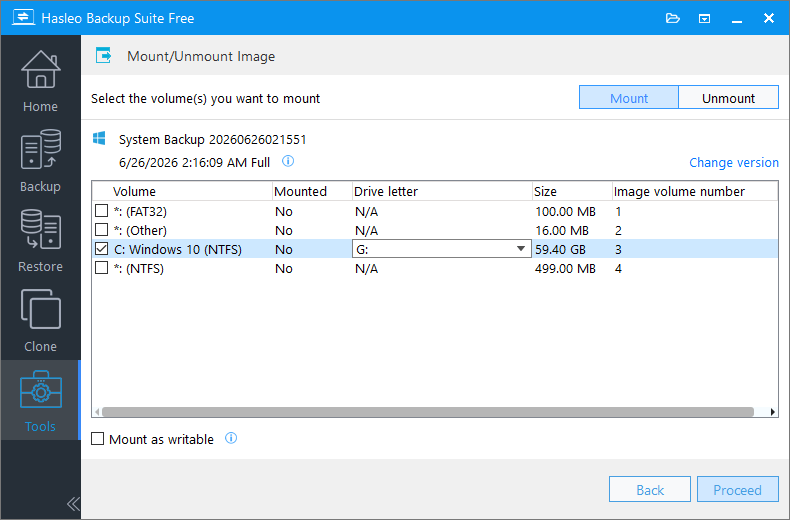
Step 5. After confirming the settings are correct, click Proceed. The program will then mount the selected image volume. Once successful, a new drive letter will appear under This PC in Windows Explorer.
Browsing and Extracting Data
In Windows Explorer, locate and double-click the newly appeared drive letter to browse the backup image contents. To restore specific data, simply select the target file or folder, press Ctrl+C to copy, navigate to your destination (e.g., Desktop or D: drive), and press Ctrl+V to paste. This works just like copying files between local folders - simple and intuitive.
Unmounting a Backup Image
When you no longer need to access the mounted backup image, it is recommended to unmount it in a timely manner to release system drive letters and avoid misoperations.
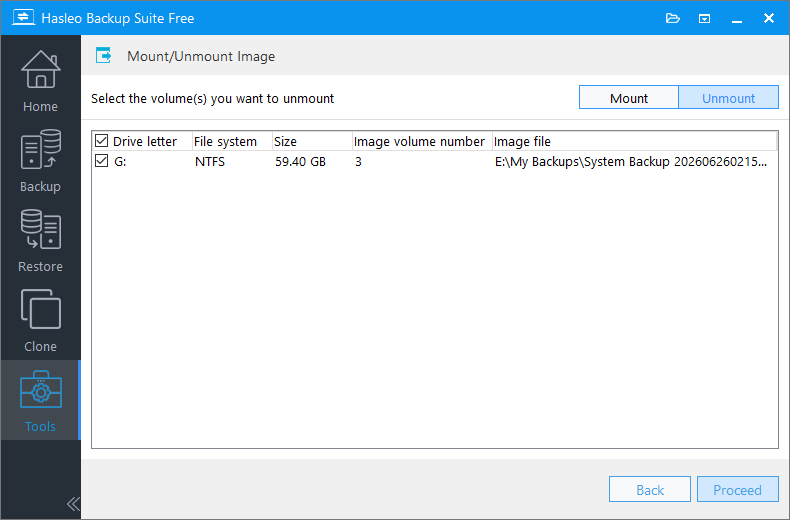
Step 1. Launch Hasleo Backup Suite, click Tools on the main interface, then select Mount/Unmount Image.
Step 2. Click the Unmount button in the upper right corner. You will see a list of currently mounted images. Select the backup image entry you want to remove, then click Proceed to execute the unmount operation.
Step 3. After successful unmounting, the temporary drive letter that appeared in Windows File Explorer will automatically disappear. The image has now been successfully unmounted from the system.
Notes on Mounting Images
When using the mount/unmount image feature, please note the following:
- Reparse points are not supported
- EFS encrypted files in file backup images generated by V4.8 and earlier versions are not supported
- File backup images can only be mounted on Windows 7 SP1 and later
- Please unmount the image in a timely manner after use to release system resources
- Before unmounting, make sure no files are being accessed or copied
Frequently Asked Questions
Q: Why does my first backup take longer than subsequent backups?
The first backup is always a full backup, meaning it copies all selected data in its entirety. The time depends on data size, disk speed, and system resources. After the first full backup, you can use incremental or differential backups that only copy changed data, making them significantly faster.
Q: Where should I store my backup images for maximum safety?
For maximum safety, store backups on a different physical drive than the one being backed up. Recommended options include external USB drives, internal secondary drives, NAS devices, or network shares. Following the 3-2-1 backup principle - three copies, two different media types, one offsite - provides the best protection.
Q: Can I restore a system backup to a different computer with different hardware?
Yes, using the Universal Restore feature available in Hasleo Backup Suite Home, Professional, Server, and Enterprise editions. This allows you to restore a system backup image to a computer with different hardware configuration, which is useful when upgrading hardware or migrating to a new machine.
Q: How often should I create system backups?
A common best practice is: create a full system backup immediately after setting up your system and installing all software. Then schedule incremental backups weekly (daily for critical data) and a full backup monthly. Use the Image Retention Policy to automatically manage and delete old backup versions to save storage space.
Conclusion
It's perfectly normal to feel confused when you first use backup software. But rest assured, the design logic behind Hasleo Backup Suite is actually quite straightforward: all backup tasks are centralized on the home page, where you can easily edit, delete, or manage each one. When creating or editing a task, you can also flexibly set up a “backup schedule.” Once you've configured automatic backups, you'll hardly ever need to open the software manually again. As long as you get through that initial learning curve, you'll enjoy true convenience.


