
- Overview of Preboot Execution Environment (PXE)
- Overview of Hasleo Backup Suite Server/Enterprise
- How to Efficiently Restore Multiple Systems Over a LAN Using Hasleo Backup Suite's PXE Tool?
- Frequently Asked Questions
- Summary
When performing system restorations across multiple computers, using a Preboot Execution Environment (PXE) can effectively speed up the process, making the selection of practical, easy-to-use software crucial. This guide provides detailed instructions on how to use the integrated PXE tool in Hasleo Backup Suite Server/Enterprise to efficiently complete these large-scale restoration tasks.
Overview of Preboot Execution Environment (PXE)
The Preboot Execution Environment (PXE) is an industry-standard client-server interface that allows computers to boot from a network, significantly reducing dependence on WinPE boot discs. It is commonly used for large-scale OS deployment, disk cloning, and system restore in enterprise environments.
While PXE technology offers the core advantage of centralized management and deployment, it also faces some limitations in practical applications.
Pros:
- Enables rapid, batch deployment without physical boot media.
- Supports centralized management to significantly reduce manual operations.
- Dependent on a stable and reliable network environment.
- Initial configuration is relatively complex and requires setting up a dedicated server environment.
Overview of Hasleo Backup Suite Server/Enterprise
Hasleo Backup Suite Server/Enterprise is a comprehensive enterprise-level data protection and system management platform. In addition to providing professional backup and disaster recovery core functions, it also integrates key features such as PXE network boot and disk cloning. Its built-in PXE Server boot tool is designed for network booting and management of multiple client computers within a local area network (LAN), supporting clients to be booted into the Hasleo Backup Suite recovery environment via the network, greatly facilitating bare-metal restoration and networked system deployment. As an integrated solution, the following are the notable features of Hasleo Backup Suite Server/Enterprise:
- Ease of Use: It features an intuitive graphical interface with step-by-step guidance. Users can complete tasks with simple clicks, which significantly lowers the threshold for use and learning costs.
- Integrated functionality: It combines backup, restore, and cloning into a single software, supporting both disk cloning and rapid full system image restoration, effectively improving operational efficiency.
- Low resource usage: Its optimized resource allocation ensures stable performance with minimal overhead, leading to lower power consumption and maximized system resource utilization.
- Flexible and efficient backup strategy: It supports a variety of modes including full, incremental, and differential backup, as well as Delta clone and restore.
- Extensive compatibility: It supports multiple editions such as Windows Server, Education, and Enterprise, compatible with x86, x64, and ARM64 architectures, and adapted for UEFI and Legacy BIOS boot environments, easily accommodating various operating environments.
- WinPE bootable media creation: It allows for easy generation of bootable WinPE disks, enabling system maintenance and deployment operations.
- Compatible with ReFS file system: It Supports the ReFS file system, enhancing the reliability of data management and storage.
How to Efficiently Restore Multiple Systems Over a LAN Using Hasleo Backup Suite's PXE Tool?
Next, we will gradually demonstrate how to efficiently restore systems using Hasleo Backup Suite's PXE tool when multiple computer systems crash within a local area network. The process is structured into three main parts: creating a WinPE boot image, configuring the PXE server, and performing the network restoration.
1. Create a WinPE Boot Image
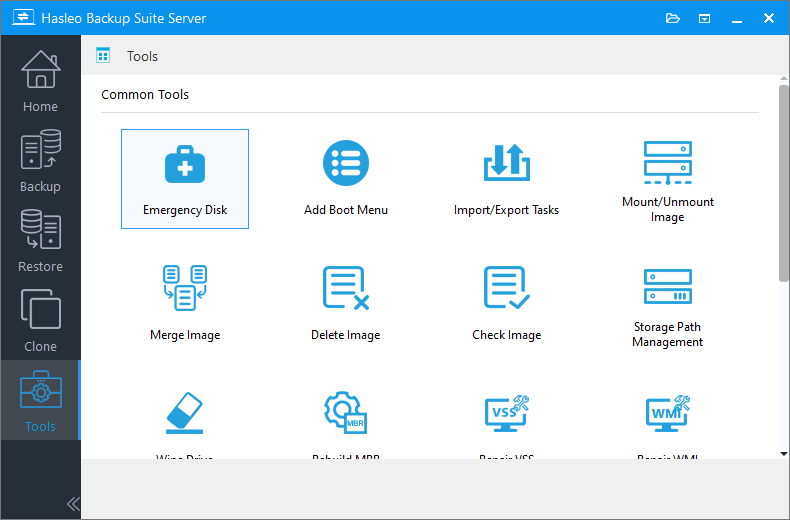
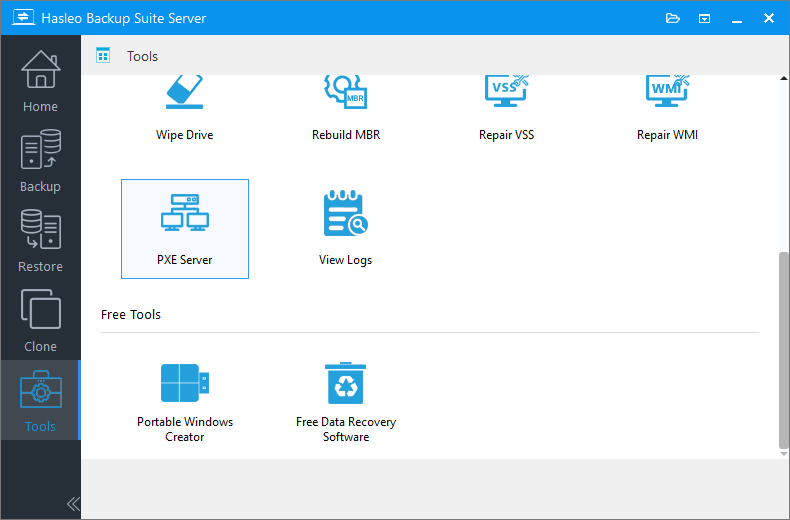
Step 1. Download, install, and run Hasleo Backup Suite Server/Enterprise on the server computer. Click the "Tools" button in the navigation bar, then select "PXE Server" in the operation area.
Step 2. Check the "Automatic driver injection" option to have the required drivers added to WinPE, then click "Next". To add any additional drivers, click "Add driver" and make your selection.
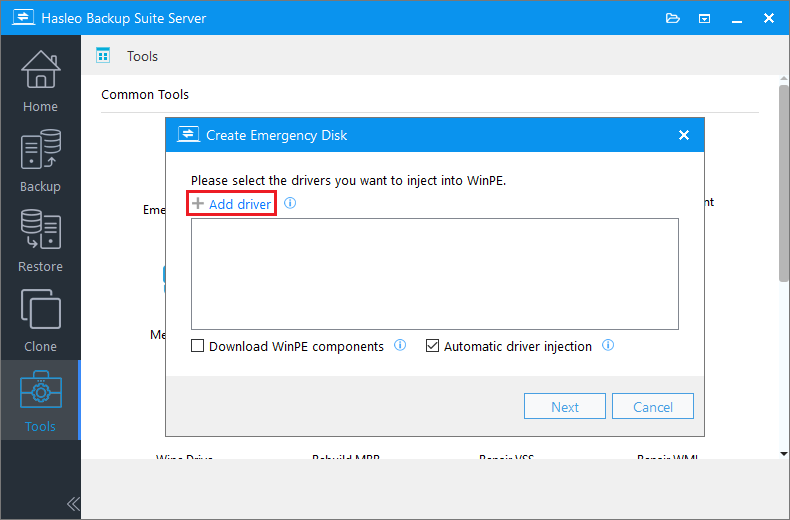
* Tips:
- Only drivers that are based on an .inf file can be injected into WinPE.
- The "Download WinPE components" option allows you to obtain them from Microsoft.
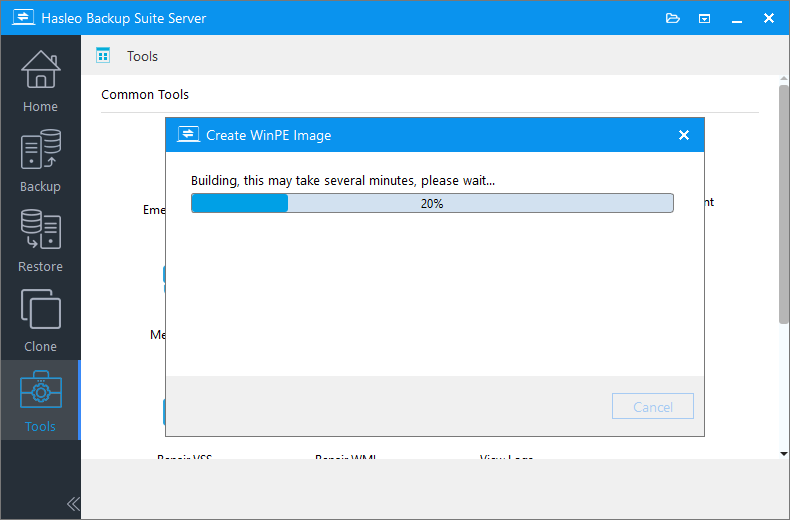
Step 3. Hasleo Backup Suite begins creating a WinPE bootable image.
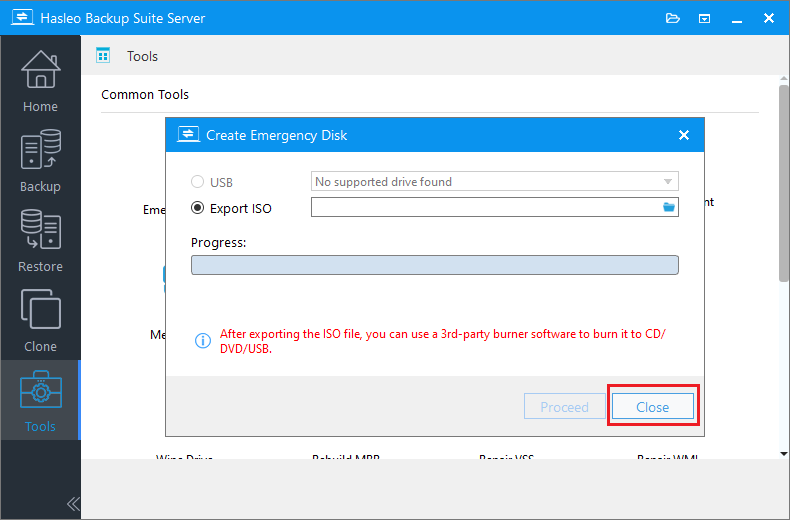
Step 4. Once the creation is complete, click "Close".
2. Configure the PXE Server
Step 1. In this panel, scroll down and click the "PXE Server" button.
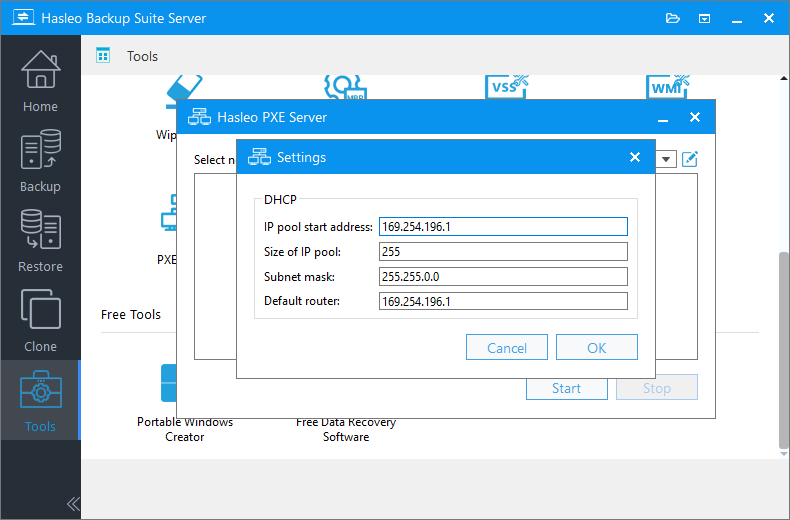
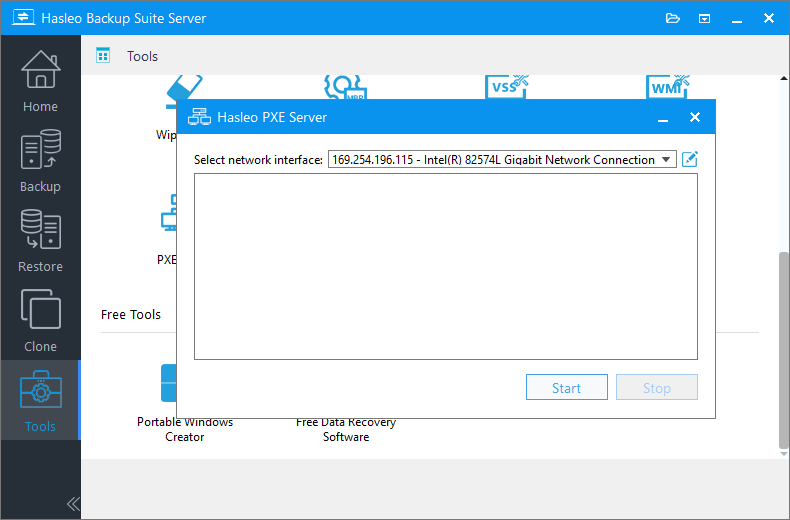
Step 2. Select the network interface for the PXE service and click the ![]() icon. Then, configure the network options as needed and click "OK" to save the settings.
icon. Then, configure the network options as needed and click "OK" to save the settings.
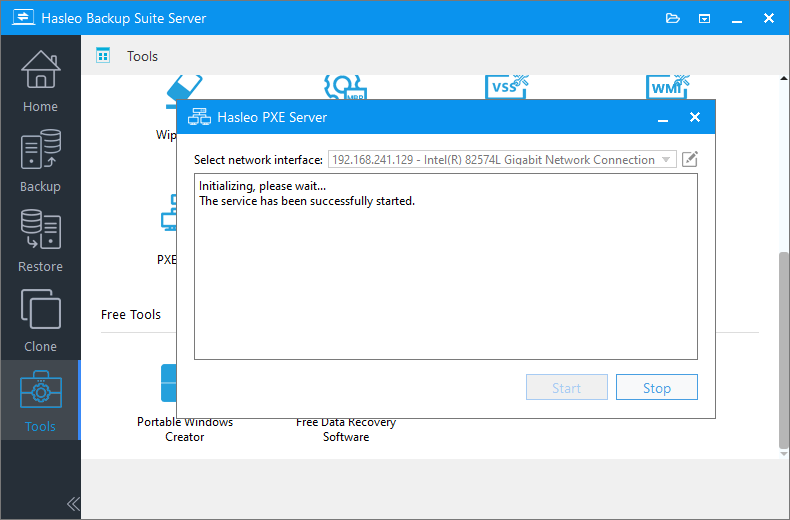
Step 3. Once the network interface configuration is complete, proceed to click the "Start" button to launch the PXE server.
Step 4. After the PXE server has successfully started, any computer on the local network can remotely boot a WinPE environment over PXE.
3. Perform the Network Restoration
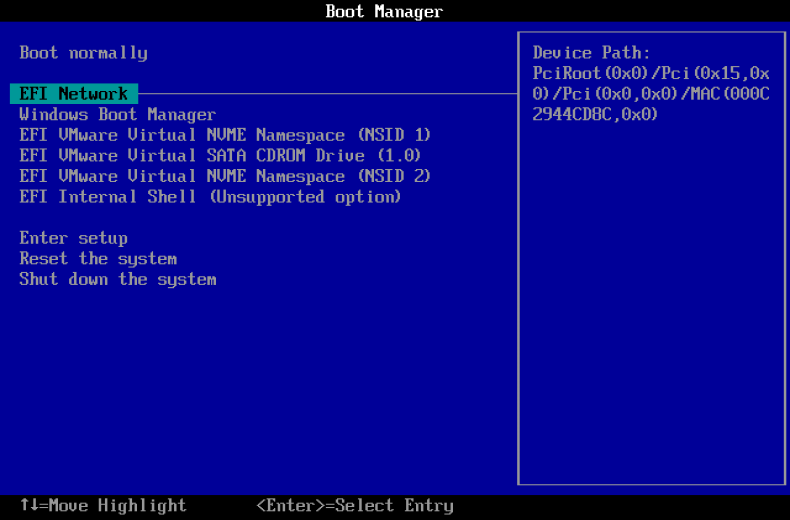
Step 1. Turn on the target computer and repeatedly press the F2/Del/F10/Esc keys to enter the UEFI/BIOS setup interface. Then, navigate to the "Boot" tab, set Network as the first boot option, and save the changes.
* Tips:
- For the correct key, please refer to your motherboard manual or the on-screen prompt in the lower-left or lower-right corner during startup.
- To boot from the Hasleo-created WinPE media, you may need to disable the UEFI Secure Boot feature in your system's firmware settings.
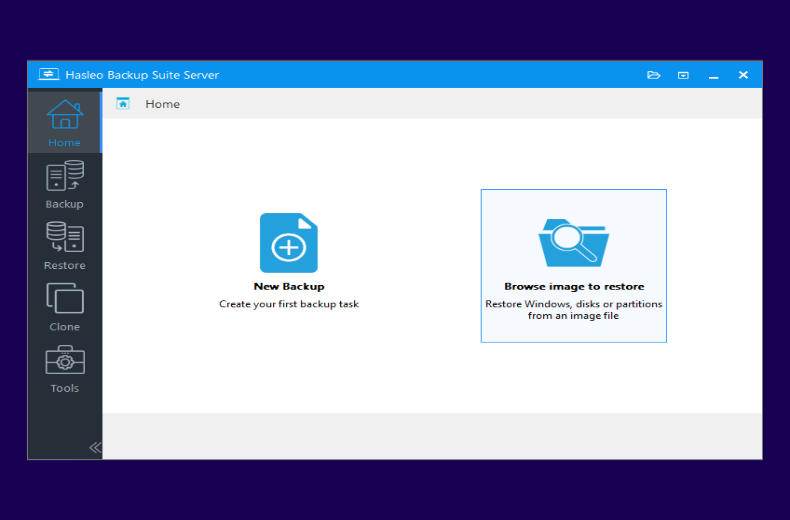
Step 2. The target computer will begin to download the WinPE image from the PXE server and boot into it. Once in the Hasleo WinPE recovery environment, click the "Home" or "Restore" button in the navigation bar. Then, in the operation area, select "Browse image to restore" to locate your target backup image.
Step 3. Select "System mode" to restore the entire system, then click "Next".
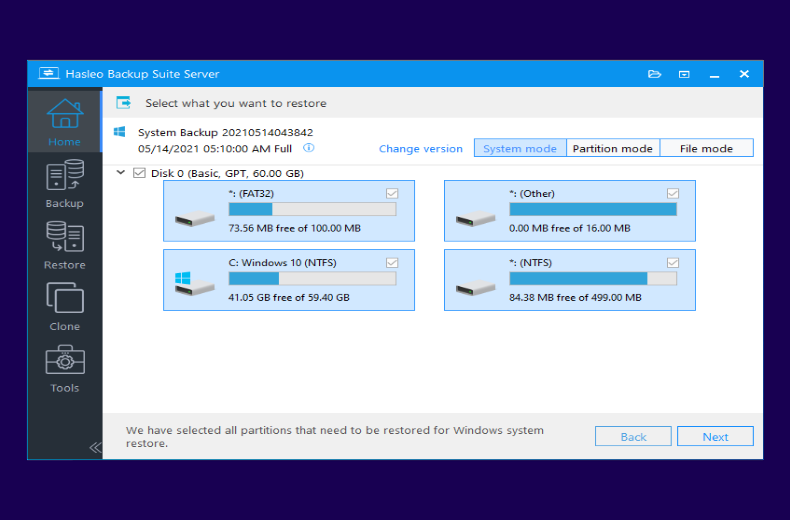
Step 4. Select the target disk to restore, check the "Universal restore" option, and click "Next". The program will begin restoring the Windows image to the target computer.

Step 5. Restart your computer and access the UEFI/BIOS settings. Configure the boot order and boot mode as required. After completing the settings, the system will reboot and return to normal operation.
Frequently Asked Questions
A: PXE (Preboot Execution Environment) allows computers to boot from the network without physical boot media. It's ideal for restoring multiple systems across a LAN because it enables centralized, batch deployment without manually visiting each machine, significantly reducing deployment time in enterprise environments.
A: PXE functionality is available in Hasleo Backup Suite Server and Enterprise editions. These enterprise versions include the integrated PXE Server tool for network booting and managing multiple client computers within a LAN.
A: You need a stable LAN connection between the PXE server and client computers. Both the server and clients must be on the same network segment. A DHCP server is required to assign IP addresses to client computers, and the server network interface must be properly configured.
A: Yes. You should enable "Automatic driver injection" when creating the WinPE boot image to ensure the necessary drivers are included. This helps ensure network connectivity and proper hardware recognition on client computers during PXE boot.
A: Enter the client computer's UEFI/BIOS setup (usually by pressing F2, Del, F10, or Esc during startup), navigate to the Boot tab, set Network/USB/UEFI Network as the first boot option, save changes, and reboot. The computer will then boot into the WinPE environment from the PXE server.
A: Yes. Each client computer boots into the Hasleo WinPE environment independently. You can then browse and select the specific backup image for that computer. Each restoration runs separately on each client.
A: Universal Restore is recommended when restoring to different hardware. It automatically adjusts drivers and settings to ensure the restored system boots properly on the new computer, avoiding boot issues caused by hardware differences.
A: The number of computers you can restore depends on your network bandwidth and the PXE server's performance. For optimal results, restore computers in batches. Too many simultaneous restores may slow down the network and extend overall restoration time.
Summary
Hasleo Backup Suite Server/Enterprise delivers professional, enterprise-grade data protection. Its integrated PXE tool enables client computers on the LAN to boot rapidly into a WinPE recovery environment, significantly improving the execution efficiency of backup and restore tasks. In addition, the software provides comprehensive cloning features, supporting the cloning of systems, disks and partitions, truly integrating backup, restore and cloning, making it the best choice for your data protection!
Related Articles
- How to Merge/Delete Old Backup Files using Hasleo Backup Suite Free?
- How to backup and restore Windows 11 for free?
- How to Compress Backup Files using Hasleo Backup Suite Free?
- How to set up a schedule to automatically back up Windows Server?
- How to Restore Your System From Full/Differential/Incremental Backups?


