
- Why do you need to restore Windows 11 to a new drive?
- Back up your Windows 11 system
- Create WinPE bootable media (for a failed system)
- Method 1: Restore a System Backup to a New Drive (When Windows 11 is Bootable)
- Method 2: Use a Recovery Drive to Restore Windows 11 to a New Drive
- Verification and troubleshooting
- Frequently Asked Questions
- Summary
Need to move your Windows 11 system to a new drive? This step-by-step guide shows you how to perform a complete system restore using Hasleo Backup Suite, ensuring a smooth transition with all your files, apps, and settings intact.
Why do you need to restore Windows 11 to a new drive?
In the process of using a Windows 11 computer, you may encounter the following situations where you need to restore the system to a new drive:
- Hard drive failure or aging: Mechanical hard drives are prone to bad sectors after prolonged use, and the lifespan of SSDs decreases as write cycles increase. When hard drive failure signs appear, restoring to a new hard drive in advance can prevent data loss.
- Upgrade storage capacity: The original hard drive capacity is insufficient, and you need to replace it with a larger capacity hard drive. Through system restore, you can migrate the entire Windows 11 system to a new hard drive without reinstalling the system and applications.
- Improve system performance: Upgrading the system from a HDD to an SSD, or from a slower SSD to a faster NVMe SSD, can significantly improve system boot speed and application response speed.
- System crash recovery: When the Windows 11 system cannot start normally due to viruses, driver conflicts, or corrupted system files, if you have a system backup image, you can quickly restore to a new hard drive to recover your work.
Therefore, utilizing a professional tool like Hasleo Backup Suite Free is the most reliable method to restore your Windows 11 system to a new drive seamlessly. For complete protection, we recommend creating a bootable WinPE emergency recovery disk so you can restore Windows 11 when needed.
Back up your Windows 11 system
Before restoring Windows 11 to a new drive, you first need to create a system backup image. If your current system is booting without issues, proceed with the following steps:
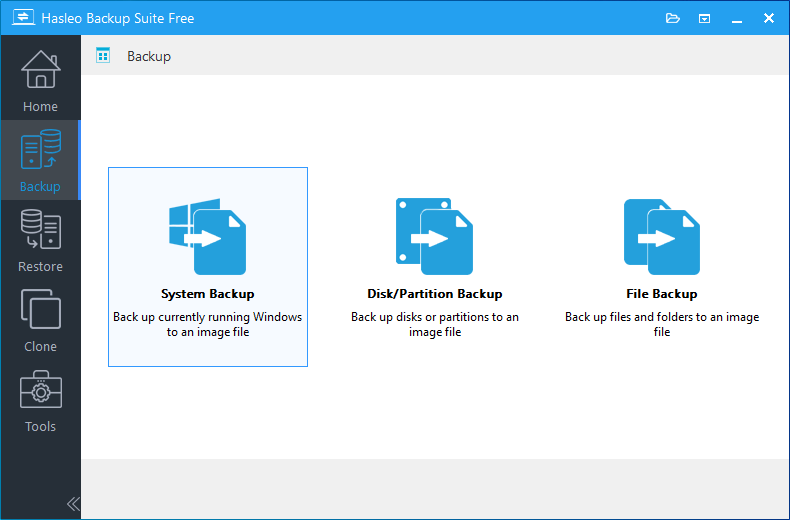
Step 1. Download, install, and run Hasleo Backup Suite. Click the "Backup" button in the navigation bar, then choose "System Backup" in the operation area.
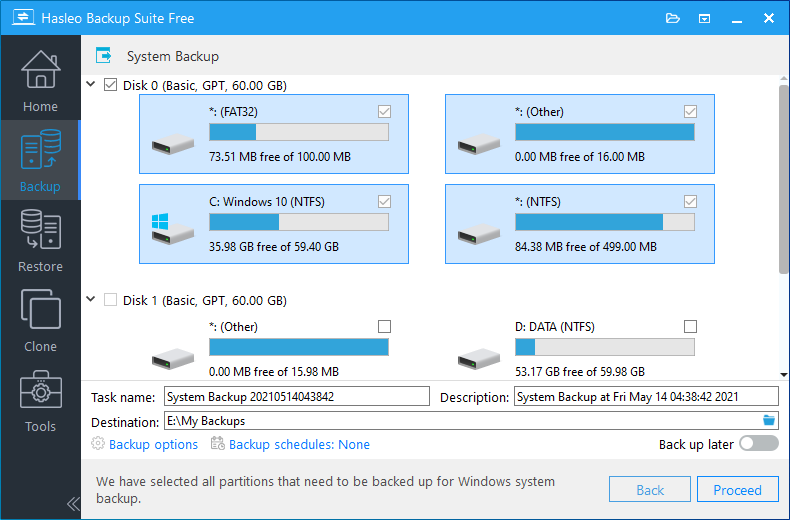
Step 2. Hasleo Backup Suite will automatically select all partitions required for Windows 11 system backup. Customize the task name, description, destination, and backup options as needed. Then click the "Proceed" button.
💡Tips:
- Task name: Specify a task name so that you can quickly find and manage your backup task later.
- Description: Briefly describe the purpose of the task and any other relevant information.
- Destination: Modify the destination path where the backup image files will be stored by clicking the folder icon.
- Backup options: Advanced backup settings. For more details, please refer to Backup options.
- Backup schedule: Set up backup schedules to automatically perform your backup tasks on a regular basis. For more details, please refer to Backup schedule.
Step 3. After you click "Proceed," Hasleo Backup Suite will start backing up your Windows 11 to your selected location. Note: Backup duration depends on your data size. The process may take some time.

💡Tips:
- Priority: Specify a priority for the backup process. A higher priority allocates more CPU time to the backup, which may cause other programs to run slower.
- Check image: Verify the integrity of the backup image files upon completion of the backup process.
- Power plan: Perform the power management action after the backup is complete.
⭐Create WinPE bootable media (for a failed system)
When the Windows 11 system cannot boot normally due to virus infection, driver corruption, or missing system files, you need to use WinPE bootable media to restore the system. Therefore, it is very important to create a bootable WinPE emergency recovery disk in advance.
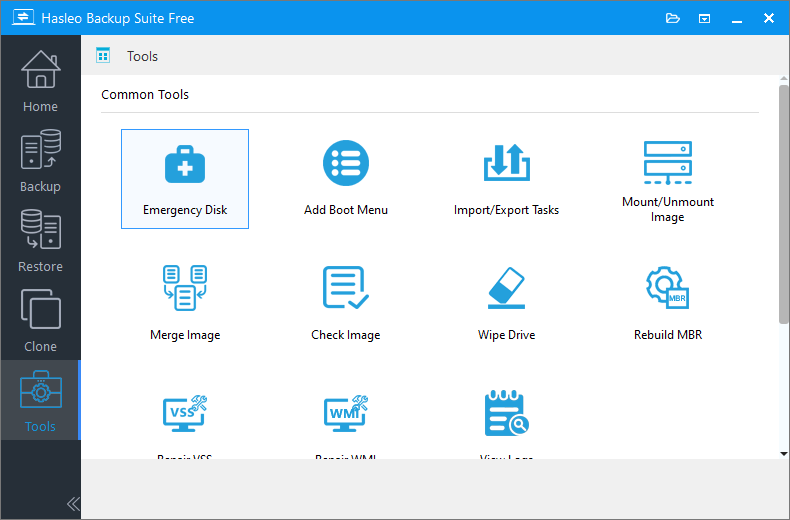
Step 1. When Windows 11 is running normally, click the "Tools" button in the navigation bar, then choose "Emergency Disk" in the operation area.
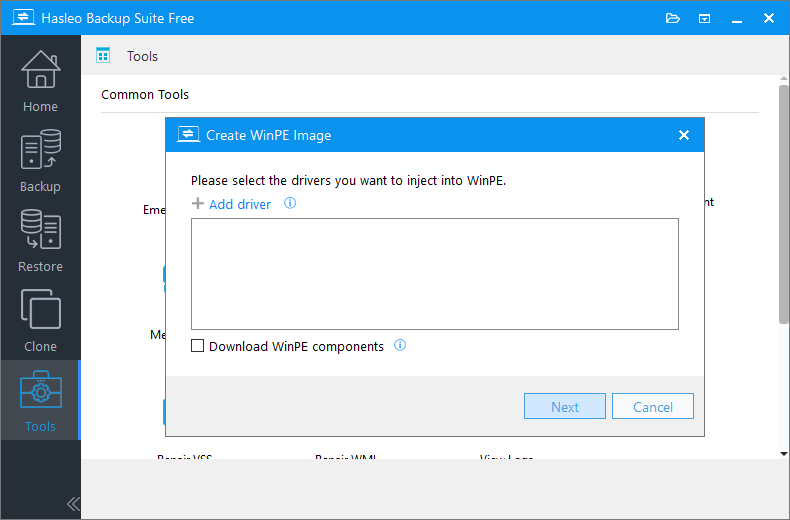
Step 2. Check "Automatic driver injection" or "Download WinPE components" to inject the drivers required by WinPE, then click "Next". If you need to inject some additional drivers, click "Add driver" and select the drivers you want to inject.
💡Tips:
- Only drivers that are based on an .inf file can be injected into WinPE.
- The Download WinPE components option allows you to obtain them from the current Microsoft.
- The Automatic driver injection option will automatically extract drivers from the current Windows operating system and inject them into WinPE. Please note that while Hasleo Backup Suite endeavors to extract and inject all drivers into WinPE, this process is not infallible, and we do not warrant that all hardware will be fully operational in the WinPE environment.
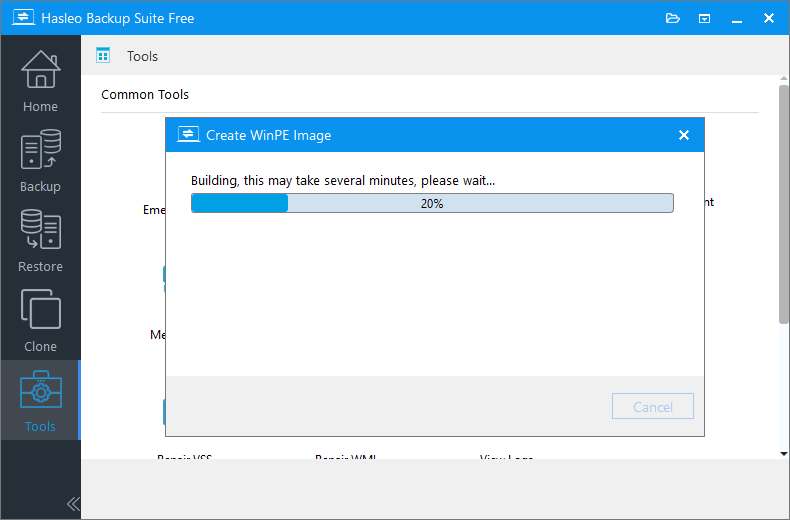
Step 3. Hasleo Backup Suite begins creating the bootable WinPE image.
Step 4. After the WinPE image is created successfully, select "USB" and click "Proceed" to create the bootable USB drive.
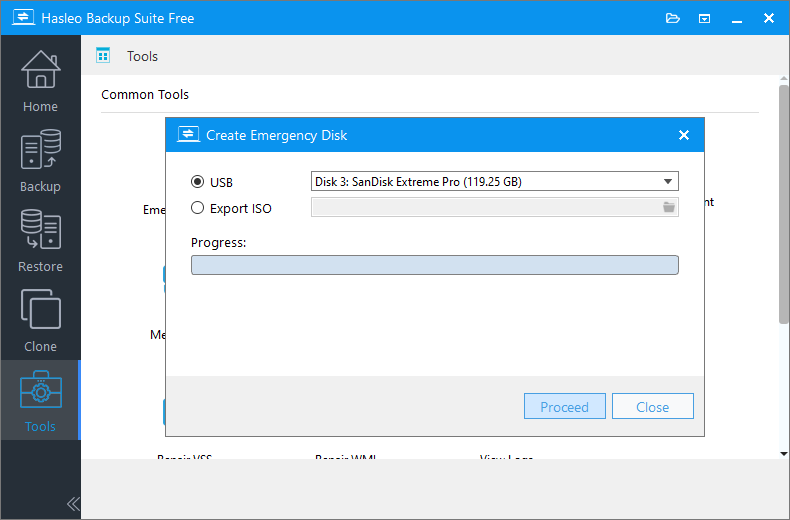
💡Tips: If you click "Export ISO", you can manually burn the ISO file to a CD/DVD/USB device using third-party burning software (such as Nero Burning ROM, Hasleo WinToUSB, etc.).
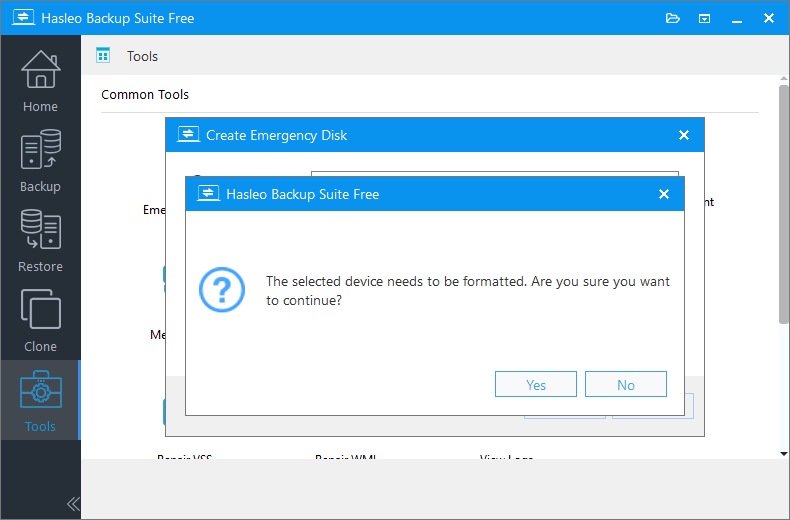
Step 5. The program will prompt you that the selected USB drive will be formatted. Please ensure any important files are backed up beforehand. To confirm and proceed with creating the bootable drive, click "Yes".
Step 6. Wait for the process to complete, then click "Close" to exit.
⚠️Important Note: You may need to disable UEFI Secure Boot to boot from the WinPE bootable media created by Hasleo Backup Suite.
Method 1: Restore a System Backup to a New Drive (When Windows 11 is Bootable)
If your Windows 11 system is running normally, you can restore a system backup directly to a target disk (internal or external) connected to this computer.
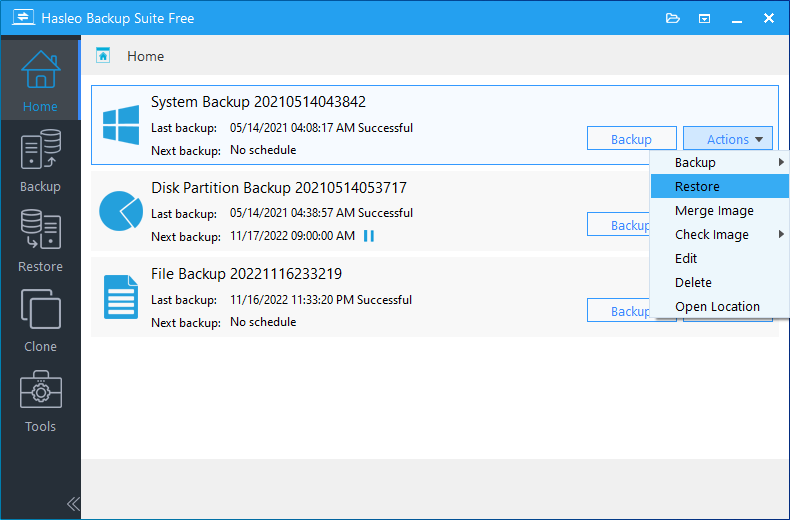
Step 1. Click the "Home" button in the navigation bar. Then, find the system backup you want to restore, click "Actions", and select "Restore" from its menu.
Step 2. Click "Change version" to select the backup version you want to restore, then click "Next".
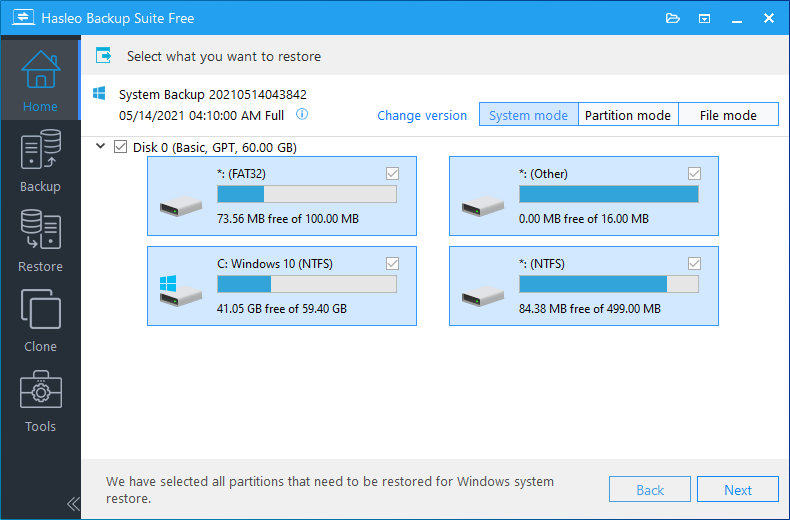
⚠️Tips:
- If you want to restore your entire operating system, please choose "System mode" in the upper-right corner. To restore a single partition, please select "Partition mode". For recovering individual files, please use "File mode".
- Important Note: Restoring only the Windows partition in "Partition Mode" may result in a system that fails to boot or function properly.
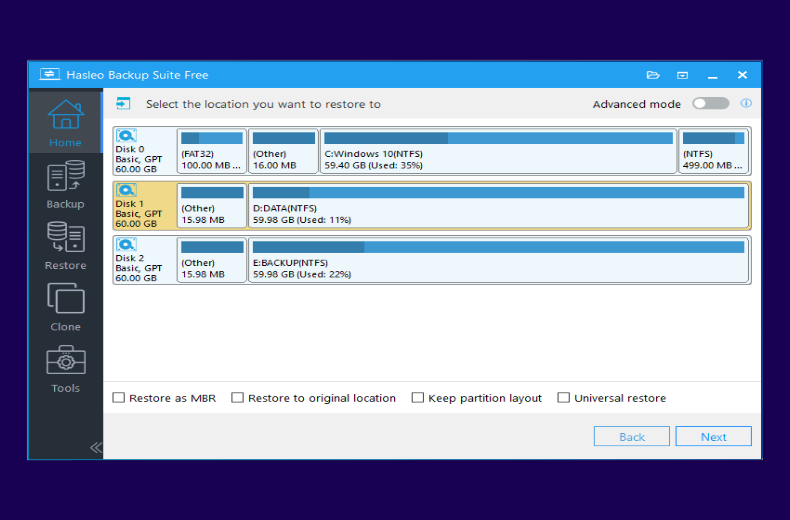
Step 3. Select the new drive as the destination for your Windows 11 restoration, then click "Next".
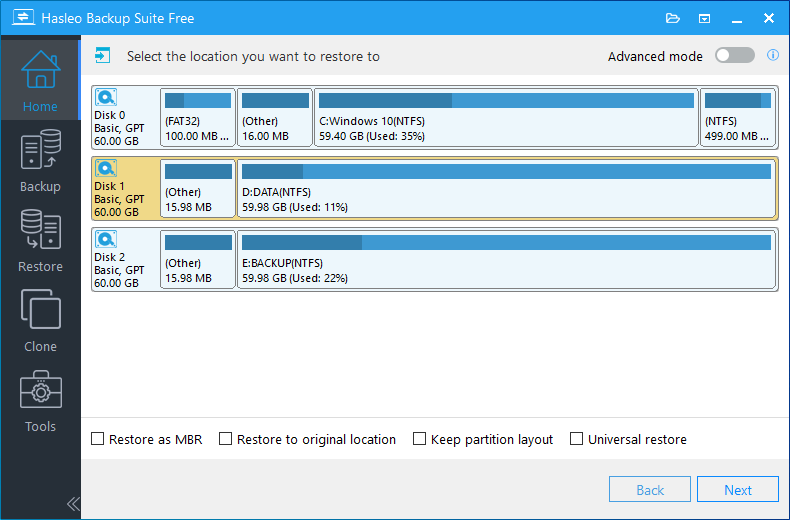
💡Tips:
- The Restore to original location option enables you to restore the Windows operating system to its original location on the original disk without damaging other partitions. Please note that this option is only available in "System mode".
- The Keep partition layout option ensures the partition layout of the destination disk is identical to the source disk after restoring. Please note that this option is only available in "System mode".
Step 4. Adjust the size and location of partitions according to your needs and click "Proceed". A warning message will appear stating that all data on the destination drive will be destroyed. If the destination disk contains no important data, click "Yes" to continue.

💡Disk alignment:
- 1M (Recommended): 1M alignment is a subset of 4K alignment. Partitions aligned to 1MB are always 4K-aligned, which helps you get the best SSD performance. In Windows Vista and later operating systems, partitions created using Windows Disk Management are always aligned to 1MB bytes, regardless of whether the disk is an SSD.
- 4K: This option ensures the starting sector of every partition is aligned on a 4K bytes, which is very important for the best performance of an SSD.
- Cylinder: Ensure the starting sector of each destination partition always starts at the beginning of a cylinder. Windows XP and previous OSs use this alignment mode.
- None: The start sector of each the destination partitions is not aligned.
* The Sector by sector restore partition option restores every sector from the source partition to the destination partition, including unused sectors.
Step 5. Hasleo Backup Suite is now restoring the Windows 11 operating system to the new drive. The required time depends on the size of the data that needs to be restored; please be patient.
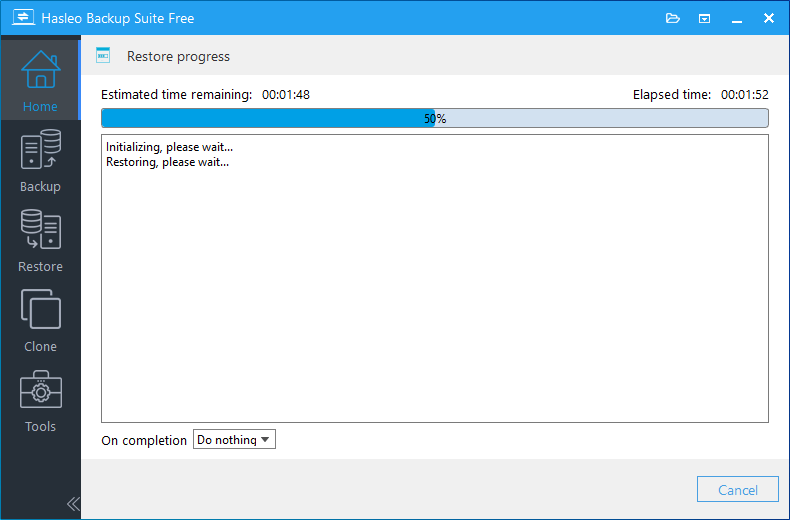
💡Here you can specify a power management action to be performed after the backup is complete.
Method 2: Use a Recovery Drive to Restore Windows 11 to a New Drive
When the Windows 11 system cannot boot normally for various reasons, you can follow these steps to use WinPE bootable media to restore the system to a new drive:
Step 1. Insert the WinPE bootable media you created earlier (USB drive), then restart the computer and boot from this media. In the BIOS/UEFI settings, set the boot priority to boot from the USB device first.

💡Tips: To boot from the Hasleo-created WinPE media, you may need to disable the UEFI Secure Boot feature in your system's firmware settings.
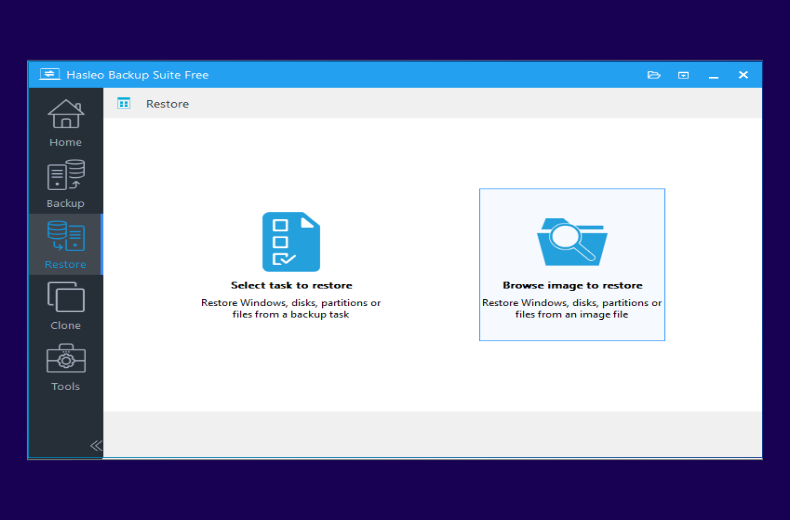
Step 2. Upon reboot from the WinPE bootable USB, the computer will automatically run Hasleo Backup Suite. Click the "Restore" button in the navigation bar, then select "Browse image to restore" in the operation area, and locate the system image file you created earlier (please ensure the device storing the backup image file is connected).
Step 3. Click "Change version" to select the backup version you want to restore, then click "Next".

Step 4. Select the new drive as the destination disk, then click "Next".
Step 5. The program begins to restore the Windows 11 system to the new disk. After the restoration is complete, shut down the computer, remove the WinPE boot disk, and then boot Windows 11 from the new hard drive.
Verification and troubleshooting
After completing the Windows 11 restore to a new drive, you should perform the following verification and checks:
- System boot test: Restart the computer and ensure Windows 11 can boot normally to the desktop.
- Driver check: Check if all hardware devices are working properly, such as graphics card, sound card, network card, etc. If some devices cannot be recognized, you may need to install drivers for the new hard drive.
- Application verification: Open your commonly used applications and confirm they can run normally.
- File integrity check: Check if your personal files are completely preserved in their original locations.
- Boot order setting: Enter BIOS/UEFI settings and ensure the new hard drive is set as the first boot device.
ℹ️Common problems and solutions:
- System cannot boot: If the system cannot boot after restore, it may be a UEFI/BIOS setting problem. Try disabling Secure Boot, or check if the partition type (MBR/GPT) of the destination disk matches the original disk.
- Blue screen error: Blue screen is usually caused by driver conflicts. Try booting in Safe Mode, then update or roll back the problematic drivers.
- Missing drivers: Some hardware (such as special models of network cards or graphics cards) may require manual driver installation. You can download drivers on another computer, then transfer them to the new system via USB device.
- Activation issues: Windows 11 will usually reactivate automatically, but if you encounter activation issues, please contact Microsoft support.
Frequently Asked Questions
A: Restore time depends on the amount of data and the speed of your drives. On average, restoring a 100GB Windows 11 system takes about 10-20 minutes to an SSD, and 20-40 minutes to a traditional HDD. NVMe SSDs are typically the fastest.
A: Yes. A full system restore includes all your files, installed applications, settings, and personalization. However, some hardware-specific drivers may need to be reinstalled on the new drive.
A: As long as the new drive has enough space to hold all the data from the backup, you can restore to it. However, it's recommended to use a drive with equal or larger capacity to ensure sufficient space for system files and future data.
A: No. With Hasleo Backup Suite, you don't need to reinstall Windows 11 or your applications. The restore process migrates everything to the new drive exactly as it was.
A: You can adjust partition sizes during the restore process. Use the partition adjustment feature to utilize the extra space on the larger drive for data partitions or additional storage.
A: Yes. Windows 11 typically reactivates automatically when restored to new hardware. If you encounter activation issues, contact Microsoft support for assistance.
A: Yes. This is one of the most common use cases. Simply restore your Windows 11 backup from the old HDD to a new SSD, and you'll experience significantly faster boot times and application loading.
A: Disk alignment affects SSD performance. 1MB alignment is recommended for SSDs as it ensures optimal performance. The default 1MB alignment works well for both SSDs and HDDs.
Summary
Using Hasleo Backup Suite, you can easily restore the Windows 11 system to a new drive, regardless of whether the system can boot normally. By creating system backup images and WinPE bootable media in advance, you can quickly restore the Windows 11 system when problems occur, protecting your data and work environment.
Hasleo Backup Suite provides a comprehensive, efficient, and easy-to-use backup and recovery solution. It integrates backup, restore, and cloning functions, fully meeting users' daily data protection and system maintenance needs.


